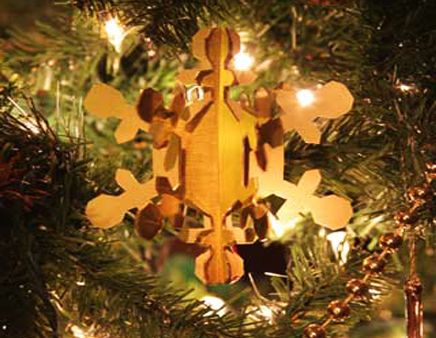
Add a little more sparkle to your Christmas tree with this scroll-sawn brass snowflake ornament.
STEP-BY-STEP INSTRUCTIONS:
Note: To make this project, you’ll need three 4 x 4 in. pieces of 1/16 in.-thick brass. You may be able to find the sheet metal at a craft store. Another option is to buy a brass kick plate made for entry doors. Most home centers sell these plates. One 8 x 34 in. plate will make four ornaments.
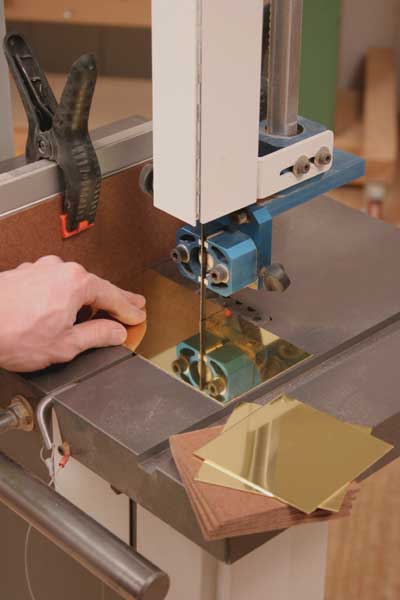
Step 1: Cut three 4 x 4 in. pieces of brass to size. Cut four pieces of 1/8 in.-thick hardboard to match the brass. You can use a table saw or band saw to cut non-ferrous metal safely and without damaging your blade. Make sure your saw’s fence meets the saw table tightly so the metal will not slip underneath it during cutting. Clamp a flat-edged scrap to the fence, if necessary, to cover any gap (see Photo 1).
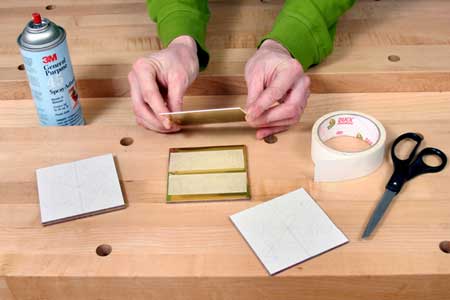
Step 2: Download and print out the Snowflake PDF Pattern for this project and cut out both paper patterns. Mount them to two of the hardboard squares with spray adhesive.
Step 3: Using fabric-woven double-sided carpet tape, create two sandwiches of brass and hardboard (where the hardboard is the “bread” and the brass is the “filling”) with a pattern placed on top of the “sandwich.” Use one piece of brass as “filling” inside the hardboard sandwich with the “Double-Slot” pattern on top. Insert two pieces of brass as “filling” inside the second sandwich with the “Single-Slot” pattern on top. Press the sandwiches — the hardboard “bread” and brass “filling” — tightly together so the tape will hold the layers securely. The purpose of the hardboard is to support the brass above and below during cutting, which will keep it from bending and create cleaner sawn edges (see Photo 2).
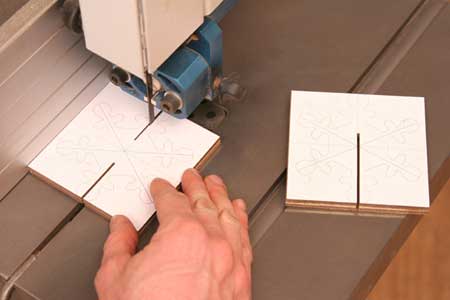
Step 4: Cut the 5/64 in.-wide slots on both patterns by guiding them along your band saw fence. In order for the three snowflake parts to fit together properly, it’s important that these slots are straight and cut carefully to length and width. You’ll probably need to make two side-by-side saw cuts to create the proper slot width. Shift your saw fence slightly to make the second cut for each slot (see Photo 3).
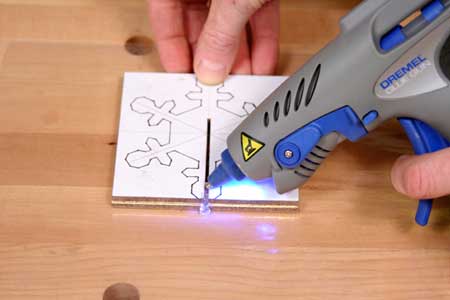
Step 5: Fill the ends of the slots with a dab of hot-melt glue. The glue will add rigidity to the pattern areas around the slots when cutting out the snowflakes (see Photo 4).
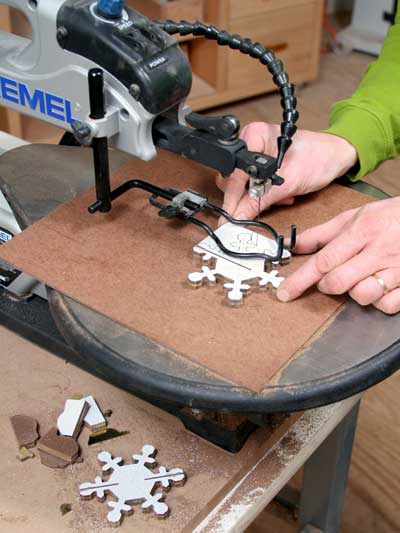
Step 6: Cut the snowflake parts to shape on your scroll saw (see Photo 5). Since you are cutting through hardboard and metal, make sure to have plenty of fresh blades on hand when they dull. Plan on needing at least two blades per pattern. As soon as cutting becomes difficult, switch to a new blade. If your saw has a wide blade opening in the table, you may also want to tape a scrap of hardboard with a small blade hole to the saw. It will help support your workpieces right up to the cut.
Step 7: Once both patterns are cut to shape, separate the taped layers by soaking the patterns in mineral spirits for a few minutes. The solvent will dissolve the tape adhesive. Do not pry the pieces apart with a paint scraper or screwdriver, or you’ll risk scratching the soft brass.
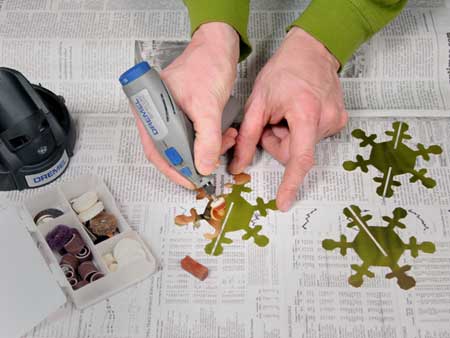
Step 8: Clean up the three brass snowflakes carefully to remove all tape residue. If the metal has any scratches, buff them away with polishing compound and a rotary tool outfitted with a buffing wheel (see Photo 6).
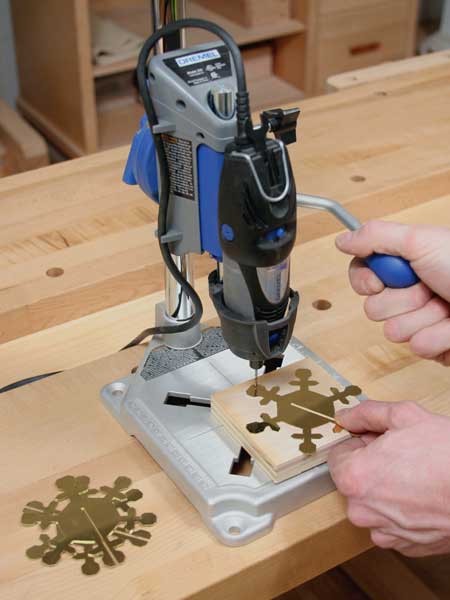
Step 9: Drill a 1/16 in.-diameter hole for hanging the ornament through one of the two single-slot snowflake pieces (see Photo 7). Thread a loop of jewelry wire or strong string through this hole for hanging the ornament.
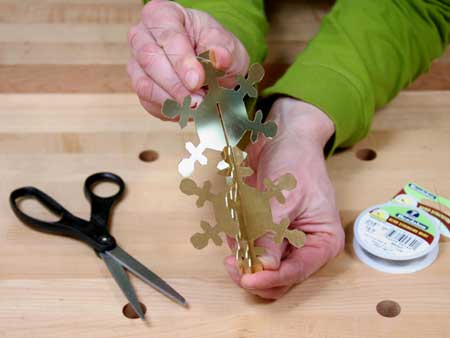
Step 10: Slide the three pieces of the ornament together by inserting each of the single-slot pieces into the slots of the double-slot piece. Make sure the part ends line up. When assembled, the wings of the snowflake should fan out to create a hexagonal shape (see Photo 8).
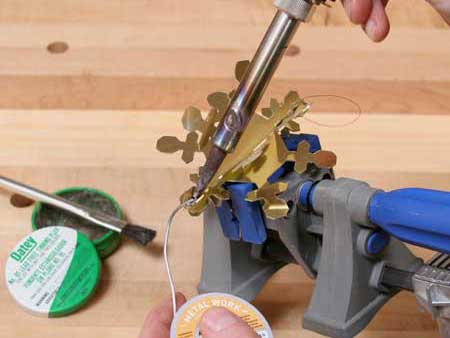
Step 11: Bond the snowflake parts with a few small dots of lead-free metal solder applied near the bottom of the ornament. Make sure to prepare the metal first by brushing paste flux in the solder areas. Heat the metal for a few minutes, holding the tip of the soldering iron against it, then melt the solder to the brass (see Photo 9).
Step 12: Once the solder cools and sets, wash the ornament with soapy water to remove the flux residue. Polish away any carbon deposits left during soldering with your rotary tool. Then, find a good spot on your Christmas tree for displaying your new ornament — it’s sure to get noticed!


