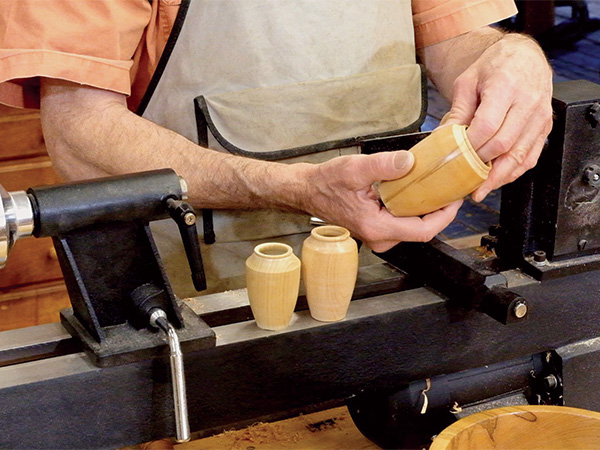
Hollow forms are a great project on a mini or midi lathe once you can turn basic spindles with proficiency. Not only do small hollow forms make a splendid gift, but they also use very little material — often, a piece of wood you would otherwise pitch out.
In spindle-turned hollow forms, the grain goes up and down on the vessel, rather than across. Small turnings in this style are a great introduction to the technique.
It is true that most vessels are faceplate turned, with the grain running across bowls. This is the strongest wood orientation. Generally speaking, for a traditional bowl with a level rim, the wood that ends up being the base of the bowl would have been near the bark of the tree.
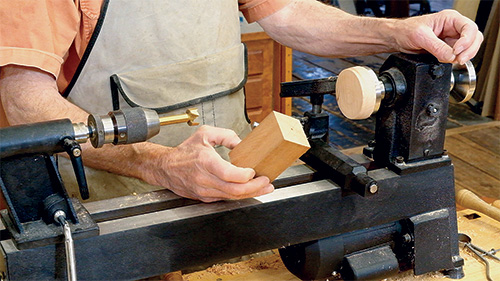
Use a bowl gouge to turn the glue block round, then scrape its face flat. Drill a 1″-diameter hole, at least 1/2″ deep, in the glue block. (The author uses a skew’s point to put a small dimple in the block’s center, to give his Forstner bit an accurate start.) Unscrew the faceplate and set it aside.Chuck your 2″ x 2″ x 4″ billet between centers and turn it just round. Use a beading and parting tool to turn a 1″-dia. x 3/8″-long tenon on one end — make sure it is a tight slide fit with the hole in the glue block. The author uses his calipers set to the size of the Forstner bit to gauge the tenon size.
However, as a vessel is made deeper, there comes a height-to-base ratio where it is better to spindle turn. At that point, spindle hollowing techniques are the next place to go. They’re also fun and easy to make.
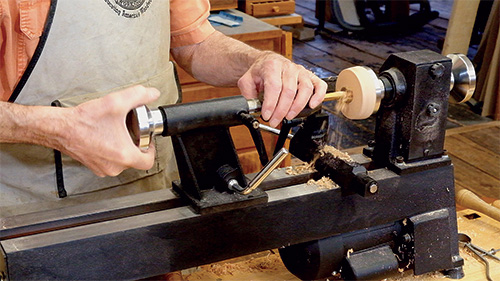
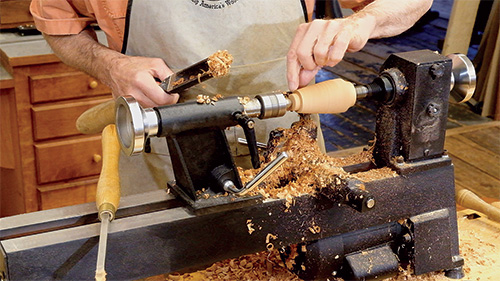
Turn the general amphora shape of the hollow form, leaving a shoulder of about 1/4″ around the tenon. This shoulder will seat against the face of the glue block, bringing the entire turning on center with the axis of the lathe. It also makes the piece resist radial forces much better during lathe work.Liberally apply medium-viscosity CA glue on the tenon and spray accelerator in and around the mortise. Use the tailstock center to push the tenon into the mortise, and allow the glue to dry for 15 minutes. Test that the glue joint is solid by grabbing the turning and applying a bit of radial pressure.
For your first hollow form, use a billet measuring about 2″ x 2″ x 4″. It can be any straight-grained species, with maple, cherry and walnut being excellent choices. I used Spanish cedar for the turning in this article.
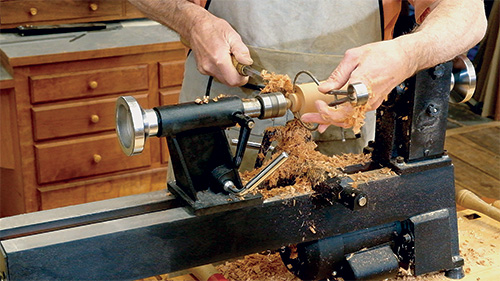
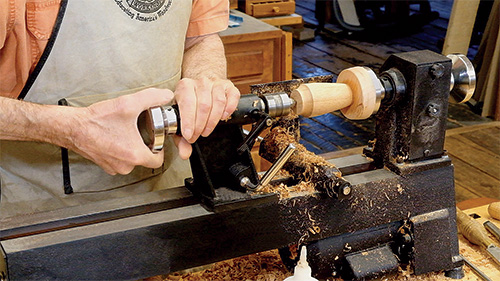
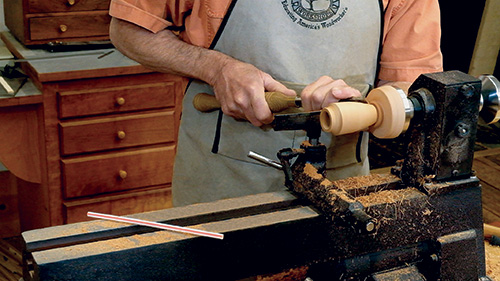
Set your rest below center so the very tip of your spindle gouge will be on exact center when the tool is held level. Turn the gouge slightly counterclockwise and push straight into the center for about 1/8″. With your left hand, pull the gouge to the left to cut the left side edge. Experiment with how much you rotate counterclockwise to find the sweet cut. Repeat this process, going deeper and deeper.Stop the lathe often and check wall thickness. The best measuring tool for this is a piece of 1/8″ welding rod bent into a U shape: the gap between the two ends of the rod should be bigger than the current wall thickness. Put one end of the rod inside your vessel and slide it down the wall to accurately gauge the uniformity. As you remove material, periodically close the gap between the ends of your bent rod.
I turned the project on a Rockler Excelsior 5 Speed Mini Lathe mounted on my workbench and set to the 1,100 rpm pulley combination throughout the process. I grabbed the ends of the lathe between the dogs in my bench, for good stability and vibration dampening.
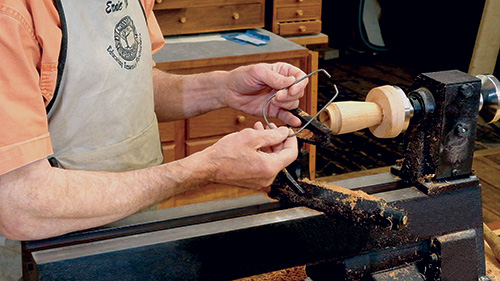
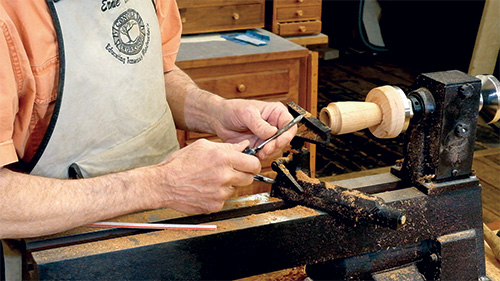
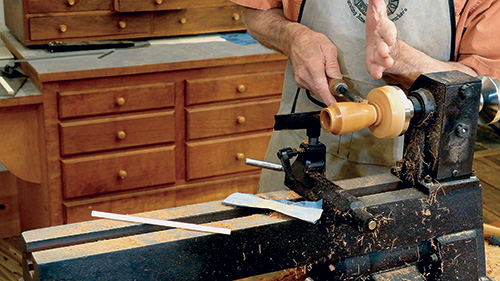
It is impossible to reach the area just under the rim with a spindle gouge to refine it; however, a small scraper makes quick work of it. You can create an inexpensive and effective tool of this type by grinding a small screwdriver to a radius.The author purposely left part of the turning, from about halfway down to the base, a bit large to lend rigidity to the hollowing process. It is now time to use a skew to increase the taper to a much smaller diameter at the base, then sand and finish your hollow form.
You will also need a 1-1/2″- to 2″-thick glue block, made of a durable wood such as maple, mounted on a faceplate. Simply band saw a suitable piece of wood to a slightly larger diameter than your faceplate’s.
Use 1″ sheet metal screws to secure the block to the faceplate; make sure they are snug but not stripped. (If the glue block rocks on the faceplate, you are likely to have unexplainable turning difficulty in your future.)
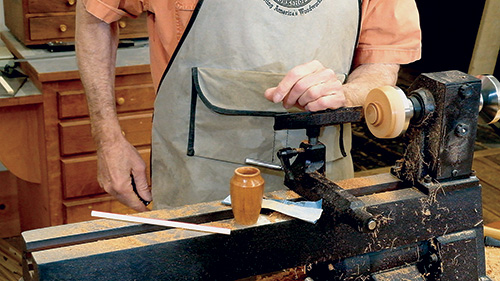
Apply finish, then cut the vessel off below its internal cavity. Cut it off at an angle so you undercut the outside diameter, making the vessel sit level without rocking. Remove any nubbin from the center with a sharp knife.Your completed hollow-form vessel is now ready for you to admire. You can also make turnings in this style with curly grained wood, and in larger sizes, too. It’s an excellent way to improve your spindle-turning skills.
Follow my step-by-step procedure through the photos in this article, and give this project a try. It will extend your spindle turning abilities immensely. Once you’ve mastered straight-grained woods, you can move on to curly (curly maple is always a winner) to keep expanding your skills.