Even if you own a jointer, you’ll want to master this technique.
With the addition of a simple shop-made fence, you can easily edge joint on your table saw. Remember that man-made materials like plywood can be hard on steel jointer knives – but not on carbide table saw blades. Let’s get cutting …
The Fence
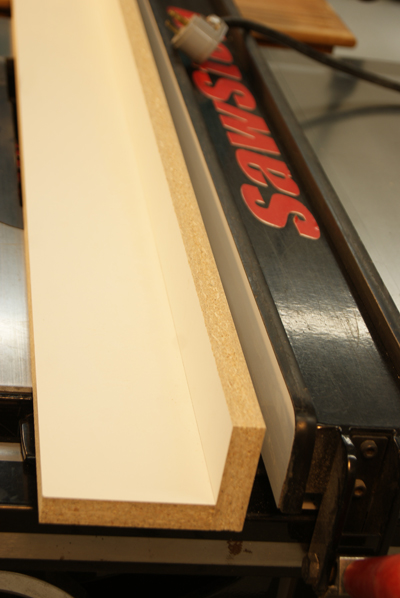
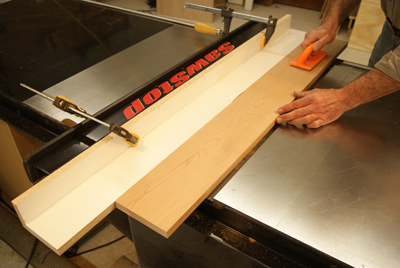
Melamine works great for the fence, but anything will do the job. Make the base piece 4″ x 48″ and the vertical piece wide enough that you can easily clamp the assembly to your rip fence. Mine is 3″ wide, 48″ long. Fasten them together to form an L.
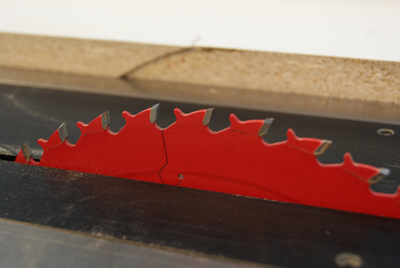
Use a thin-kerf 40-tooth ATB (alternate top bevel) blade. The ATB produces an excellent surface on the jointed edge. The kerf of the blade determines how much you’ll be removing with each pass, so thin-kerf is better than full-kerf. That way you’re not hogging too much material off.
Locate the Cut

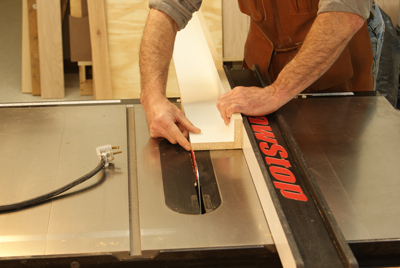
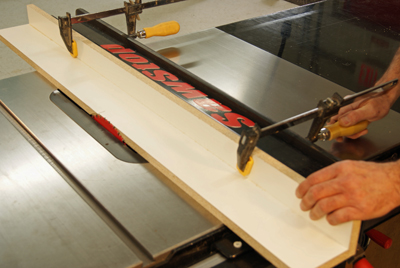
Clamp the shop-made fence to the rip fence, centering it on the length of the rip fence. Be sure your saw is unplugged.
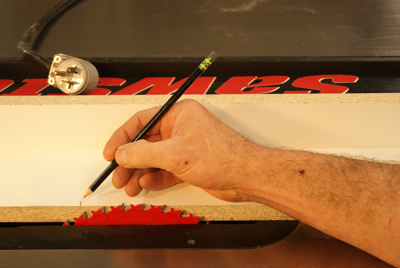
Make a mark on the fence approximately even with the back of the blade.
Make a Relief Cut
Just like a jointer, the table saw setup requires an infeed and an outfeed side. The outfeed side must be perfectly even with the saw blade. The infeed side must be a blade’s width short of this point. To make this cut, move the rip fence to the left side of the saw blade.
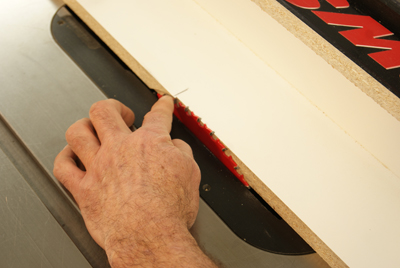
Position the fence so the outside face of the blade is even with the edge of the fence.
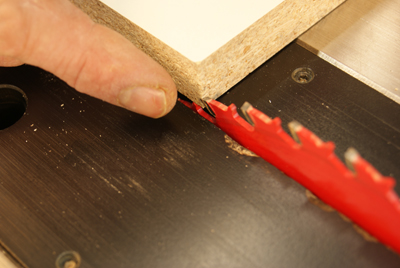
It’s easier to feel this than it is to see it. Run your finger along the face of the tooth and the edge of the board. Adjust the fence until they’re even.
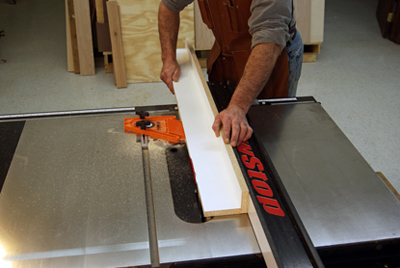
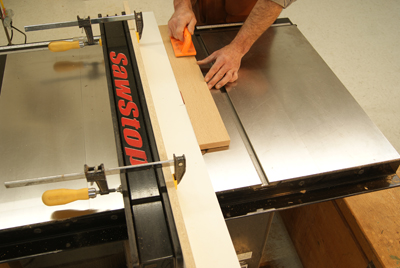
Plug the saw in and cut into the edge of the shop-made fence. A feather board helps keep the work tight to the rip fence.

Stop when you get to the pencil line you made a few steps ago.
Do the finger test again. Your goal is for the outside edge of the blade to be even with the outside edge of the fence. If the blade projects past the fence you’ll need to move the rip fence to the right and skin off a little more material. If the edge of the fence projects past the blade you’ve taken too much off. Fix this by cutting the rest of the way through the fence and repeating the setup and cutting process.
Your Table Saw Becomes a Jointer
Move the rip fence back to the right side of the saw blade. Remove the riving knife.
Clamp the fence in place such that the blade relief in the fence is slightly behind the saw blade.
Feel your way to the right setting. Adjust the rip fence so that the blade spins free and the outside face of a tooth is even with the outside edge of the fence.
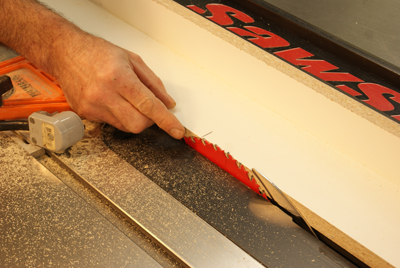
Make a test cut.
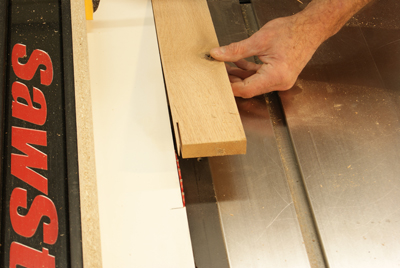
If the fence is too far to the right, you’ll leave a sliver of wood on the edge of the board. Adjust the fence so it’s closer to the saw blade. If the fence is too far to the left, the blade will be rubbing on it like crazy. Adjust the fence until you have it correctly positioned.

Edge joint away! You’ll be amazed at how well this works. And, because you’re using a carbide-tipped blade, you can edge joint nearly anything, and get great results.


