In last eZine’s editorial, Rob questioned whether he should study up, or barge ahead, when turning a really large bowl from a recently acquired birch burl. Here’s what eZine readers had to say.
Most were fully in the “do your research” camp. – Editor
“Burls are precious jewels. Do your research. Of course, if you are the type of man who would do brain surgery on your child without doing any research, go for it. Yes, it’s that serious.” – Doug Manter
“By all means,study up on green turning, especially large bowls and projects. Any time you spend reading and learning will improve your results and improve safety.” – John Bonnett
“If you don’t have the required experience, then read up on the subject or at least ask Ernie Conover. Having done that, then look at your burl and decide what you want to do with it. Then plan the processes required. My failure to do this has ruined quite a few pieces of wood until it was pointed out to me by no other than Stuart Mortimer. It had occurred to me, but only after I had finished the item in question. Luckily for me, I was able to go back and make good all my errors. The platter in question made from a piece of mango now looks beautiful.” – Roger Phebey
“I turn a fair amount of green wood. I’m no expert, however, just a weekend turner that’s been at it for about 14 years now. If I were in your shoes, I’d get all the advice I could before diving in. Large burls (or large blanks in general) are perfect candidates for coring a couple of smaller pieces from the middle instead of turning all that beautiful wood into shavings and blowing your only chance at this chunk of tree.
“It was a beautiful madrone burl that was the incentive for me to spend a little time learning to core with coring tools. It wasn’t all that difficult to learn — there’s good resources available on YouTube and the AAW [American Association of Woodturners] website, and it results in a couple of blanks to get your chops down before you attempt the big one — the money bowl.
“If you’re reluctant, look for a local club. There’s usually a group of mentors that will walk you through the process, perhaps even loan the tools to get it done. Turners are a generous bunch, by and large. The thing about turning green wood: it’s more fun than you should be allowed to have with your pants on.” – Jeff Smith
“Contact Alaska Bowl Company in Fairbanks, Alaska for some tips. They do nothing but birch burl bowls, and have done some up to the 18-21 inches range. They usually cut a series of concentric bowls from the same burl, going from the largest to the smallest. They have special cutting tools which allow them to make cuts which leave the blank for the next smaller bowl, but they can probably give you some tips to use normal turning tools to make your bowl(s). My wife and I have a set of 9-inch bowls that we got from them 25 years ago, and still use them regularly today, especially for Chinese food, and other friends really like using them for popcorn and cereal. Using them for soup can sometimes leave staining.” – Kelly Blalock
“First, be sure to treat all of the end grain of that birch burl with something that will prevent it from checking as it dries. Then, yes, you should definitely consult the ‘experts’ for advice on turning green wood. It’s too nice a piece to risk ruining by just ‘plunging forward.’” – Rodney Eisenbise
“I have not yet turned any green wood, not readily available in my desert location. However, I would feel that this is not a recurring opportunity, and a large burl is too valuable to just rush in. At least visit a few websites and, of course, you have the enviable resource of your skilled subscribers to get their feedback. You cannot imagine the envy of that much green stock from us remote desert turners. I am aware of many considerations that could affect your outcome, and I think you really want at least these basics before risking such a valuable, possibly irreplaceable, burl: finished in one piece and uncracked. Best of luck and skill to you!” – William Fish
“If it was just a piece of the birch from the base of the tree, I’d say dive in and have fun! But this is a burl! Many turners consider this to be a precious commodity. I’d find a friend with a set of coring tools so you can get more than one bowl, including the really large bowl you envision, from this piece of burl. I’d definitely phone a friend on this one. The key to turning green wood is consistent wall thickness so you can reduce the possibility of cracking. Varying wall thickness causes uneven stress on the wood, which promotes cracking. Some woods are prone to cracking anyway, so you want the odds stacked in your favor. Have fun and please share the finished product with your readers!”- Tim Rix
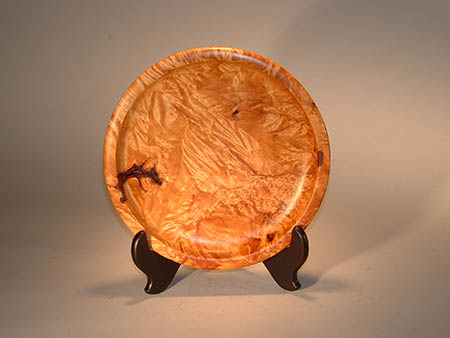
“Congratulations on getting a big birch burl. I am a big burl lover. Birch burl can be fabulous. I attached a photo. If you have experienced turners on speed dial, I would suggest you get in touch with them and let them share the mistakes that they have made. Turners are usually very generous about sharing knowledge. Coring is an option; getting multiple bowls from a piece of burl is almost life changing. There are a lot of simple procedures that can turn an average turning to a work of art. Listen to the experienced turners; they still learn every day.” – Kevin Nee
“The fun to me would be the end product, not saying I plowed ahead. If you have some folks to tap their experience, do it. Then plow ahead and turn a masterpiece. Good luck to you on your upcoming project! May the wood gods cooperate.” – Lon Knoedler
“Normally I’d say let it rip — just do it. But turning a big piece of wood can be dangerous. Talk to someone who has done this before.” – John Kulluk
“Green turning, especially on burls, is tricky. If you do it wrong, it will surely crack. Read up on it, talk to the experts. But before doing anything, wax it or wrap it in
shrinkwrap. Good luck!” – Barry Saltsberg
“Turning a bowl from a large green birch burl sounds like a great experience. Just remember fools rush in where experienced angels fear to tread. Don’t be afraid to ask an expert.” – Everett D.
“I drive my engineering friend nuts because I usually just sketch out a rough drawing and then get to cutting. I love woodturning especially for that reason. Since, I am not making a living off of it and use it as a creative outlet, I usually wing it for the most part as I figure, if I foul up, I’ll just turn something smaller. However, since you are planning on turning a rather large hunk of heavy, wet wood I would talk to someone about the best way to prepare the blank and mount it so you don’t create a new window in your shop if it were to fly free.” – Frank McEnulty
“Call a friend. Turning burl wood is not like turning any other type of wood. The grain goes every which way and is usually very off-balance to start. I have only done very small burls and cutoffs. Safety, safety, safety. Sounds like a great project.”- Edson Holmes
“You edit a magazine so we can learn. Join the rest of us! Bite the bullet: read, talk, research so you end up pleased with your results of hard labor. Of course you must report back on your newly gained wisdom. Did you pack the turning in sawdust, wrap in newspaper and plastic bag? How often did you let it breathe so it didn’t crack? Did you go to the expense of sealer? Or, since you’re pretty much the boss, simply get someone to write an article.” – Elaine D.
A few shared specific techniques that they thought applicable. – Editor
“Do you have a lathe that will handle that size of wood? If so, yay! Do you have a coring system? If so, yay again. I would use it, but be careful not to make a funnel if you have not done this much before. Turning green: rule of thumb, rough turn it and leave 10 percent of thickness. But my limited (recent) experience is that burl does not move much so instead of 2-inch wall thickness for a 20-inch bowl, maybe 1 inch (trying to save you as big a cored bowl as possible) would be enough. Let it dry and re-turn it. Enjoy and have fun!” – Tim Aley
“You haven’t said just how large that burl is, but if it is too large for your lathe, you might consider doing the initial shaping using a small router mounted on a pivoted arm that will allow you to make successively deeper pendulum-like cuts into the raw blank. Shaping the outside could also be done with a router, but guided by an arched trestle. Just a suggestion.”- Bill Wing
“I have turned some cherry burls and they can be really beautiful. I would advise you, if the wood is green, turn it thick and let it dry before turning it to the final thickness. The burl is unpredictable. For the first turning, I leave at least 10 percent of the diameter of the bowl as a thickness and let it dry slowly. I toss the bowls in a cardboard box with other similar green turnings and they slowly dry. You can paint the end grain with a moisture retarder if you want. Wait till the moisture is down to the 8 – 12 percent range before doing your final turning.”- John Hart
“I have been a woodworker for almost 50 years and have always loved every aspect of wood and its exceptional versatility. What I have seen in birch: the burls are pretty tight with few voids or inclusions — but never say never! With that being said, once you have the burl mounted on the lathe and roughed out to your desired shape and size, if you have the option to core the center out to get multiple bowls out of the burl, that would be my choice. If you don’t have a coring tool, you will have to sacrifice the burl to curls! After you get your bowl or bowls roughed out with about three-quarter-inch to 1-inch thick walls, I use a few different methods to get them dry and to a finished piece. The first and proven is to use AnchorSeal to seal each piece and let dry for up to a year and remount and finish turn them. Next, and one of my favorites, is to wrap the bowls in shrinkwrap and leave the inside open to allow air in. This is also a way to ‘spalt’ the piece, but some mold can form if the wood is very wet, so I will air dry the pieces for a day or two before wrapping them. This might be dangerous on some types of burl so pay attention to them to see if they look like they may crack. The last way is to start the bowl and then put it into a plastic bag overnight and the next day take it out and dry the bag from condensation. Then I let it air dry for as many hours that day. If no cracks begin, then repeat the process for a few days until no water or little water is inside the bag. Then I will chuck it up and turn off maybe one-quarter to one-half inch and start the bagging and drying until you can finish the piece.This keeps me involved in the piece until fished. That is my two cents’ worth, and I wish you good luck with the big burl!”- Jeff Nicol
And a few were all for damn the torpedoes; full speed ahead. – Editor
“Methinks you ask a rhetorical question. You know the deal. Turn it about 1.5 – 2 inches thicker than you want your final turning to end up. Leave the (I don’t know what it’s called; I just do it) leave the ‘stump’ on the end so you can re-chuck it later for final turning. What you’re looking for is a slow, controlled drying. Some people put it in a cardboard box with shavings all around and in it to minimize the quick temperature changes and sudden drying when conditions are right for it. Rule of thumb is in lumber and bowls, about a year of drying per inch. Moisture meters help — looking for about 11% or so. Then in 2019, re-chuck it and turn it again to final size & shape and finish.” – Tim Harrelson
“One word: No. The longer you wait, the drier it is going to get. If you have to stop to walk the dog, pack it all back in its shavings. Use a good oil to seal/replace the moisture there and use it liberally. Good luck and remember, there ain’t no grain that goes with you on a burl. Tools sharp and keep the buffing wheel close to buff off the grime your tools are going to collect. That’s all I got. Jealous.” – Riley G.
“Don’t be shy or slow. Start turning … Now! (Damn the torpedoes; full speed ahead.) Of course, some experience would be helpful. Good luck.” – Andy Wilkerson, M.D.


