Upgrade your table saw’s cutting quality and safety with a zero-clearance throatplate.
Even a fresh, sharp blade will cause splintering on some woods if you use the standard throatplate that came with your table saw. Truth is, the blade opening is just too wide to provide enough support for the wood. When the teeth exit the cut, they break the weak surface fibers, and you’re left with a splintery edge. That big throatplate gap also allows slivers of offcuts to fall down inside the saw where they can jam against the blade or even fly back out at you. Not good! But, there’s an easy solution to these kinds of problems: make your own “zero-clearance” throatplates. All it takes is a scrap of plywood and a little effort to close that gap.
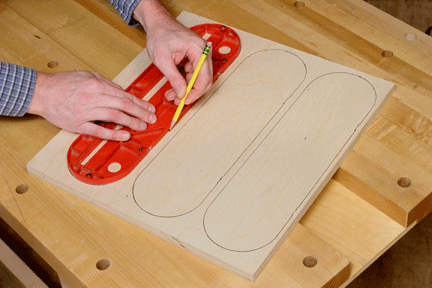
Step 1: Since you are going to the effort of making one throatplate, do yourself a favor and knock out several at the same time. They work great with dado blades, too. Stash the extras in a drawer so they’re ready when you need them. Start by tracing the outline of your metal throatplate onto a piece of good-quality plywood (see Photo 1). It doesn’t matter if the plywood is thicker than the metal plate – you’ll adjust for that later. Plywood is a better choice for making throatplates than solid wood, which can swell until it doesn’t fit the table opening.
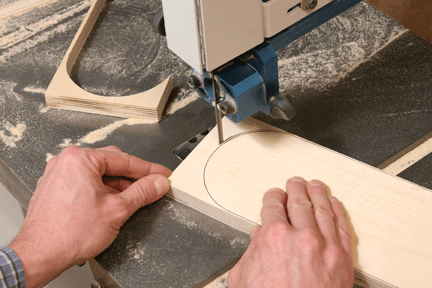
Step 2: Take your plywood blanks to the band saw and cut out the shapes about 1/16 in. larger than the pattern (see Photo 2). No need to be overly fussy about this… you’ll template-rout them to final shape and size.
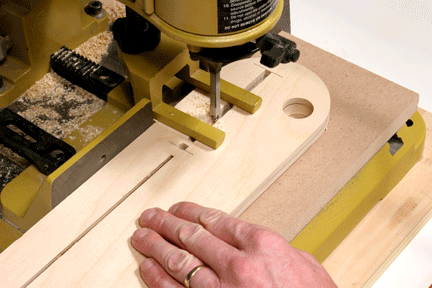
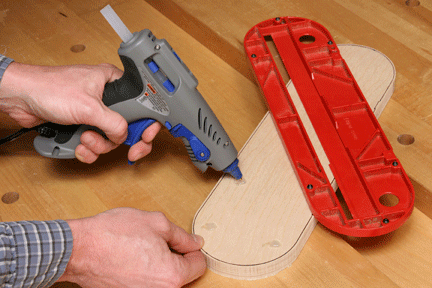
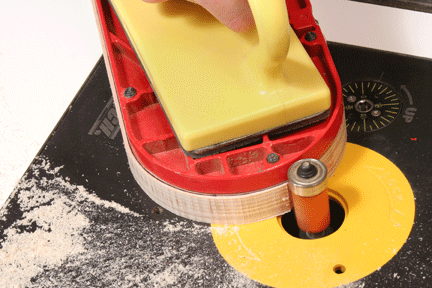
Step 3: To prepare for routing, mount the metal throatplate upside down to one of your plywood blanks. You can use dabs of hot-melt glue or strips of doubled-sided tape to stick the parts together (see Photo 3).
Step 4: Chuck a piloted flush-trim bit in your router table, and rout off the excess material. Raise the bit until the bearing rides against the metal and the cutters just clear the top of the plywood. Start the cut on one of the long edges of the throatplate, feeding the workpiece from right to left and all the way around the shape. Use a push pad or a push stick to keep your fingers well away from the bit (see Photo 4).
Step 5: When you’re done routing, separate the parts and clean any adhesive residue off the plywood. Test-fit the blank in the saw. You may need to touch up the edges with a little filing or sanding before it drops easily into the opening.
Step 6: Now’s the time to compensate for the difference in thickness between your new plywood throatplate and the metal one. With the blank resting on the throatplate tabs in the saw table, take a chisel or utility knife blade and make a mark on the edge of the plywood where it meets the table (see Photo 5). This establishes how much wood you’ll need to remove to drop the plate down flush with the tabletop.

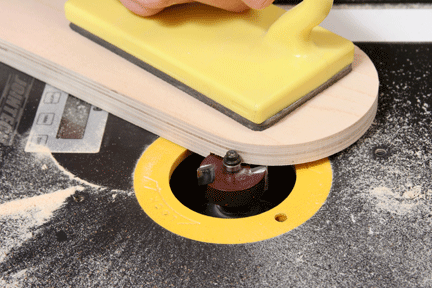
Step 7: The quickest and easiest way to mill off the waste around the bottom edges of the plywood is with a rabbeting bit. Measure the length of the throatplate tabs inside the opening of your saw table, and install a pilot bearing on the bit that will allow the cutters to remove at least this much material.
Step 8: Adjust the rabbeting bit in your router table until the top edge of the cutters meets the reference mark you made on the throatplate blank in Step 6. Set this depth carefully, and rout away the excess plywood. Feed the throatplate past the bit from right to left (see Photo 6).
Step 9: Install the new throatplate, and use a straightedge to check it for flush with the table surface. If it’s a little high, raise the rabbeting bit slightly and take another pass around the bottom edge. If it’s a tad low, stick a few strips of tape over the tab areas on the plate to raise it up.
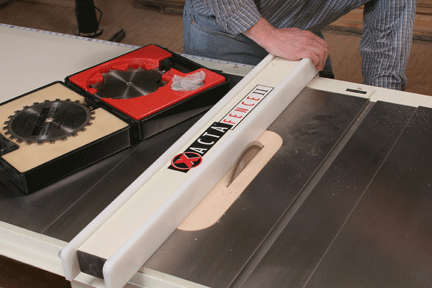
Step 10: It’s time to cut the blade kerf opening. Chances are, your standard saw blade will be too large to drop low enough for starting the cut. Here’s an easy solution: use one of the outer blades of your dado set instead – its smaller diameter should be just right for the job. Even if its thickness is slightly greater than your standard blade, the difference won’t matter much. Slide your rip fence partially over the new plate and so it’s clear of the blade path, and lock the fence to clamp the plate down securely. Then, start the saw and slowly raise the blade up through the new throatplate (see Photo 7).
Step 11: Your last tasks are to drill a finger hole through the plate and cut an opening to accommodate your saw’s riving knife or splitter/guard assembly. It’s very simple to cut the slot for the riving knife with a mortising machine (see Photo 8). You can also make this slot by drilling pilot holes at each end of the slot and then cutting the sides of the slot with a jigsaw. Now, you’ve got a throatplate that’s custom fit to your machine. Say goodbye to tearout and hello to safer sawing.