Chris Marshall demonstrates his process for using a few pieces of scrap wood to create some attractive wood handles for a folding knife. Click here to purchase the Sarge kits mentioned in the video.
Chris Marshall: Start by resawing and planing a piece of stock for the scales down to about 1/4″ thick. Make it long enough to lay out two scales end-to-end and a little wider than necessary. Since this is thin material, it’s a good idea to tape the stock to a carrier board with double-sided carpet tape to keep the wood flat as it gets thinner. The two pieces of scrap wood along the edges of the carrier board make it easier for the planer’s feed rollers to pull the scale stock through.
On this folding knife, the flat ends of the scales fit against these raised metal bolsters here. The intersection of the wood and metal forms about a 7° angle, so I crosscut the two ends of my scale blank to this angle. That way, it will help keep the grain pattern of the wood running parallel to the knife body. And that’s a concern for me here with this very uniform-grained cocobolo I’m using. If your scale stock doesn’t have strong grain like this, you could skip the angle cuts.
This knife blade is razor sharp, and we’ll be handling the blade throughout the building process. So, do yourself a favor and wrap it with several layers of electrical or duct tape for safety. Work smart here.
Now lay the knife on your scale blank so the bolster is snug against the angled end of the wood. Trace around the edge of the liner to form two opposing scale shapes. Draw the shapes on the side of your workpiece that will face out when the knife scales are completed, and mark the scales with an “L” and “R” to keep clear which scale is which.
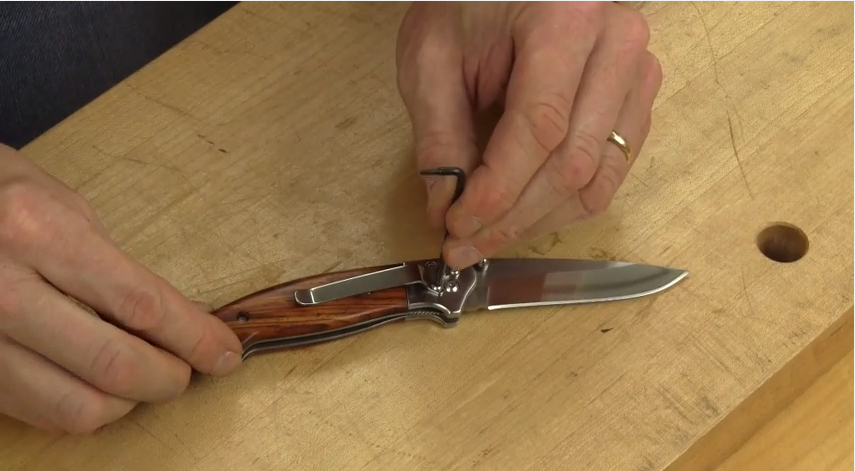
CM: Each scale will be attached to the metal liners with two tiny machine screws and epoxy, so drilling for those screws is your next step. Use a finish nail or 1/16″-diameter drill bit to mark a centerpoint for each screw hole, tapping the nail or bit through the liner holes as a reference.
To drill these screw holes, you’ll need a 3/16″ brad-point bit to counterbore the screw heads and a 3/32″ twist bit for drilling the screw shank pilot holes. Now, it’s important when drilling these screw holes that the screws don’t protrude through the scales on the backside more than 5/64″. So, I drilled a couple of pilot holes through my scale stock, then experimented with the counterbore depth until I got the drilling depth just right. Slip a screw into the test holes and measure the amount of protruding thread to check it.
Once you’ve got an accurate test hole, drill the four counterbores into the two scales at the centerpoints you marked previously. Then switch to the 3/32″ bit and, aligning it with the spur centerpoints created by the brad point, drill a pilot hole through each counterbore.
It’s time to cut out and shape the scales. You can use a coping saw, scroll saw or your band saw and a narrow blade. Just make sure you cut about 1/16″ outside of the two tracings so there’s a bit of extra material all around the scales for the shaping process.
CM: Now you’re ready to start sanding the scales down to their final shape for the knife grips. First, screw the scales to the liners temporarily, and wrap the bolters with more tape to protect the metal during the sanding process. Then install a coarse-grit sanding sleeve in your spindle sander (or sanding drum in your drill press) to sand the two scales until they’re flush with the edges of the metal liners. Keep the knife moving to prevent divoting the wood.
At this point, you can bring down the scale thickness so the front end of the scales is even with the metal bolsters and the handle has a uniform contour that’s comfortable to hold. I found the quickest way to shape the scales was to invert and clamp my belt sander in a bench vise and use it like a stationary sander. I started the sanding process by holding the leading end of each scale down flat against the moving belt near the sander’s front wheel, and rocking the knife slowly from front to back to form a gentle arch. I continued until the ends matched the bolster thickness but left the centers much thicker.
When the front-to-back curvature is done, soften the sharp edges of the scales at the spindle sander and then add more contour across the handle’s width. It’s easy to do by holding the knife perpendicular to the belt’s travel and rolling the knife gently across its narrow width.
Whether your like it or not, it’s time to start hand-sanding to remove all the scratches from rough shaping, and to do some final contouring. Start with 100-grit until the handle fits comfortably in your hand, then work up to 400-grit, without skipping grits. Look closely for scratches. Now’s the time to make these scales as smooth as possible.
When you’re satisfied with your sanding, go ahead and apply finish to the scales. I started with a coat of dewaxed shellac to seal the oily cocobolo I used for my knife scales, then followed with two coats of oil-based poly. After it thoroughly dried, I buffed the finish to a shine on a cloth wheel in the drill press.
After you’re done polishing them, you’re ready for final assembly. I’m epoxying the scales in place here, just to make sure they never come loose. Remove the scales and clean the liners with some acetone to get rid of any manufacturing contaminants on the metal. Install the screws and put the belt clip on. You’re new knife is all finished.
This was a simple and fun afternoon project, and you get a handsome knife in the end. Give one of these kits a try. Thanks for watching!


