
As anyone who has ever even heard of a router knows, there is a dizzying selection of router bits available on the market today, and it doesn’t take very long to acquire a collection of bits that far exceeds the cost of the router itself.
Many of these bits are made to help you perform difficult router tasks more easily, but often people are nervous about spending significant money on a bit they don’t understand or are not sure will do the job. This series will cover some of those bits, the proper ways to set up and use them and tips for getting the best results.
The Multi Profile Bit is the first in this series. This is one of the bits that I always keep on hand. It does not get used all that often, but comes in very handy for making quick moldings or matching existing profiles that your other bits may not be able to cut.
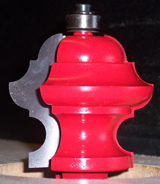
Looking closely at the edge profile, it seems confusing at first, but if you view it as several individual profiles, it sorts out quickly. From bearing to shank this bit offers a 25/64th radius cove, a 5/16th inch bead, a 5/16th inch cove, and a 15/64th inch bullnose. There are different sizes and manufacturers of this style bit and the various radii may be different, but the use is the same.
This is a pretty large bit. It is for router table use only. I also recommend using it with a 3HP router. There is a smaller version of the bit if you don’t have a large router. Because of the large diameter of the bit, run it at a slower speed, around 12,000 rpm. If this is the first big diameter bit you use, you will find that it cuts amazingly easily. It seems wrong, but bigger diameter bits cut more smoothly than smaller diameters. This is due to the physics of the cutting action. The larger arc described by the tip removes the material at a more shallow angle than a smaller arc. This gives the same result as skewing a plane or chisel.
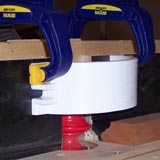
A few cautions before starting: When cutting any profile, I prefer to work with wider stock, cut the profile, then rip the desired molding off the wider stock. This is true working with any molding bit. Also, working with the lower sections of the bit will leave a fair amount of the bit above the table and exposed. For safety, this should be covered. I cut a section off a PVC saddle connector and clamp that to the fence. This keeps hands out of the bit should a slip occur.
To get the most from this bit you need to use three basic adjustments; the height of the bit in the table, the position of the fence, and the thickness of the material. By adjusting one or more of these settings, you can totally change the profile cut.
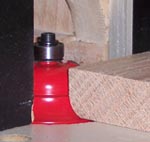
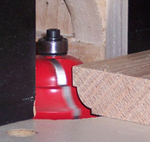
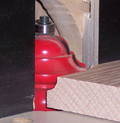
As an example, I began by setting the bit low in the table, set the fence and cut a 25/64th inch roundover.
Moving the fence back a bit created a stepped bead.
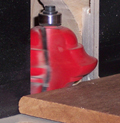
Raising the bit exposes more cutter and cuts a double stepped bead.
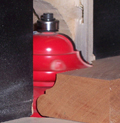
By setting the fence flush with the bearing, and using thicker stock you can create a stepped ogee profile.
All sections of the bit can be treated in this manner. There are literally hundreds of profile cuts and combinations that can be created. The edge of a thin piece of stock can be eased using the center of the bullnose section.
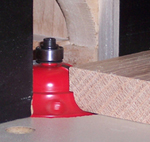
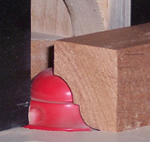
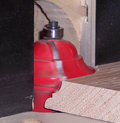
Use thicker material and reset the height to mill a 15/32nd inch bullnose.
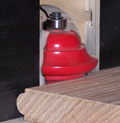
Raising the bit and adjusting the fence exposes a 5/16th inch cove.
Backing the fence off allows the bit to cut deeper into the board, and further into thickness. This creates a stepped ogee that is a reverse of the one at the top of the bit.
Using a thicker piece of stock and raising the bit creates a bullnose with a stepped cove.
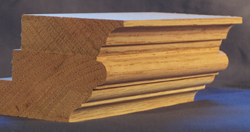
With a little practice, you can create a really wide variety of small and medium moldings for your projects. But you also can create much larger moldings with it too, by stacking the smaller moldings together. Working with 3/4 inch stock, I created the top ogee molding described above, and the reverse ogee from the bottom of the bit. I combined them with the stepped bullnose to make a 2 1/8 inch tall complex molding suitable for topping a clock or cabinet.
This one bit will help you create dozens of useful profiles for your shop projects and widely expand your router’s capabilities.


