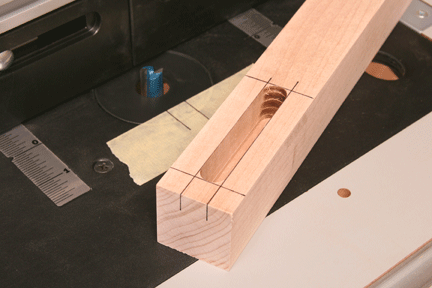
There are lots of ways to cut a mortise. Your router table is one of the quickest and most foolproof ways to cut mortises.
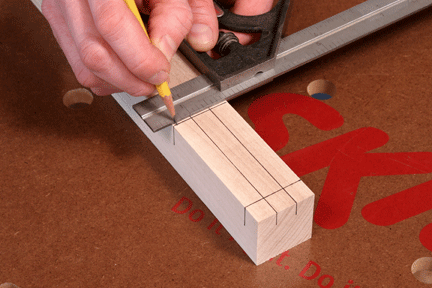
Step 1: Milling a mortise on your router table is essentially a “blind” operation, because you’ll cut the mortise by plunging the wood down into the bit. All the cutting action will be concealed. The first step is to lay out the mortise shape on your workpiece. Extend the layout lines around to one side and onto the closest end of the board (see Photo 1). The side layout lines will direct you where to start and stop each pass over the bit.
Step 2: You can use a straight bit, mortising bit or an upcut spiral bit to rout mortises with this method. Straight and upcut examples are shown here (see Photo 2). Whichever bit you use, select one with a cutting diameter that matches the width of the mortise you want to make. It’s difficult to widen a mortise accurately if the bit is undersized to begin with. Bits with 1/2-in. shanks are preferable to 1/4-in. shanks, especially when you’re milling hard stock or cutting deep mortises.

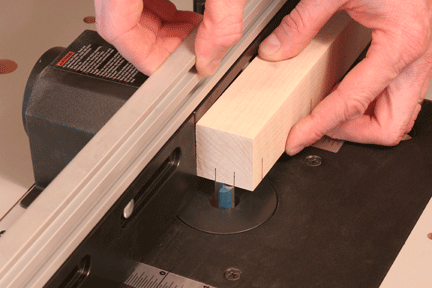
Step 3: Raise the bit a half inch or so above the table. Set your workpiece against the router fence, and move both as needed until the end layout marks on the wood line up exactly with the edges of the bit (see Photo 3). Lock the fence securely.
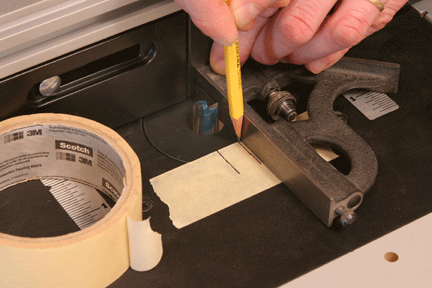
Step 4: You’ll need accurate reference lines, marked on your router table, to know the bit’s precise location during the cutting process. If your router table has a light-colored surface, just draw pencil marks on it. Or, stick a strip of masking tape to the table in front of the bit and far enough away from the fence so your workpiece won’t rub against it. Mark the leading and trailing edges of the cutter, holding a square against the fence and bit and extending two lines out from it (see Photo 4).
Step 5: You’re all set to start routing the mortise! Lower the bit to a 1/8-in. cutting height for the first pass. Start the router, and press the workpiece against the fence with the back end planted on the table. Slowly pivot the wood down into the bit, keeping your fingers clear of the area above the bit at all times. Align this plunge cut so the left layout line on your workpiece meets the bit’s left layout line on the table (see Photo 5).
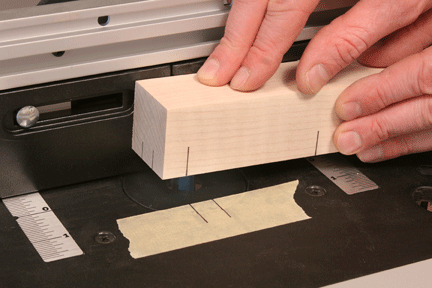
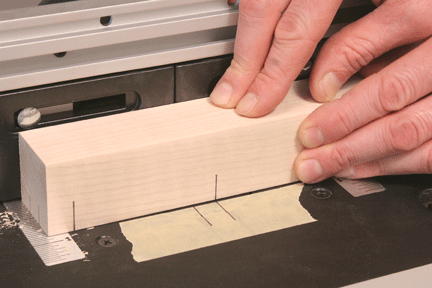
Step 6: Slide the wood slowly from right to left along the fence until the right layout lines meet (see Photo 6). This completes the first pass. Shut the router off, holding the workpiece in place. When the bit stops spinning, lift the wood up and off. Raise the bit another 1/8- to 1/4-in. and repeat the “plunge and slide” process to hog out more waste. Continue these passes, increasing the bit height each time, until you reach the mortise depth you want.
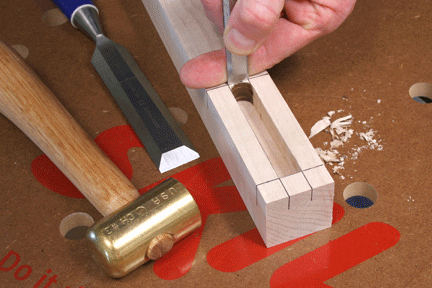
Step 7: A conventional mortise has square ends. Use a sharp chisel and mallet to cut away the rounded ends left by the bit up to your layout lines (see Photo 7). Pare away the waste carefully and in stages, working your way down to the bottom. Don’t try to chop it all out at once. You’ll probably discover that after squaring up a few mortises, they’ll turn out crisp and clean, just like Norm makes them.
Check out what’s new from our sponsor and get access to their FREE project plans.


