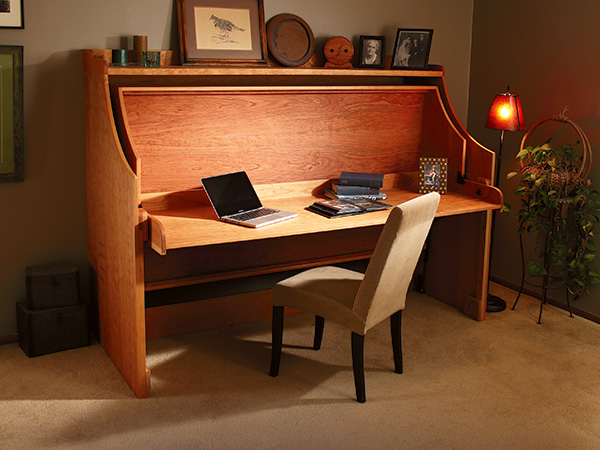
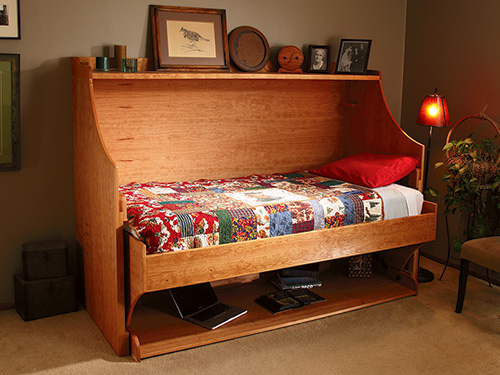
I was asked if I could build a Murphy Bed/Desk combo. Of course I can, I thought to myself! It involves some cool new hardware and unique challenges that sound interesting, and the whole concept would be a useful space saver. (My wonderful studio home is a whopping 475 square feet.)
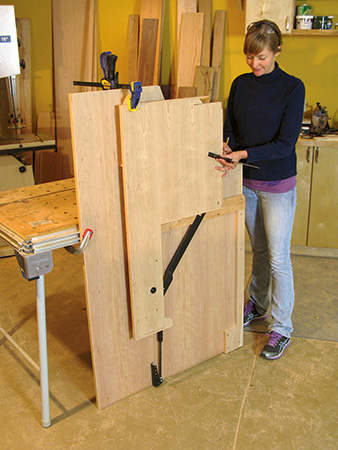
The project went together fairly easily with simultaneous work on different sections. I started with a mock-up to be sure the hardware would be located properly, created the case, constructed the desktop, constructed the bed, and then put it all together.
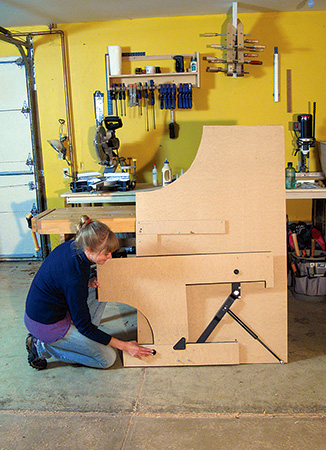
I created an MDF mock-up to confirm that the metric conversions for the hardware would indeed work. Imperial measurements are very ingrained in our work habits, but I do think metric could be easier for all of us. Fractions don’t come naturally for everyone. Sometimes my new students look at me cross-eyed if asked for something like 5/16″. Fractions, I tell them, take practice.
Why Build a Mock-up?

A mock-up is just an even safer version of the measure twice, cut once practice. Once you have the case pieces built out of the final material, you’ll want to be sure you drill the holes in the proper place, unless you are a fan of the Swiss cheese look or of wasting good wood.
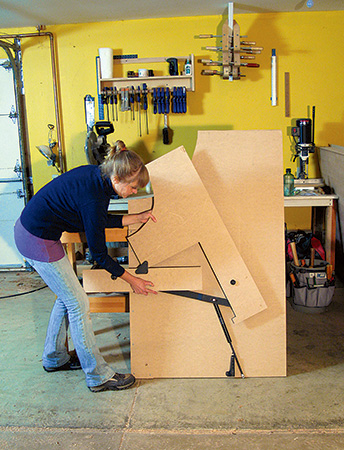
The arm mechanism of the bed/desk required a little bit of tweaking on the mock-up to get the desk resting flat on the floor in the bed position and perfectly level in the desk position.
If you follow our measurements, you will be fine. But if you modify the plan, be sure to make your own mock-up to work out the details. You’ll be glad you did!
The Case

Starting with the large ends of the case, cut the cherry plywood to size on the table saw. Before establishing and routing the curved sections on the case sides, you must rout the V-shape into the straight edges of the plywood. After that, move on to the curved sections, which have a nice solid wood edge treatment attached with a butt joint.
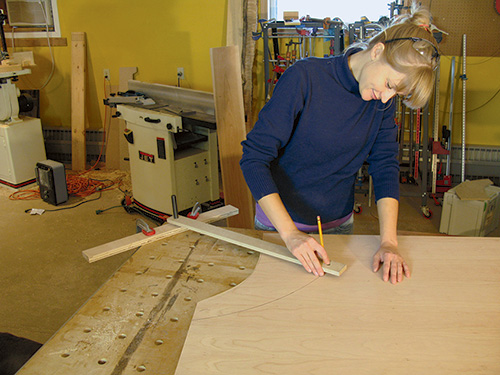
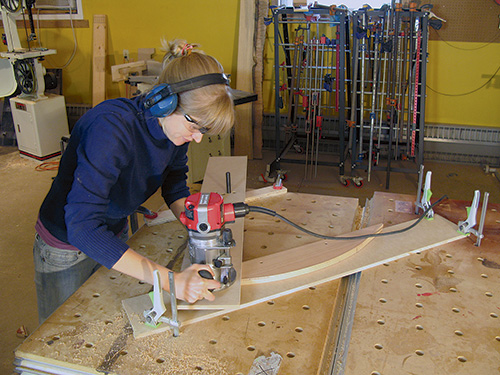
Achieving a solid wood edge on the curved section of the side requires patience and a trick or two. First, I made a couple of trammels out of a scrap piece of MDF. Then I established the pivot point for the trammels at the corner of the work table.
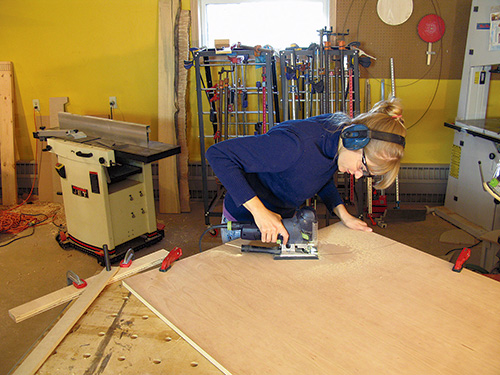
I put the plywood that would become the side on the table and scribed the arc I would be routing onto the plywood using the first trammel. Marking the setup so that I could put the plywood exactly back in place, I used a handheld jigsaw to rough out the arc, leaving about 1/16″ or so to trim off.
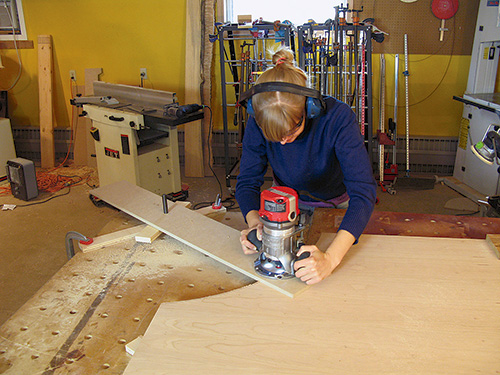
Now, with the second trammel set up to cut the arc perfectly, I put the plywood end piece back on the table with a piece of plywood underneath to boost it away from the table (you don’t want to rout into your table). The arm of the trammel needs to be parallel to the table to get a perpendicular cut. You can achieve that by drilling a hole the size of the pivot dowel in small scraps and adding the scraps at the pivot point. Attach the router to the trammel, centering a straight bit in the hole. I used a 3/8″ carbide-tipped straight bit. (Please, be sure to have your router unplugged while you are setting up. I’m a fan of my fingers, and I’m guessing you like yours, too.) Adjust the plywood again so that the edge of the bit aligns with the scribed line. Turning the bit so that you are aligning with the outermost point is imperative to getting the cut where you want it. Clamp the plywood side piece to the table securely. Now plug in the router, and clean up the jigsawn edge by routing that perfect curve from left to right.
Repeat the process for the second side piece, but before you remove it from the work table, drill a second pivot hole in the trammel that will locate the edge of the router bit to the other side of the arc you just cut.
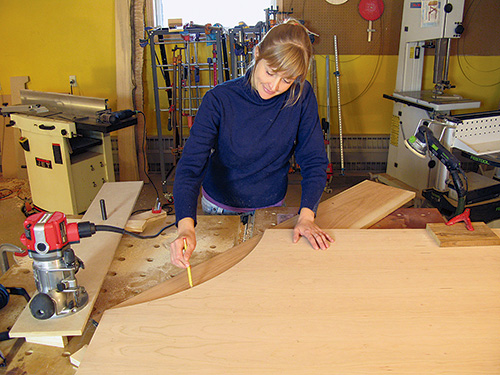
This will allow you to rout the matching curve in the hardwood you’ll use for your edging. Label these holes so that you will know which is which. Grab your hardwood stock and mark the curve from the plywood onto the hardwood.

Cut the curve on the hardwood piece using either the jigsaw or band saw, again leaving at least 1/16″ extra. Place the hardwood piece on the table where it will match up with the plywood curve and then remove the plywood. Rotate the router bit so that the innermost tip is just touching the line on the solid wood.
Take note: you’ll be routing in the opposite direction this time. In order to not have clamps in the way of the trammel, I screwed the solid wood piece (a good portion of the solid piece will be scrap) into a piece of MDF which I clamped to the table. Please, make sure the trammel arm is now perpendicular to the table again. Now you can rout that curve!
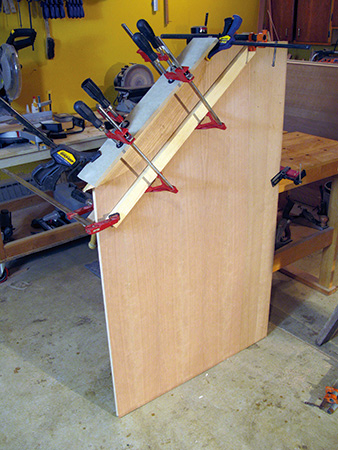
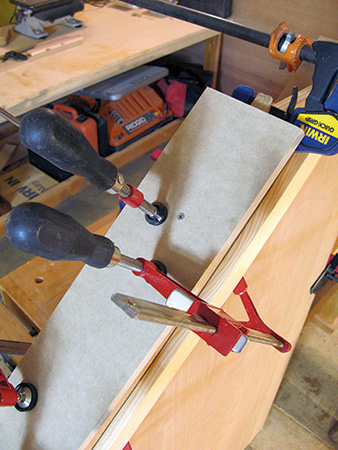
I glued the solid wood curve to the plywood by using some creative clamping. Because much of the solid wood piece will be cut away, screw a slightly wider but just as long scrap to the top of it. Clamp two pieces of scrap wood on the front and back faces of the plywood. Now you have two parallel surfaces so you can get good clamping pressure on the curve. Glue the curves together now, and leave the ends of the solid wood long. I usually let glue-ups set overnight.
Once the glued curve is dry, take the base side back to the trammel table. If you used a 3/8″ straight router bit, drill another hole in the trammel arm, making the distance from the first hole 5/8″ less (1/4″ for the edging and 3/8″ to account for the straight bit). Label the three holes on the trammel to use them later on the bed end curve. Yes, you will be doing this exciting exercise again later! Mark on the solid wood where you want the edge to be (for me it was 1/4″ from the plywood to leave a 1/4″ solid wood edge). Mark this curve with a pencil on the solid wood that is now glued to the plywood. Use a jigsaw to cut the curve, leaving at least 1/16″ extra. Align the pieces so the router bit cuts the curve and leaves 1/4″ of solid wood edging glued in place.
After those tricky curves, the next steps may seem like a breeze. Rip the plywood for the top, bottom crossbar, and back of the case. The top stretcher is made from solid wood as well as solid wood edging strips for the bottom stretcher, case sides, bed ends, top and bottom of the bed rails. See the Material List for the dimensions and details of all these pieces. Then go ahead and rout the rest of the plywood edges for the case with the V-groove bit.
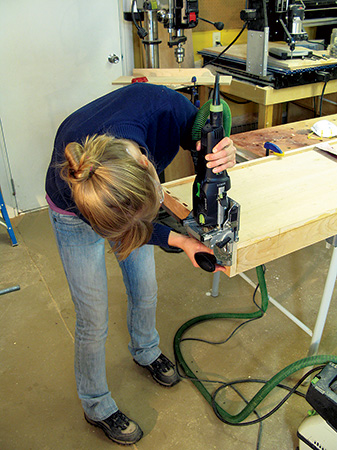
Next I moved on to making the body concealers, locking pin blocks, bed stops, and top of the case molding, which are all pretty straight forward. Just follow the sizes and pre-drill according to the Material List and the Drawings. Then I decided to put the top of the case together using the fabulous Festool Domino. The Domino is such a fun tool, and the Festool tools have such great dust collection! I sanded up to 180-grit before gluing up the top of the case. You should sand each group of pieces before gluing, even if I don’t keep reminding you to do so. Remove any pencil lines, etc. Remember, work smarter, not harder.
Before the case sides can be assembled, you must mark and drill for the hardware. I marked where to drill the holes by placing the hardware plate on the case inside and measuring from the bottom and the back side to the edge of the hardware plate. Then mark the center of the holes in the hardware plate. For the piston mounting bracket, the measurements are for marking to the center of the holes. Since the case sides are much too big to get on the drill press, use your combination square next to your drill to help you drill perpendicular holes.
And remember, at some point, you’ll need to notch out the little section on the bottom back of the case to make room for the baseboard. Attach the body concealers, locking pin blocks, and bed stops by countersinking and pre-drilling the holes. I covered the screw heads later using plastic screw cap covers for Phillips and Square-X screws. These little covers snap right in the screw heads, if you countersink to the proper depth.
Moving forward, the case sides, back, and bottom stretcher need to have their Domino mortises machined. In order to get the bottom stretcher where you want it (kind of floating behind the hardware), measure and mark a line to align the Domino machine perpendicular with the bottom of the case. Set all these parts aside now and move on to the desk.
The Desk
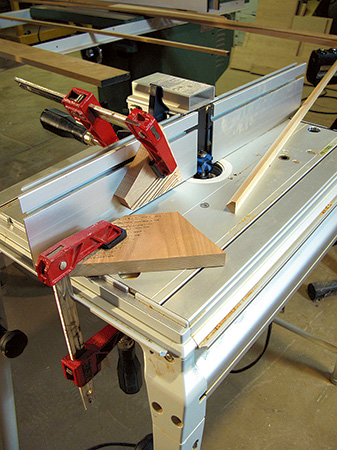
The desk assembly is very similar to the case top construction. Rip the desktop to width, use the edge V-groove to attach the solid wood front support, and then cut it to length. Next, make the desk sides and the back out of solid wood. Measure, mark and drill for the hardware that attaches to the desk sides, including the tri-bearer, link pivot and locking pin. You will bolt the tri-bearer to the desk sides now, before gluing up. The cap nuts used with the connector bolts will be concealed in the desktop.
Go ahead and cut Domino mortises in the sides and back to the desktop. I used the same clamping trick of clamping solid wood strips to the desktop in order to get a right clamping angle using short clamps for the desk sides. Then I glued the desk back on.
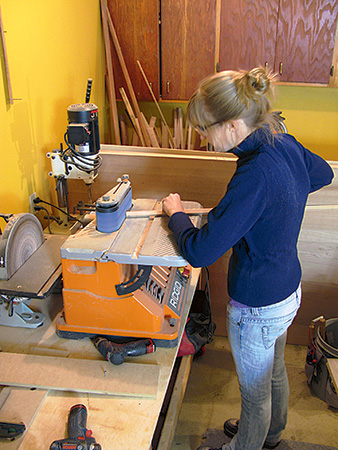
Edge Banding with V-groove Bits

This project requires about 700 lineal inches of wood edging to cover the plywood edges. I used an Edge V-groove Bit set to attach most of it so the joints would be interlocking. But they only work on straight edges that don’t intersect on the same piece to form an inside corner.
It’s necessary to cover the curved plywood edges and two intersecting straight edges on the bed ends without using the Edge V-groove Bits. I just used a butt joint for those edges.
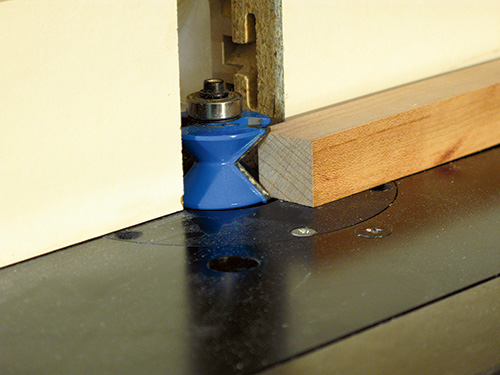
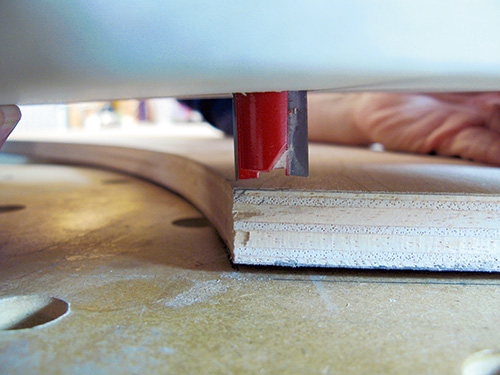
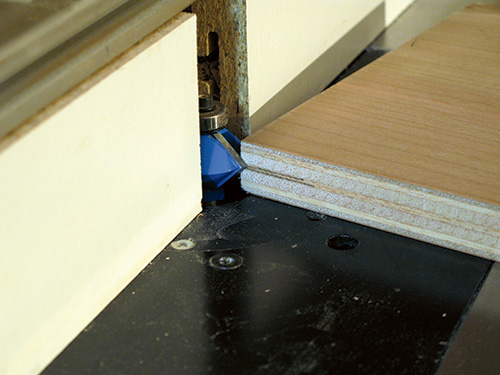
The setup for the Edge V-groove Bit is pretty straightforward. The negative “V” will be cut into the plywood, and you will align the point of the router bit with the middle of the ply. The positive V will be cut into the solid wood edging.
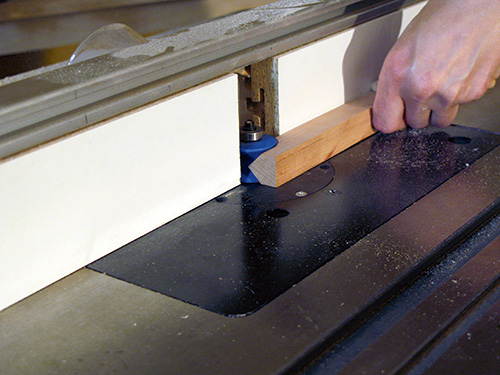
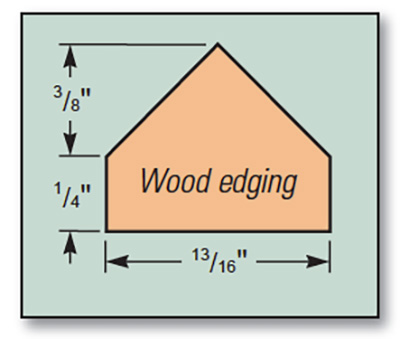
The strips for the solid edging need to be the thickness you want exposed (1/4″ here) plus 3/8″ which will be routed into a V-shape and glued into the plywood. The width of the solid wood strips should be just over 3/4″. I used a flush-trim bit to trim the hardwood flush with the plywood once it was glued and dry. When routing the matching V into the plywood, make sure the fence is aligned perfectly with the bearing of the bit.
These bits cut pretty clean, but don’t waiver the plywood at all. It will cut too much off of one side, which will leave a gap on that side and mess up the V-groove alignment. I recommend using a featherboard to apply pressure down on the plywood to stabilize those large pieces. Remember, you only get one shot at routing the plywood.
If you try to touch up the cut, the bit will damage the delicate veneer edges. And after routing the solid wood once, there won’t be enough surface left to handle it safely. When routing the banding, featherboards are necessary for downward and inward pressure. Use a push stick, do at least one practice piece, and let the router do the work.
During the tricky parts of this project, one may forget that this should be fun. I recommend keeping cookies on hand for said moments. Cookies can be more soothing than a freshly sharpened hand plane cutting its first ribbon of wood.
The Bed
The bed ends are rather tricky, just like the case ends. Now that you have practiced doing the curves for the case, the curves on this section should be easier. After routing the edge V-groove on the four parts of the sides shown, mark and drill for the trunnion bushing. Then attach the bed end to the case side with the trunnion bushing. You can align the bed end in the perpendicular (desk) position and clamp it. Then mark where the curves will line up on the case side and the bed side. Now remove the bed end.
You are ready once again to go through the steps of making the curves — mark, cut, and rout the plywood, and then move the trammel arm. Mark, cut, and rout the solid edge. Glue the matching pieces as described in the case side curve. Mark the final dimension 1/4″ out from the plywood. Cut it leaving at least 1/16″ of extra wood. Move the trammel arm to the third hole. Clamp the bed end down and rout the curve again. I made this the same curve, but it is 1/4″ smaller than the case side curves. This still looks nice, and it takes the pressure off of counting on the curves lining up spot-on. Once you have completed the curves, glue on the edge treatments. You will need to rip 1/4″ pieces for the edges on each bed end, and you will also need to make the solid wood round pieces with edging. Fit these edges, miter them and glue them on. The clamping for the bed ends is a bit easier because they are smaller. Once all the edges have dried, been flush-trimmed with the router and sanded, then round the corner where the link pivot goes, using a jigsaw or the band saw.
Next, I ripped the bed rails and attached the edge banding using the edge V-groove and glue. Go ahead and chop Domino mortises into the bed rails and the ends of the bed. Glue the rails to the bed ends after sanding. Check for square by measuring corner to corner. Tweak the bed if needed. I used two giant clamps for this assembly. That allowed the middle of the bed to be open, so I went ahead and made the cleats out of solid wood and attached them. Use a countersink bit to pre-drill for the screws. Put screw covers over them later on, because the holes will be visible.
The next step (there are a lot of steps, aren’t there!) involved ripping and crosscutting the 1/4″ sheet stock for the bed bottom cover. Set this piece aside for now. When the bed is in use, you’ll never see the slats, so I used pine alternating with maple for the bed slats, which feature chamfered edges. I also pre-drilled the bed slats using a countersink bit so that the mattress won’t get snagged. For ease of finishing, I did not yet assemble the bed bottom cover or the bed slats.
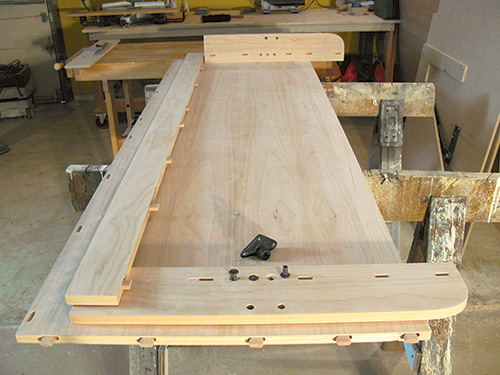
Finishing/Assembly
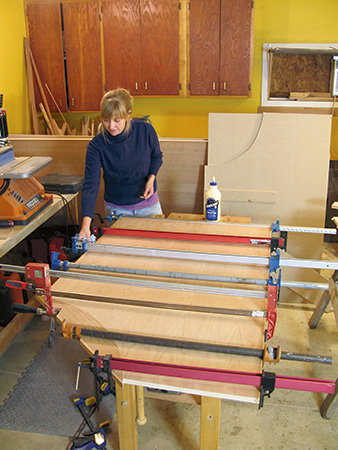
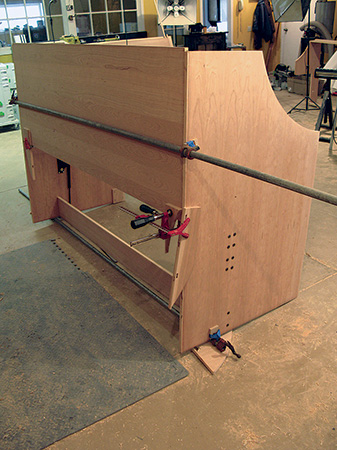
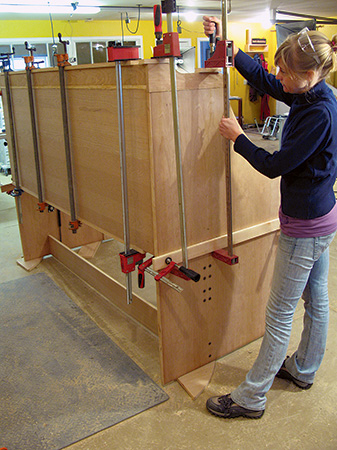
Now you are ready to do the most difficult glue-up of the project. Go collect the case parts you set aside earlier and get your biggest clamps close at hand. I clamped the sides of the case to two tables so they wouldn’t fall over while I glued the back and bottom stretcher in place. I also put one of the two long clamps under the case to get the best pressure for the bottom stretcher, and put the other clamp across the back panel. This worked pretty well. All right, now attach the top of the case to the rest of the body with Dominos. I clamped solid strips to the plywood panel so I could get better clamping pressure on the glue-up of the case top to the sides/bottom.
Once I completed construction of the bed, desk and case, I finished sanding everything up to 180-grit. I usually go to at least 220-grit, but I think 180-grit is adequate for this project. Break all of the edges while sanding.
Now, you get to see the wood come alive! I used Watco® Danish Oil for the finish on this project. It is easy to use and protective enough for a bed/desk. Flood the surface with the first coat. Let it sit for about half an hour. I just let it sit long enough to move through the three sections and the bed bottom cover, which did take about 30 minutes. Then wipe everything down, going with the direction of the grain. After 24 hours, I put on another coat of the Watco Danish Oil, and then I wiped it off after going over all of the pieces. You will need to do this a total of five to six times to get a nice buildup of the finish.
Then you need someone to help you assemble. The hardware arms are much too strong for someone to do it by themselves, and the case is unsteady until you attach it to a wall. Start by attaching the bed bottom cover by pinning it between the bed slats and the cleats. Then attach the hardware to the base sides. Next, attach the bed to the desktop using the link pivot. Attach the bed ends to the case ends using the trunnion bushing. Now lift the bed and desktop up to attach the tri-bearer to the hardware arm. This is when you will most need someone to hold the bed and desk in the up position while you pull the arm down and under the tribearer. Move the whole contraption from the bed position to the desk position. It should work smoothly, but you’re not finished yet.
Now you can mark where to drill the holes in the upper and lower locking pin blocks for the nylon bushings that accept the safety locking pins. I marked where to drill these holes by tapping the safety pin into the locking pin block to leave a mark. Remove the locking pin blocks. Drill the holes on the drill press, and then reattach the locking pin blocks to the body case/concealers, and glue in the nylon bushings for the locking pins.
It’s almost time to make your bed and take a well-deserved nap! I disassembled the bed at this point for ease of moving it. Remember! You must anchor the bed/ desk to the wall! Finally, put the mattress in, strap it down using Velcro® straps, and you’re ready to take a load off.
Safety and Knockdown Advice
Let there be no confusion about this next point. This Murphy Bed/Desk absolutely needs to be anchored to the studs in a wall for stability and safety. Also, the techniques for this bed involve permanently gluing the case together. The finished case is just under 36″ wide. Please, keep this in mind when planning where you will install it. You don’t want to be disassembling door frames! There is an option to use confirmat screws to assemble the case sides, case top, bottom stretcher and case back, which would make this project somewhat “knockdown” in nature. If you choose to use confirmat screws, keep the number of times you assemble and disassemble the parts to an absolute minimum.
Well, there you have it. Hopefully you learned something, tried a new technique, or benefited from this project some other way. Now you can leave your work spread out on the desk, pull down your bed in a matter of moments, and take a snooze. Happy working/sleeping!
Download the Drawings and Materials List.
Hard to Find Hardware
Hiddenbed Twin Mechanism (1) #44833
Statuary Bronze Cap Nuts (8-pack) #31815
3/4″ Edge V-Groove Bit (Convex) (1) #40362
3/4″ Edge V-Groove Bit (Concave) (1) #40368


