
In the past few issues, I’ve introduced you to techniques that let you create some interesting patterns with paint. We dabbled in crackle, parchment, linen, toning and shading, glazing and dry brushing, and a few others.
But before we go back to talking about clear finishes, there’s one more set of tools I’d like to share with you. Called pattern rollers, they let you quickly add interesting patterns to either a painted surface or raw wood.
Pattern Rollers
Just as common paint rollers apply paint quickly and evenly, pattern rollers apply patterns just as quickly and easily. There are well over 200 different patterns available covering just about every look you could desire.
Though they are primarily designed for use on walls, there’s nothing stopping us from using them on either painted or raw wood. The only caveat is that the surface can’t be too smooth or glossy. Trying to roll over a slick, glossy surface can cause the roller to slip and the pattern to smear. Flat or matte paint works well as a background, as does raw wood.
One company, Rollerwall, offers a huge range of patterns and pairs their rollers with a clever foam paint applicator, all in one handheld unit. You load the paint onto the foam roller and it applies the paint evenly and consistently to the pattern roller as you use it.
Most pattern rollers are designed for applying water-based paint, but many work equally well with water-based glazes. Besides applying color, you can use a clean roller on a freshly glazed or painted surface to remove paint selectively. Not surprisingly, a heavy-bodied paint can add texture, should you want that.
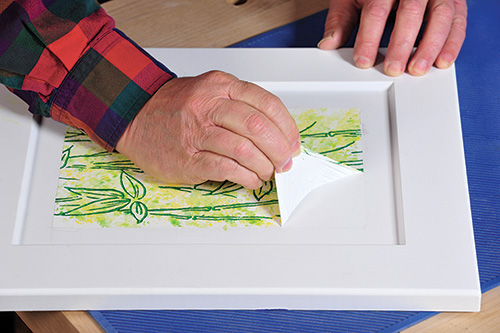
A Few Examples
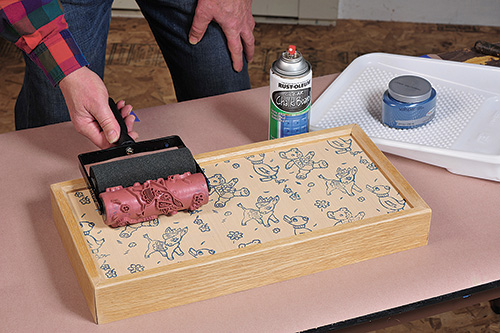
As you can see, a single application of paint, like this toy pattern on the lid of a storage box, quickly adds character and interest. This lid will eventually be sealed with clear chalkboard paint so the owner can color in the ducks, bears and donkeys, erase it, and do it again.
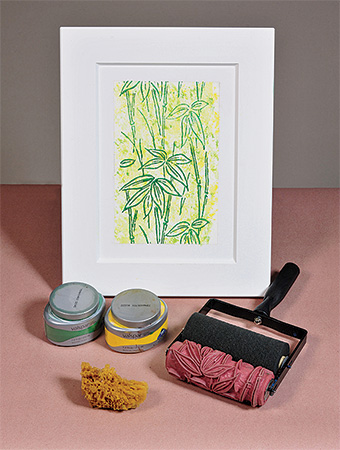
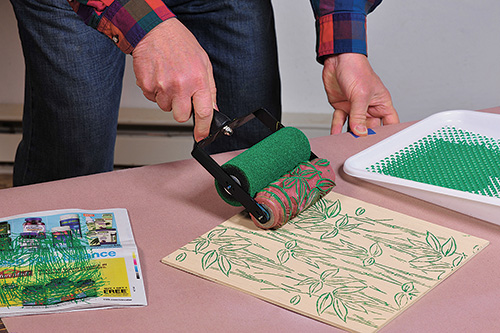
Of course, nothing is limiting you to one solid color over another solid color. Behind the bamboo pattern, I used some latex paints and a sea sponge to create a background of mottled yellow and green. The background adds a soft touch to the otherwise stark outlines that the bamboo pattern roller creates. I could also have filled in some or all of the leaves if I were feeling artistic.
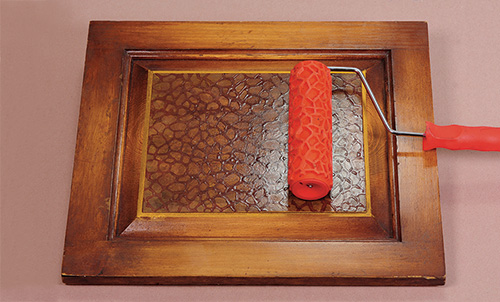
This photo is another example of a pattern atop a background. On this raised panel, I used an alligator skin pattern roller over a lighter, mottled background. By using thick paint Because I used dye instead of pigment, I was able to add the toner color after the graining pattern instead of before, and still not obscure the graining.
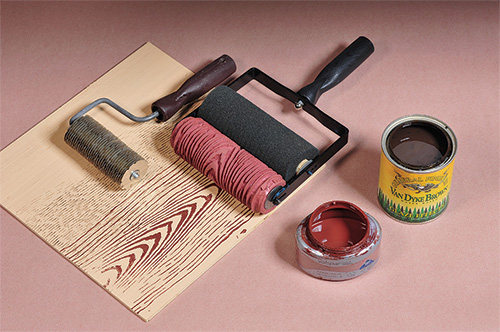
Beginning with a neutral beige background paint, I first applied fine grain lines with a metal checking roller. After that, I added coarse grain with a wood grain roller.
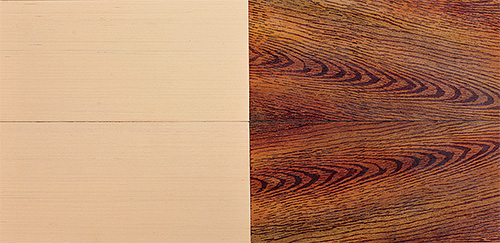
The two grain patterns were rolled onto two boards in a slight diagonal, since I was aiming for a book-match look. Once both grain patterns were dry, I selectively added reddish and greenish toner along the grain lines
to make the piece look more realistic. The end result is a long way from the original and, at a distance, makes a fairly convincing fake wood.
Peel Coat
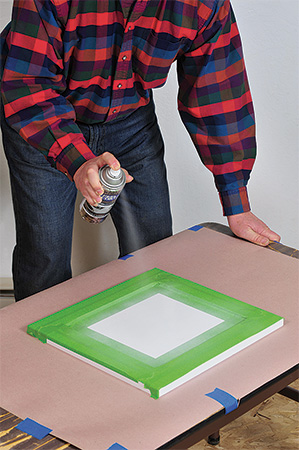
Thinking of trying one of these roller patterns, but not sure you are ready to commit to it permanently? First, try applying Rust-Oleum® Peel Coat®.
Peel Coat is a removable paint that comes in aerosol cans in a variety of colors. Once it is dry, you can paint over it, and then peel it off when you get tired of it. Here are some directions for using Peel Coat, taken largely from Rust-Oleum’s own website:
Make sure the surface is clean, free of wax and grease and completely dry. Mask off any areas that should not be painted. This is a solvent-based vinyl paint, not water-based, so you’ll get cleaner edges with green “lacquer” tape as opposed to other masking tapes.
Hold the spray can 8″ to 10″ from the surface and spray slowly and steadily. Target 50 percent coverage on the first coat and apply four or more coats for complete coverage. Allow 5 to 10 minutes between coats. The more coats you apply, the easier the paint is to remove.
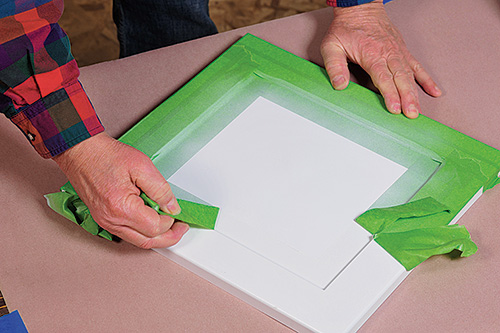
Remove masking immediately after the last coat. If you wait too long, the coating may adhere to the tape. Let it dry 24 hours before painting on top of the Peel Coat. As luck would have it, the Peel Coat dries to a matte surface that makes it perfect for using a roller without slipping and smearing the pattern.
When it comes time to peel the coating off, slowly rub along one edge until it begins to peel back, and work slowly from the edges. It’s best to remove Peel Coat within six months.
This coating is designed for cars, and it will not easily peel off of shellac, lacquer, most water-based coatings or raw wood. However, it will work on pretty much any cross-linked finish.
Cross-linked finishes include two-part coatings (polyurethane, epoxy, polyester, conversion varnish) as well as oil-based polyurethane and even cyanoacrylate glue, a popular finish among turners. These are the types of finishes you’ll find on most modern kitchen cabinets, most guitars made overseas (and many made here), most prefinished flooring and a lot of commercial furniture, especially that made overseas.
And yes, it will work over the powder-coated paint on your power tools. Just think: you can temporarily embellish the door of your band saw with seasonal decorations, or with your favorite team logo, then peel it off when the season is over.


