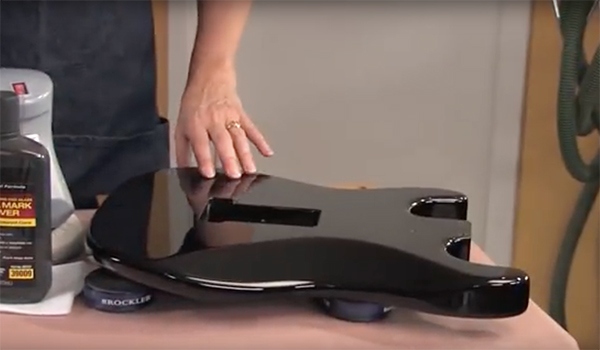
Start with a sanding sequence from 600 through 1200 grit (and sometimes finer grits). Next, the surface is rubbed out with rubbing compound, polishing compound, and swirl mark remover.
Got Pores? Fill ‘Em
The easiest way to end up with a smooth surface is to start as flat as possible and keep it that way. Sand the raw wood very smooth and flat, then later sand out any dust nibs, brush marks, or orange peel as they come up.
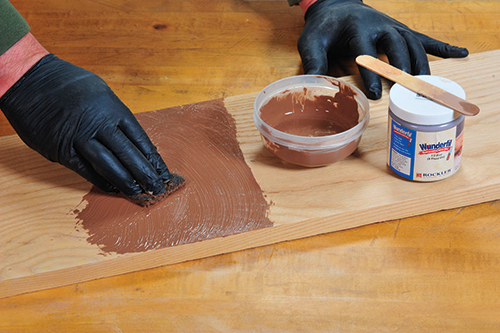
That brings up the issue of large pores in open grain woods like mahogany, walnut, koa, etc. To get a flat surface, those pores must be filled. You don’t want to fill them with finish because it keeps shrinking over time, and eventually those pores will show up again and mar your otherwise smooth surface. Instead, fill the pores first with an inert material that will not shrink. Not surprisingly, it’s called pore filler.
While you can buy oilbased pore filler, I vastly prefer water-based filler. It can go directly onto raw wood, but I usually apply it after the first thin coat of finish. Either way, the application method is the same.
Most water-based fillers are sold extra thick, so mix them with water to the consistency of cream. Scrub the filler into the pores with fine ScotchBrite®, then remove the excess immediately. I squeegee off the excess with an old credit card held at right angles to the grain, and pulled in the direction of the grain. Remove as much as possible with the card; the object is to leave filler only in the pores. Let it dry overnight, then lightly sand off any residue with 320-grit paper.


