Using the scroll saw has been part of my daily routine for quite a while, yet my introduction to the tool occurred quite by accident. When the board of a community woodshop asked me to teach how to make collapsible baskets, I found that the shop’s band saw was in such poor repair that its use would have posed a danger. Needing a safer alternative, and aware that these baskets could also be made with a scroll saw, I prevailed upon the board to buy a mid-priced saw of reasonable quality as a substitute.

I bought an instructional book and an assortment of blades, and started teaching myself how to cut. As I worked my way through the exercises, I was impressed by the range and beauty of the projects that could be made with this versatile little tool. From that point on, I never looked back.
What Can a Scroll Saw Do?
Smaller than most shop tools and deceptively simple in appearance, the scroll saw is the hands-down winner for “most underestimated and unappreciated tool in the workshop.” Because of its association with simple, pattern-based projects (think sewing machine!), woodworkers often fail to appreciate its capabilities and therefore don’t utilize it fully in their shops.
You may already be familiar with some of the better-known uses of the scroll saw. They include:
– Puzzles of various types
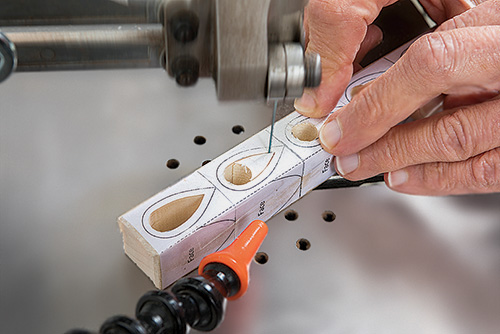
– Fretwork, in which a blade is inserted into the workpiece through small entry holes to permit the removal of pieces of varying sizes and shapes
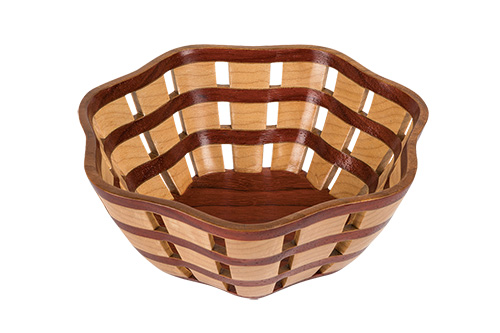
– Intarsia and segmentation, which use many small pieces of wood glued together to form mosaics
– Wooden toys of all types, from simple pull toys to realistic, detailed models You’re less likely to know that with the scroll saw you can also:
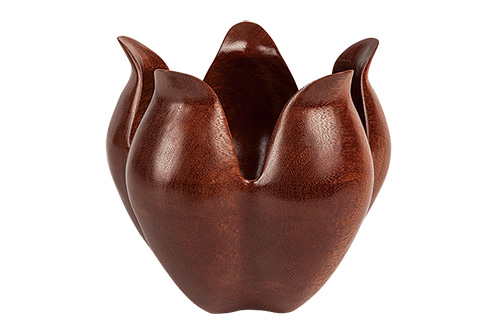
– Make bowls and vases that appear at first glance to be lathe-turned
– Create unique boxes of many kinds, free from the constraints and demands of conventional joinery
– Make projects usually associated with the band saw, such as “band saw boxes” and collapsible baskets

– Use a technique called compound cutting to create three-dimensional objects
– Decorate projects with inlay and marquetry without using a router or chisel
– Cut a variety of materials: softwood, hardwood, particleboard, Corian®, acrylic, melamine, aluminum, copper, silver, brass, gold, horn, antler, bone, glass, ceramic tile and stone
– In conjunction with other tools, cut dovetails and tenons, and make templates to use with bearing-guided router bits
A pretty impressive list for an unassuming little tool!
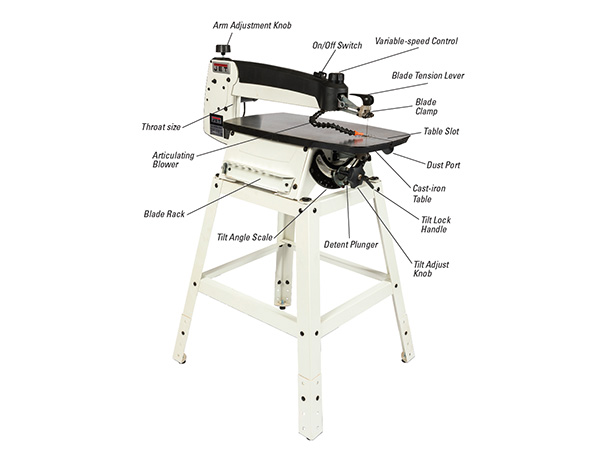
Choosing a Scroll Saw
To get the most from a scroll saw, you’ll need to find the features that make a particular saw, or model, most appropriate for you. Some things to look for, overall, include: minimal vibration; vertical or near-vertical up and down movement of the blade; conveniently located speed controls and tension adjustments; and easy-to-use blade clamps.
Some scroll saws have matching stands. Some are adjustable; others areavailable in different heights and configurations, including wheelchair accessibility. A foot pedal, which serves as an On/Off switch, may be included. I strongly recommend one, since it frees up your hands to control the workpiece. I’ve found low-profile foot pedals the most comfortable to use.
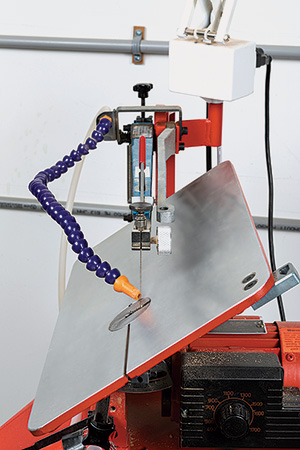
The throat size of the saw table — the distance between the blade and the rear of the saw table — determines the size of the wood you can cut. It typically ranges from 16″ to 30″. The saw table itself can vary in size, shape and distance from the blade to the front of the table. As with table saws, those with more saw table surface area provide more stability for larger workpieces.
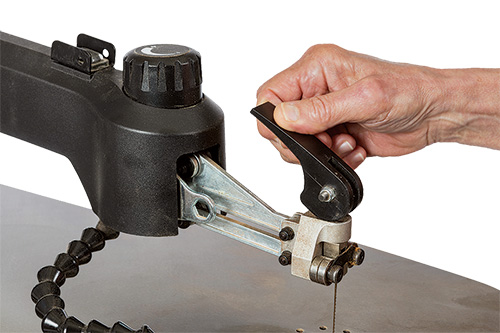
Some saws require a tool to secure the blade into its clamp; others use knobs that are hand tightened. Sometimes several options are offered, or a combination of methods is used. Regardless of specifics, a well-designed system of any type will be easy to use and provide a secure, reliable attachment.
Blade clamps — upper, lower or both — can be either attached to the saw or removable. This feature is relevant for those who do fretwork, which involves feeding the blade through small holes drilled in the workpiece. Those who prefer to insert the blade from the top down, or “top feeders,” need a saw whose lower clamp can remain in place when the bottom of the blade is detached. To “top feed,” the scroller detaches the bottom of the blade from its holder, leaving the top end attached, and feeds the blade through the drilled hole in the workpiece and the opening in the saw table. The blade is then reattached to the bottom holder. “Bottom feeding,” done in the opposite direction, can be done with all saws, since the upper end of the blade is always detachable with its clamp in place.

All scroll saws can make beveled cuts, typically up to 45°. Making cuts of this type usually requires tilting the saw table. However, some saws are designed so that the arm tilts and the table remains level. While this might seem a major advantage, even the steepest cuts can, with practice, be cut successfully with the table tilted. Some tables tilt fully in only one direction. This poses no problem, since cutting clockwise with the saw table tilted one way gives the same results as cutting counterclockwise with the table tilted the other way.
Ease of maintenance: although all scroll saws are easily maintained, some may have fuses and brushes that need periodic replacement, while others require only the oiling of a few moving parts after a specified number of hours of use.
Selecting Blades
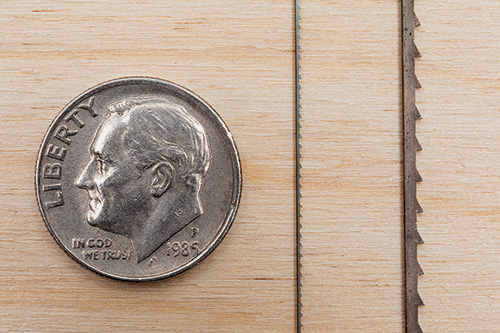
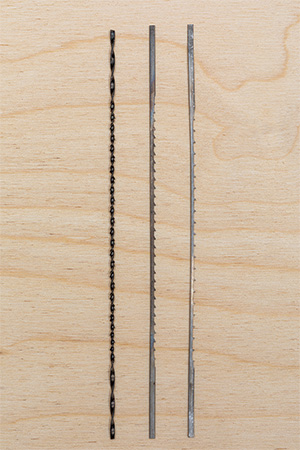
Choosing scroll saw blades can be confusing, even for experienced scrollers, since several companies manufacture quality blades that vary in type, tooth configuration, teeth per inch (tpi) and other characteristics.

The most commonly used blade is the skip tooth, a blade with widely spaced teeth that cut on the down stroke. Reverse tooth blades are skip tooth blades that have a small number of teeth, usually at the bottom of the blade, which cut on the upstroke. This gives a smoother cut on the underside of the wood. However, this type doesn’t clear away sawdust as effectively as the skip tooth and may cause the wood to bounce slightly. Spiral blades have teeth that spiral all around the blade so you can cut in any direction. Controlling this type of blade takes practice, but the ability to cut in any direction without moving the workpiece is especially important for those doing large, intricate fretwork projects, involving many tiny cutout areas.
Even blades of similar types differ in how aggressively or smoothly they cut. As you gain experience, you’ll be able to select the blades that work best for your cutting and project preferences. For starters, however, make your best guess and buy a few dozen blades of types and sizes that seem appropriate. As you try them out, keep notes on their performance, and before long you’ll know just which blades are best for you.
Beyond the Basics: Cutting at an Angle
Once you’re comfortable making beveled cuts, new types of scroll saw projects become possible.
You can easily and economically make bowls and vases of different shapes and sizes from angled concentric rings that are glued together, then sanded. Online design tools such as PolyDraw offer myriad shapes and profiles.
Double-bevel inlay refers to a scroll saw technique in which two equally thick (usually between 1/4″ and 3/8″) pieces of wood are attached temporarily. When the piece to be inlaid, with pattern attached, is placed on top, you drill a blade entry hole on the pattern line and cut out the pattern in a clockwise direction. Downward pressure on the upper piece forces the matching lower piece to drop out. The upper piece takes its place, creating the inlay. Multiple pieces can be inlaid sequentially, enabling the scroll saw user to create attractive designs with relative ease.
Scroll Saw Safety
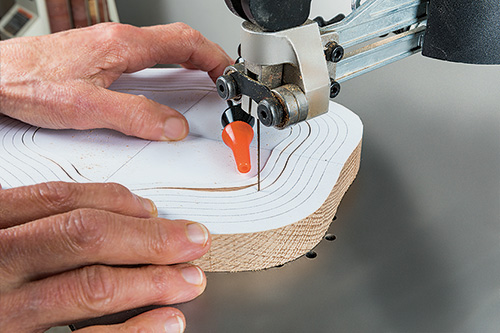
The scroll saw, with its tiny blades, is a relatively safe power-cutting tool. To prevent cutting yourself, keep your fingers to the side or back of the blade, especially when working with small pieces of wood. Eye protection is a must, since small fragments of wood can occasionally go flying. Sawdust is produced both above and below the table, which means a dust mask or respirator is essential, even if you’re using a vacuum or dust extraction system. Hearing protection is always recommended.
Prepare a Successful Cut
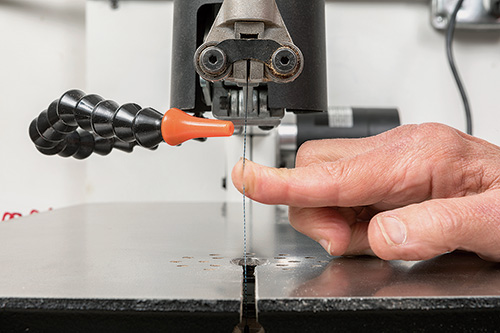
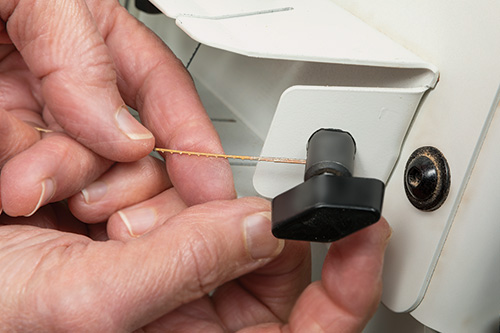
For accurate cutting, the blade must be properly tensioned. Too much tension and the blade will snap; too little and it will wander. I tension mine so that there is a slight deflection, no more than 1/8″, when the blade is pushed sideways, being especially careful not to over-tighten fragile, wire-thin blades. Blades are routinely de-tensioned when not in use, and the better saws have a quick-release mechanism at the front of the saw that lets you de-tension the blade without losing the setting.

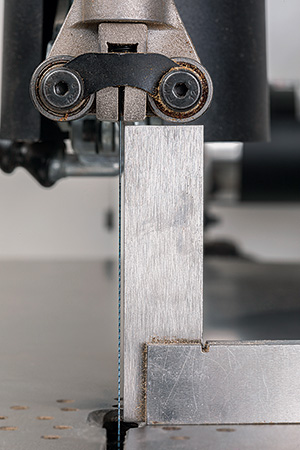
Vertical cuts require that the saw blade and table be perpendicular to each other. I check this by tensioning the blade and placing a small square next to it to see if the blade and the vertical edge of the square are parallel. If not, depending on the type of saw I am using, I adjust either the arm or table until the blade and vertical edge of the square are aligned, then tighten the knob fully to keep the adjustment.
It’s a good idea to check your saw’s angle gauge at this time, to be sure that it reads zero, and to adjust it if it doesn’t. This lets you use the gauge when adjusting the table or arm for angled cutting.
However, when precision is critical, a small digital readout with magnetic base may be preferable. It can be used with either a tilting arm or table; it’s easy to read; and it avoids the problem of parallax when viewing the scale.
Making the Cut
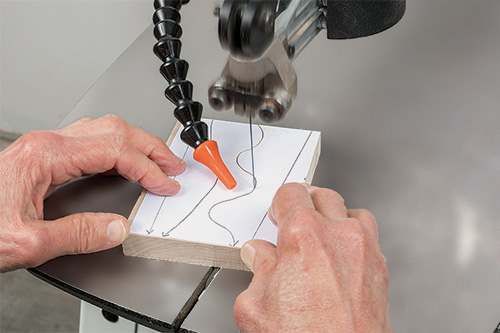
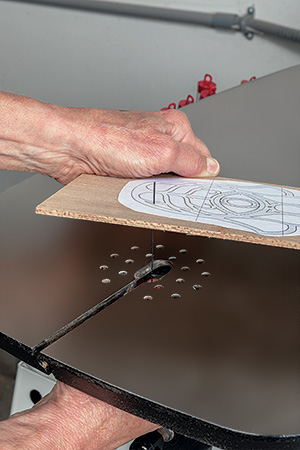
There is no “shortcut” to learning how to cut: you learn by cutting until you get the feel of guiding the wood smoothly into the blade. Practice the major types of cuts: straight, curved and pivots, which are used to make sharp corners or to reverse direction. Although your first tries may look ragged, you’ll soon find it easy to follow a line accurately. Use a soft wood like pine or poplar, 3/4″ thick, and a #5 skip tooth blade, which is wide enough for stability but narrow enough to make most types of cuts.
Just don’t make the common mistake of continuing to use a dull blade for “those last few inches.” You’ll recognize dulling most easily by the need to increase pressure on the wood as you cut. If you continue to use the blade, burning may occur and the blade may deflect sideways. Eventually, the blade will break. Change the blade as soon as you notice a change in your cutting.
Look online for more of my troubleshooting tips for situations you might encounter during cutting as you move through the variety of projects you can make with a scroll saw.


