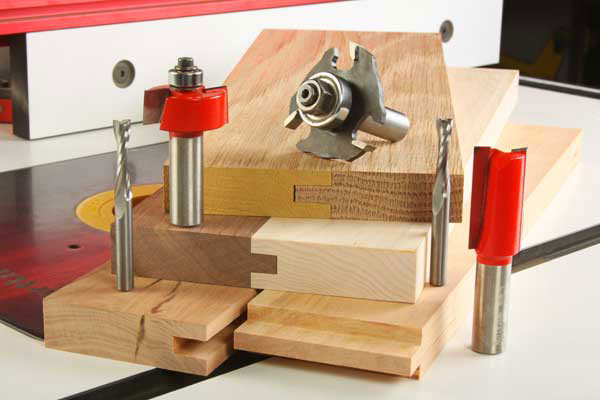
There’s no need for a dado blade if you have a router table and a few common bits.
Tongue-and-groove (T&G) joints form sturdy, interlocking connections with lots of glue surface area for all sorts of woodworking applications: cabinet door joints, self-aligning shelf edging, web or face frames and even carcass assembly. There are DIY applications for this joint too, such as V-groove wainscot or wood flooring. Cutting the narrow centered groove and the corresponding tongue to fit into it doesn’t take a dado blade and table saw. You can do it all at the router table easily with three different cutter approaches. Here’s how.
Straight Bit and Rabbeting Bit
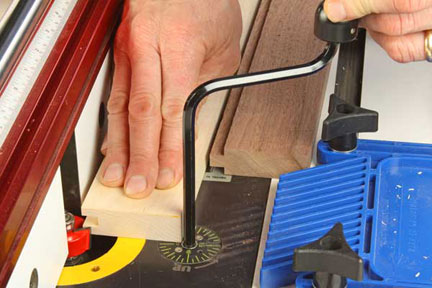
Step 1: Generally speaking, it’s easier to cut the groove of a T&G joint first, then mill the tongue to fit the groove. A 1/4-in. straight bit or spiral upcut bit makes an ideal groove-cutter into the edge of a workpiece. Mark your workpiece with a couple short reference lines for centering the bit on the thickness of the wood. Hair-splitting accuracy isn’t crucial here — just get them close. Install the straight bit in your router table, and raise it about 1/4-in. Adjust and lock the fence so the bit is centered between its reference marks with the workpiece held in place. Clamp a featherboard to the table to press the wood firmly against the fence.
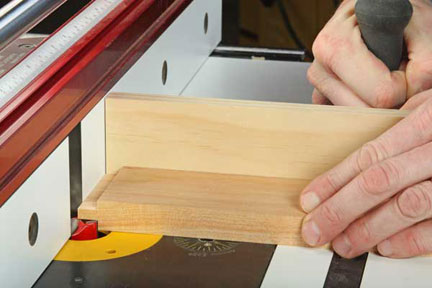
Step 2: Push the stock through the bit using moderate feed speed. Once you’ve completed the first pass, clear out any debris from the groove, then flip the workpiece end-for-end and make a second pass (see Photo 1). Two passes will ensure that the groove is perfectly centered. Now raise the bit about 1/8- to 1/4-in. at a time and repeat the process until you reach the groove depth you want. Note: It’s a good idea to make the groove about 1/32-in. deeper than the tongue will be long; the open space at the bottom of the assembled joint will give the glue some room to migrate so the parts close properly.
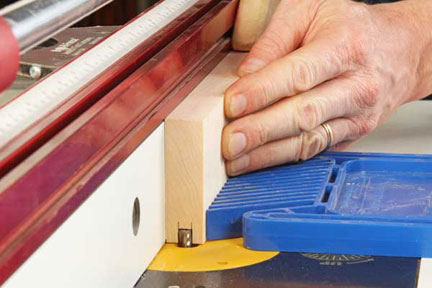
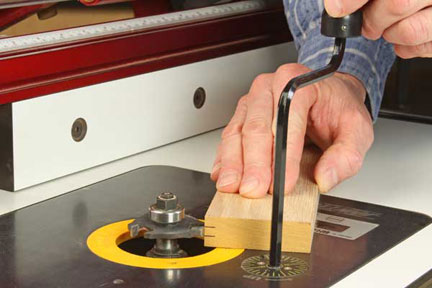
Step 3: You’re done with the straight bit, so switch to the rabbeting bit. But first, install the appropriate-sized bearing on the bit. You want the distance from the bearing’s rim to the edge of the cutters to match the tongue length you want to make. Install the bit, and adjust the router table’s fence so its faces are flush with the bearing rim (see Photo 2).

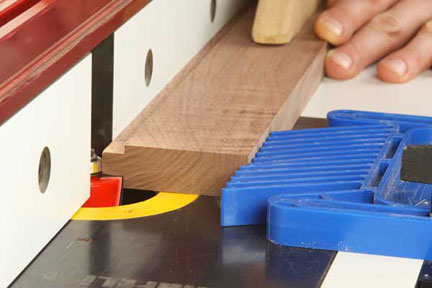
Step 4: The cleanest, safest way to mill the tongue is to rout away the waste a little at a time and not with a couple of heavy passes. Lower the bit so just 1/8-in. or so of the cutters are above the table. Again, install a featherboard to keep the workpiece on track while you slide it along the fence. Make two passes over the bit — one into each face of the workpiece — to form the rough tongue shape (see Photo 3). Then, repeat, raising the bit about 1/8-in. with each round of passes to remove more waste.
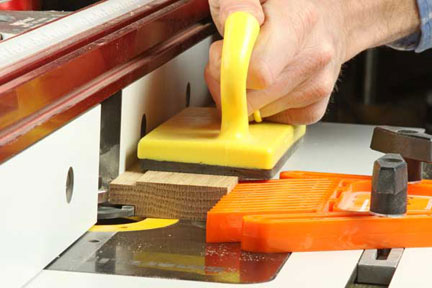
Step 5: When the tongue nearly fits the slot, use the grooved workpiece to dial in the final bit height. Raise the bit until it just intersects the bottom wall of the groove (see Photo 4), and make two more passes to shave the tongue to final thickness.
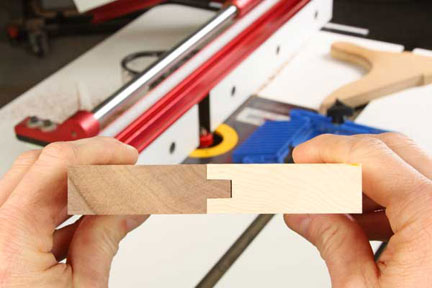
Step 6: Test-fit the joint (see Photo 5). The parts should slide together with a bit of friction, but it shouldn’t take force. If the tongue is still too snug, try running the tongue workpiece over the cutters one more time without changing the bit height at all. Press down harder when feeding the wood along. Often this is all it takes to whisk off the last bit of waste and improve the fit.
Slot-cutting Bit
Step 1: A slot-cutting bit can mill both halves of a T&G joint. Install a bearing on your bit so the amount of cutter projection from the rim to the edge matches the depth of the groove you want to make. Mark a workpiece that centers the groove location, as in Step 1 of the first technique. Install the slot cutter, and adjust the bit height to meet the layout marks (see Photo 6).
Step 2: If the fence facings are adjustable, close up the fence around the bit to eliminate gaps around the cutters. Now shift the fence so only about 1/4-in. or so of the slot-cutter projects beyond the fence — a deeper pass is too much waste to remove safely. Make the first set of passes, flipping the workpiece over between cuts to center the groove. Now, make more passes, shifting the fence back about 1/8-in. or so each time to expose more cutter; do not change the bit height. Make your final two passes with the fence adjusted flush to the bearing’s rim (see Photo 7).

Step 3: Now loosen the fence just enough to shift it, and tap it lightly from the back to withdraw the bit about 1/32-in. deeper into the fence — this will create the slightly shorter tongue and the open space at the bottom of the groove. Re-tighten the fence. Lower the bit to about 1/8-in. above the table. Follow the same cutting process as you would with a rabbeting bit to form the tongue, raising the bit with each set of passes until you shave away all of the waste (see Photo 8 and steps 4 and 5 of the second technique).
Two Straight Bits
Step 1: A 3/4-in. straight bit can take the place of a rabbeting bit or a slot cutter to form the tongue of a T&G joint, too. But, to start with this method, use a 1/4-in.-dia. straight or spiral bit to mill the groove first (see steps 1 and 2 of the first technique and Photo 1).
Step 2: To cut the tongue portion of the joint, install the wider straight bit (it should have a larger diameter than the tongue’s length), and adjust the fence until the bit’s cutters project out from the fence the length of the tongue you need. Hold a ruler over the bit and rotate the cutter by hand to check your fence setting carefully (see Photo 9). Close up the fence facings around the bit, if possible.

Step 3: Lower the bit as you would when using a rabbeting bit or slot-cutter, and follow that same cutting process, raising the cutting height a little at a time until the tongue is just a bit thicker than its groove (see Photo 10). Use the grooved workpiece to adjust the bit for the last passes that bring the tongue to final size (see Photo 4).