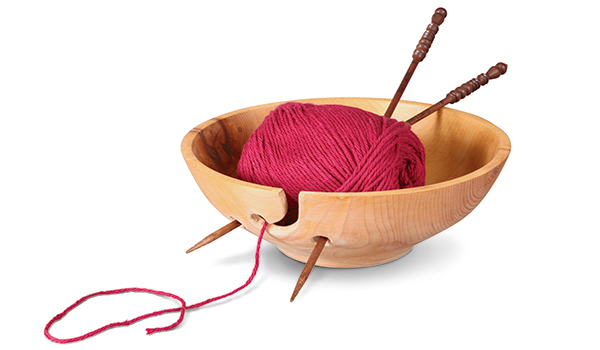
I have been exposed to spinning, weaving, knitting and needlework all my life, for my wife is a talented fiber artist. I say “all my life,” for fiber art was my mother’s passion as well. In many years of teaching woodworking and woodturning classes, I have found a lot of my students have spouses who engage in some form of fiber art. Therefore, a knitting bowl seemed a good project. It is a simple bowl that will hold one or several balls of yarn and has a scroll-shaped cutout and holes to dispense yarn without allowing it to tangle. The holes also allow storing of a pair of knitting needles. You skewer the yarn ball with the needles and pass them through the holes.
It is a practical, attractive and fun gift for the knitters in your life — and I even came up with a way to “take it mobile.”
Knitting Bowl
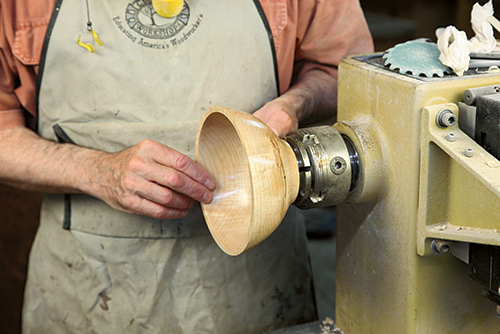
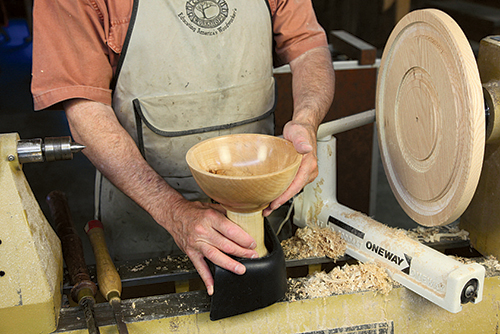
Depending on your knitter, the bowl should be between 5″ and 7″ in diameter and 3″ to 4″ tall. It can be from green or kiln-dried wood but should be sanded to a very smooth surface and a slippery finish applied. I recommend a shellac-based friction finish. Polish it out nicely with some 0000 steel wool. While it is important that it look nice, it is more imperative that it be smooth. Yarn cannot snag anywhere! (If your knitter uses wool yarn, the lanolin in the yarn will add a smoothness all its own after a while.)

The wall thickness is not very important, but a thinner wall looks nicer and it is much easier to cut the scroll-shaped opening if the wood is not too thick. If you want to keep it really simple, in place of the scroll you can simply drill a hole of generous diameter for the yarn to go through, but your knitter will have a bit more rigamarole in starting the yarn.
In any event, you will need two additional holes near the scroll. They are to store the knitting needles when not knitting. The knitter skewers the ball and then passes the needle through the holes. A 3/8″-diameter hole will allow needles up to Number 13 to pass. The biggest needle is a #19 and will require a 3/4″ diameter hole, but a hole that size may well be impractical for a bowl like this. These holes can also be handy if a knitter is working with multiple balls of yarn (they can put a different colored yarn in each hole to keep them separate but under control).
Base for Use in a Car

My mother always knitted when riding in the car, so a good design addition is to make a base with a long foot that is the diameter of the cup holder.
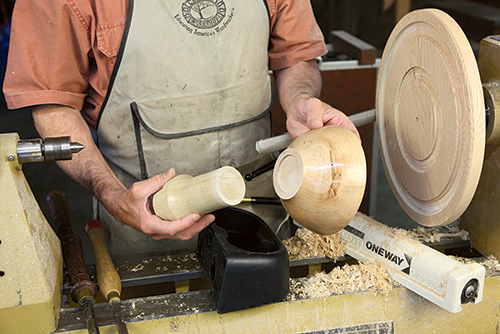
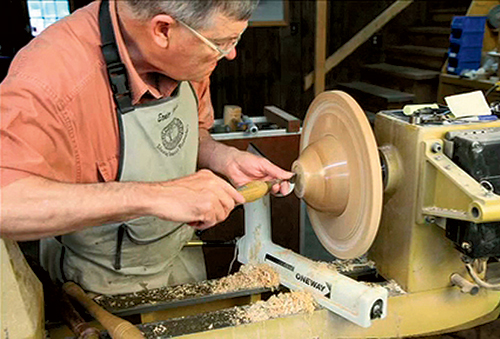
This allows the bowl to fit in the drink holder, thereby elevating and immobilizing it during travel. Turning the bowl and base from one piece is impractical, so the base is spindle turned as a separate piece.
The extended base needs to be 5″ to 8″ high, around 2″ in diameter at the bottom, with about a 3″ shoulder to stabilize it, depending on your car. Careful measurement of your car’s cup holder is imperative for this scheme to work well — it needs to be a firm friction fit to keep the whole assembly secure.
Carving the Scroll
The scroll for the yarn can be made in a number of ways. I used a coping saw to remove the bulk of the material. I then employed a rotary tool to smooth and fair the scroll and chamfer all the edges. It leaves a superlative finish that needs less sanding. Once sawn and carved, the scroll must be sanded very smooth, especially at the edges, so that yarn slides smoothly at all times.
Pattern for Scroll
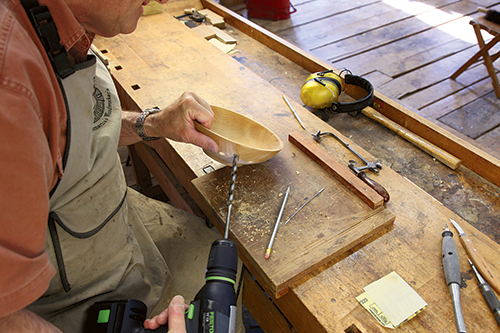
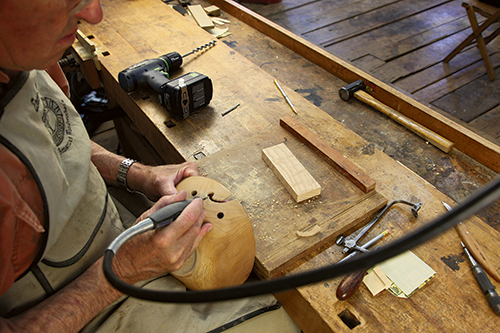
On one of the two face grain sides of the bowl, lay out the hole that is the terminus of the scroll plus a hole to either side for knitting needles or more balls of yarn to come through. Do not lay this out on the end grain sides, as this will cause structural problems (the edges of the scroll can easily break when cutting and machining the shape).
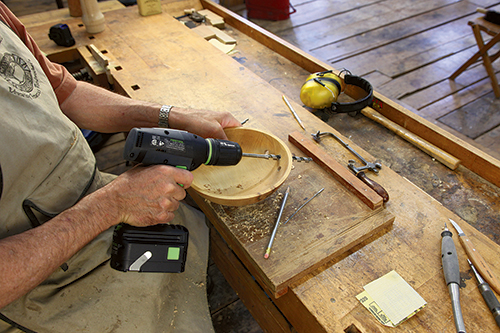
Center punch the hole centers and bore the openings. Using a drill with a brad point, drill carefully from the outside until the point just pokes through the inside. Now drill from the inside where the point poked through. The result is a perfect breakout on both sides.
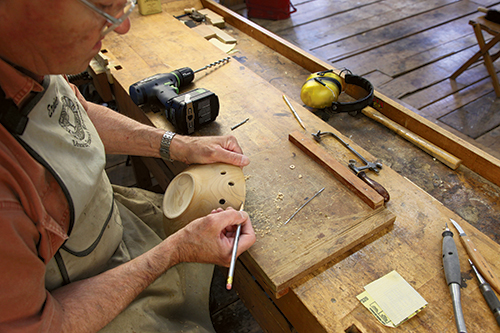
Use a coping saw to follow the outline of the J-shaped design. I use a blade that cuts in any direction, as the frame cannot clear a bowl with a normal blade. Follow up with the rotary tool to refine the shape and smooth the edges. Files are useful here as well.
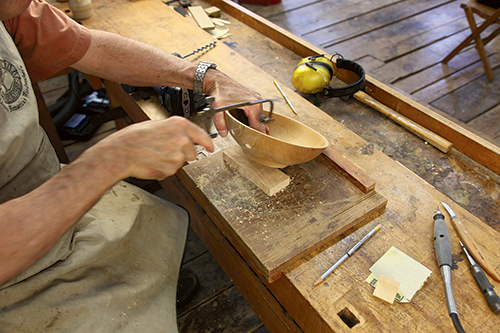
Getting a good, smooth edge is a bit trickier in practice than it may seem. I am afraid that you will need to hand sand the form as well. Any rough bit of edge will snag the yarn and cause troubles for your favorite knitter. Don’t forget to apply finish to the edge of the cutout scroll.
I hope that next holiday season your effort gets you a nice pair of hand knitted socks or a hat to keep you warm. After all, one good turn deserves another.


