Most coatings are formulated to work best with a particular type of applicator, but some work nicely with more than one. Knowing which coatings favor which application techniques can help you get better results. To that end, here’s a rundown of the various common finishes and some of the best application strategies for each.
Oil-based Varnish or Polyurethane
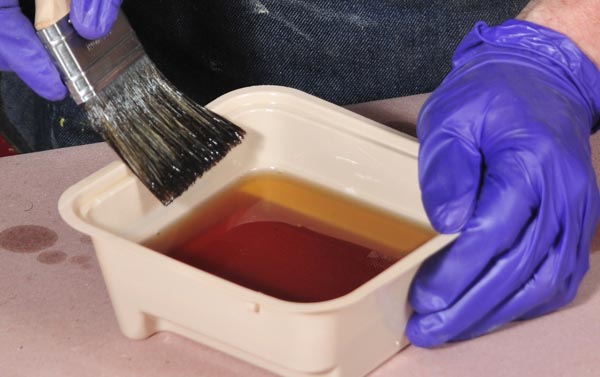
- Scrub on unreduced finish direct from the can using a nylon abrasive pad; wipe off completely to leave a thin, even coat.
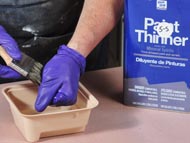
- Brush with a soft bristle varnish brush of ox hair, badger, fitch, or a blend. Thin 10% to 20% with mineral spirits.
- Spray with a fine 1 mm (.040″) tip thinned up to 100% with mineral spirits, naphtha, or acetone.
- Spray from aerosol can
Water-based Lacquer or Polyurethane
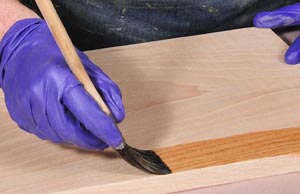
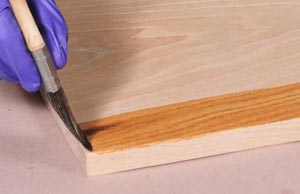
Paint pads are ideal for applying waterbased finishes on flat surfaces.
On flat surfaces, use a paint pad to apply very sparse coats that make the wood just barely wet. Do not reduce.
- On carved or fluted surfaces, use a soft bristle synthetic brush, such as nylon, Taklon or Syntox to apply very thin coats. Do not tip off. If you must reduce, use small amounts of Floetrol.
- Spray without reducing, using a fine 1 mm (.040″) fluid tip. If you must reduce, use small amounts of Floetrol.
- Spray from aerosol can
Shellac
Flood on and wipe off immediately for the first coat only.
- Brush with soft bristle brush reduced to 25% solids with Bekhol solvent or butyl alcohol. Do not tip off.
- Spray with standard lacquer tip reduced with denatured alcohol to 25% solids or thinner
- Shellac-Wet will help finish lay out better whether brushing or spraying.
- French polish using a soft pad of cotton or wool covered with linen
- Spray from aerosol can
Lacquer
There are two very different types of lacquer. Brushing lacquer is designed for brushing with a soft bristle brush. Spraying lacquer is designed to be sprayed. Both can be used as is from the can, or can be reduced to any degree with lacquer thinner.
- Apply brushing lacquer with a very soft bristle brush. Do not tip off.
- Apply spray lacquer with a standard 1.75 mm (.070″) lacquer tip
- Reduce as much as needed for smooth spray or easy brushing
- Spray from aerosol can
Application Tips
Below are some guidelines on getting the most from your application tools, such as spray guns, pads and brushes, as well as specific techniques that apply to particular finishes. But before we get into specific applicators, it’s worthwhile to say a word about sanding between coats. You always want to apply finish to the smoothest possible surface. Therefore, if you have any dust nibs, raised grain or applicator marks in the previous coat, it is wise to sand just enough to smooth them. That usually means 400 grit paper and not very aggressive sanding. After all, you don’t want to cut through. If your last coat was perfectly smooth, there is really no need to sand between coats for the sake of adhesion unless you wait more than two or three days between coats. In that case, you will need to sand for adhesion, but as long as you apply a coat each day, sand only when needed for smoothness.
Wiping
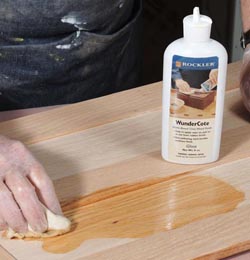
Rockler’s Wundercote is a handy waterbased alternative to wipe on Danish oil finish.
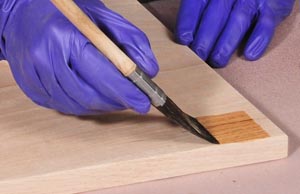
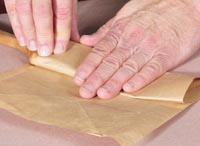
You can apply the first coat of shellac or any oil based varnish or polyurethane by wiping it on and off. I prefer to scrub the finish on with a nylon abrasive pad without thinning or adding anything to it. Wipe it off immediately, working in small areas for a fast drying finish like shellac, or in larger areas for slower drying oil based finish. When using shellac, you’ll have to switch to a different application method after the first coat since each coat dissolves the last. However, with oil based coatings, all subsequent coats may be applied by wiping on and off the same way, at the rate of one coat per day.
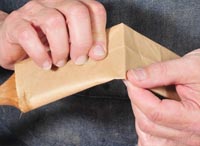
Wiping leaves no brush marks, creates little waste, avoids air bubbles and dust nibs, and applies thin, quick-to-dry coats. It’s long been a favored method for applying oil based finishes, and now there is even a waterbased wipe on finish. When you are done, spread the nylon pad and the wipe cloths out one layer thick and let them dry, which usually takes about a day. Once they are dry and crusty, they are safe to throw away with the household trash.
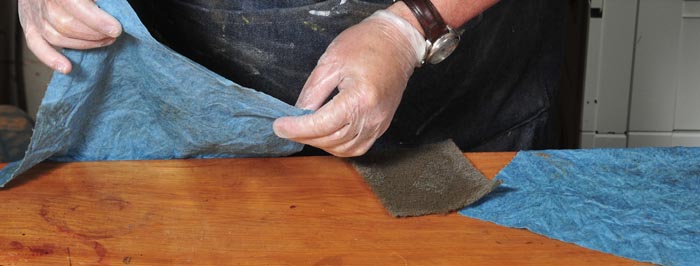
Lay out any oily rags or pads one layer thick to dry.
Brushing
Good brush handling technique is essentially the same for all finishes. However, oil based finishes can tolerate an extra, and valuable, step that other finishes can not. Solvent and waterbased finishes should be applied quickly in one direction with one or two swipes per row, then left alone. Oil based finishes, however, can be tipped off, a process described below.
Preparation

Anatomy of a Brush
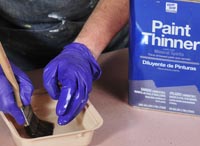
Start by soaking the brush all the way up to the ferrule in the finish solvent; alcohol for shellac, lacquer thinner for lacquer, water for waterbased, and mineral spirits for oil based coatings. After a minute or two, remove the brush and squeeze out all the excess solvent, but do not dry the brush with towels. You want the bristles wet but not dripping. This soak will not only help the finish flow, it will make cleanup far easier.
Squeeze the excess solvent out of the bristles, but do not wipe them dry
Stir the finish thoroughly, pour some out into a square sided pan, and thin it if necessary. Dip the brush so that only one third to one half of the bristles go into the finish, then gently touch the tips of the bristles to the flat sides of the pan. That will ensure that the brush is loaded but will prevent it from dripping on the way to the wood.
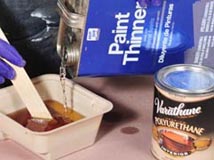
Add about 20% mineral spirits to oil based polyurethane for better handling, and stir well.
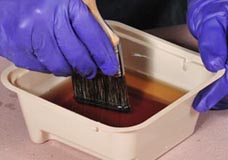
Dip only the last third of the bristles into the finish.
Touch the tips of the bristles to the flat side of the pad to prevent dripping on the way to the wood.
Brush Handling
Set the bristle ends down just in from the edge of the board to avoid drips on the adjacent side, and press down to deflect the bristles ever so slightly as you move the brush in the direction of the grain. As the bristles deflect, finish will rise to the upper surface. The idea is to gently slide the brush out from under the smooth liquid finish on the bristle surface. As you go further, deflect more. Reload the brush as necessary. When you get to the end, lift up so there is no tension on the bristles at the end, lest they flick finish elsewhere. Go back and pick up the missed area at the starting end of the stroke by going in the other direction.
As you work, the finish will start creeping up toward the ferrule. When that starts to happen, stop, go back to the pan of solvent and quickly rinse out the brush and squeeze it dry. It takes about six seconds, but if you do that every five or ten minutes, you’ll have a brush that is easy to clean at the end of the day, with no dried crust of finish near the ferrule.
1. Start the brush stroke just off the end of the board to prevent drips on the adjacent side.
2. As the stroke continues, deflect the bristles more so they continue to feed finish onto the wood.
3. Lift up and end the stroke gently to avoid flicking finish on nearby pieces.
4. Now go back and pick up the area you missed at the start of the stroke, brushing lightly in the other direction.
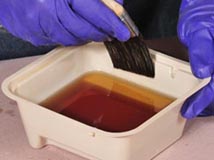
5. Scrape the brush over the edge of the pan to unload it.
Tipping Off

To tip off, hold the brush at 90 degrees so that just the very tips touch the finish.
This technique is for oil based finish only. When the entire section or panel is coated, unload the brush by scraping it across the edge of the pan. Use the damp bristles to tip off by holding the brush at 90 degrees to the wood. Go in the direction of the grain and gently drag just the tips of the bristles through the still wet finish. That will help blend brush marks and burst air bubbles.
Cleaning the Brush
As soon as you are done, unload the brush by scraping it across the pan edge, then immediately wash it thoroughly in your pan of solvent. When it looks clean, squeeze out the solvent, take the still wet brush to the sink, and wash it several times in warm water and dish soap or shampoo. When the soap foams readily you will know that you’ve gotten the solvent out. Rinse well until all the soap is out, then return the brush to its cardboard keeper. If there’s no keeper, roll the brush in brown bag paper, feel for the bristle ends, and fold it over about an inch past the ends. That will reshape and set the bristles while they dry.
1. When you are done, wash the brush thoroughly in the appropriate solvent.
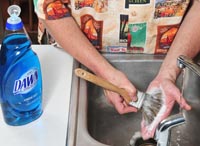
2. Take the clean, solvent wet brush to the sink and scrub the bristles with dish soap and warm water until it suds readily, then rinse out all the soap.
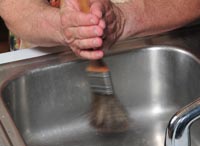
3. Spin the brush between your hands to remove most of the excess water.
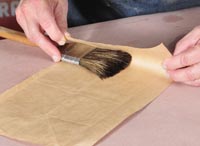
4. If you don’t have the brush keeper, wrap the wet brush in brown bag paper.
5. Crease the paper parallel to the brush width.
6. Feel for the end of the bristles, then fold the paper over about an inch past them.
Paint Pads, Foam on a Stick, and Rollers
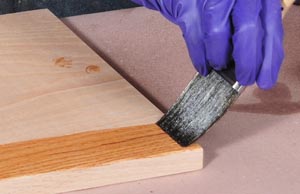
Paint pads allow you to apply a thin, even coat of finish thanks to their multitude of very soft synthetic bristles. They are absolutely ideal for waterbased finishes. Make sure you know whether your pad is made for oil based or waterbased, since the solvents in the finish will dissolve the adhesive on the wrong type. Thin the finish just as you would for a brush, and apply very thin coats, swiping once in the direction of the grain, then immediately once again to smooth it out before applying the next row.
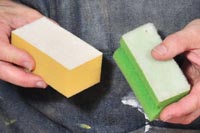
Many paint pads work only with waterbased paints, but the yellow one in this photo is made specifically for oil based coatings.
Some folks swear by gray foam-on-a-stick brushes, and if you get good results with them, by all means use them. They have the advantage of not requiring clean up, but to be honest, I have never found them to hold a candle to a top notch varnish brush, and most types will dissolve in shellac or lacquer. Similarly, rollers will apply finish quickly, but usually it comes out chock full of air bubbles and application marks. Again, if you can get it to work for you, that’s great. With slow drying oil based finish, it may sometimes make sense to roll on the finish, just to get quick coverage, then go back with a brush to smooth it out.
Spraying
Let’s face it; the easiest way to spray finish is to buy it in aerosol cans. The finish will be formulated perfectly for spraying, there is no need to set up or buy any expensive equipment, and there is virtually no cleanup. Every common finish, including shellac, lacquer, and both interior and exterior waterbased and oil based finishes are all available in spray cans. In fact, tinted polyurethane, which allows you to add a layer of semi-transparent color along with the finish, is also available in aerosol cans.
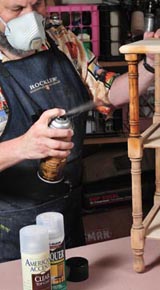
Just about every type of finish is available in aerosol cans, offering a cheap, easy alternative to those who don’t own spray equipment.
Setting up the Gun
On almost all spray guns, rotating the air cap 90 degrees will change the fan pattern from a horizontal oval to a vertical oval.
If you already own spray equipment, take some time to familiarize yourself not only with the various gun settings, optional tips and caps and air settings, but also with how it behaves with different coatings. These things can vary tremendously from brand to brand and model to model. Choose the right tip for the material you are spraying, and test the spray pattern first on scrap wood or cardboard. Adjust the air flow, fluid trigger and the fan shape and width. Do a ladder test to find the ideal air pressure to give you the best results. Start at 30 psi and spray some material onto scrap. Raise the pressure and try again. Do that in 10 psi increments up to 80 psi to find the ‘sweet spot’ for the combination of your gun and the finish you’ve chosen to spray. When the air is too low, you will get orange peel; too high and you’ll get overspray. When it is just right, you should get a smooth, thin, uniform finish.
Handling the Gun
Once the gun is set up, hold it about eight inches from the wood and keep it moving at right angles to the spray fan at all times. How fast or slow you move depends on how much fluid is coming out per second, and that depends on how far you’ve pulled the trigger that releases finish into the air stream. Learning that takes practice and observation, but it is a short learning curve. Play with the gun a bit and you’ll be in charge before you know it.
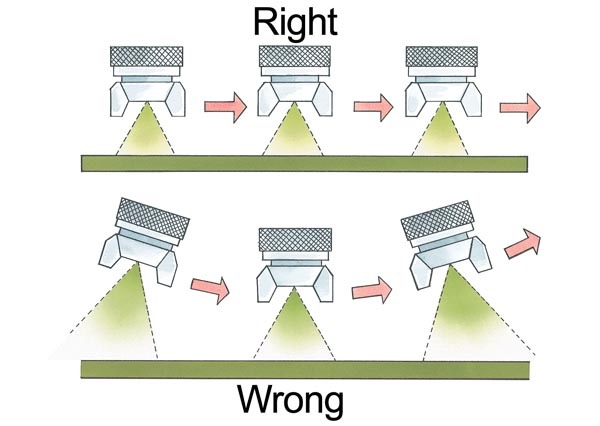
As you move the gun from side to side, keep it parallel to the wood and spray in straight lines. Resist the impulse to swing the gun upward at the end or beginning of the spray path, as that will leave you with insufficiently coated ends and flooding in then center. Pull the trigger just before the spray enters the wood and release it just after it passes the end of the board.
Spraying Solvent and Water-based Coatings
You will find that waterbased coatings generally spray quite nicely right out of the can with no alteration needed. If you must thin them, use Floetrol rather than water. It will give you far better results. Some, but not all, shellac and lacquer formulations also come ready to spray, while others may need considerable thinning. Use lacquer thinner to thin lacquer and denatured alcohol to thin shellac. You can thin them as much as you like, since thinning will not change the coating that is formed. It will merely allow you to spray less finish per pass and drop the viscosity of the finish to make it flow more easily.
The exception is oil based finishes. Those are usually formulated not for spraying, but for brushing. To make them behave well through a spray gun takes some alteration, and a slightly different spraying technique.
Spraying Oil-based Varnish and Polyurethane
Spraying oil based polyurethane or varnish is not a huge problem on horizontal surfaces, which will flow out, but be prepared to spend a bit of time getting used to how varnish hangs on vertical surfaces. Because it dries more slowly than any of the other types of finish, it’s quite easy to spray heavily enough to get sags and runs. Choose a fairly small fluid tip, between 1 mm and 1.5 mm, and get a lot of scrap boards or cardboard on which to practice.
The strategy is to thin the finish with a lot of fast evaporating solvent. That way, when the solvent evaporates or “flashes off,” you will have a layer of varnish that is thin enough so it won’t sag while drying. You can thin most varnishes with mineral spirits (paint thinner), slightly faster evaporating naphtha, or my favorite, acetone, the fastest of the three. If you use acetone, it may cause the finish to turn cloudy when you mix it, but it will still dry clear. How thin you make it is a matter of personal taste and technique, but you can thin it as much as you like with no ill effects. I’ll often use equal parts solvent and varnish. Stick to one, or at very most two coats per day with several hours drying time between the two.
Here’s a trick for spraying vertical surfaces. Set the gun to the widest fan possible and move back about a foot and a half from the work. Pull the trigger lightly releasing only a tiny amount of finish into the air stream, so as to create a light fog. Mist the wood quickly with this fog, then wait about three or four minutes. Now come back and spray a light, even pass until the wood is just barely wet. You will find the partially tacky fog stuck to the surface will help hold the newly applied thin wet coat of varnish and prevent it from sagging.


