 Traditional inlaying is a fine skill to learn, but sometimes there’s more than one way to skin the same cat.
Here’s a little technique to try if you’d like to embellish a project with a narrow band of solid-colored inlay. Could be a neat way to add a “racing stripe” or a little border detail to a project that befits it. All you need is some aniline dye powder and ordinary five minute, two-part epoxy. I’ve used several different brands of epoxy with equally good results. Any dye color you like will work fine. Heck, you can mix and match different dry colors if you like to get just the shade you want.
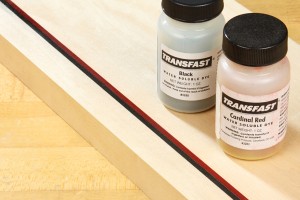
Before stirring up your inlay mixture, you’ll need a groove or a recess to fill it with. For the example shown in the top photo, I just used an ordinary saw blade to cut a shallow kerf in a piece of maple. Router bits also work well, but I would suggest keeping the width of your pinstripe narrow — less than 1/4 in. or so. As the epoxy cures, it will form a slight, concave depression. The wider your stripe, the more you’ll notice this dip. Keep the groove shallow, too. One-eighth inch or even less means you have less gap to fill.
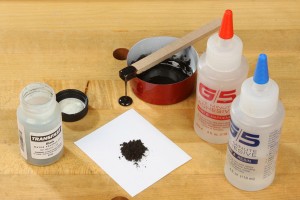
Blend your epoxy and hardener in equal proportions, just like you would if you were using it as an adhesive. Add a small amount of dye powder to the epoxy. One-quarter teaspoon works well when you’re mixing up a couple of quarter-sized dollops of adhesive and hardener. Gauge your ratio up from there if you’re mixing more material.
 Now, use a paint scraper or stir stick to pack the epoxy into the groove you’ve made. Work fast, of course…you don’t have long. Then let it cure for at least a couple hours or even overnight. In the morning, sand, scrape or plane off the excess, and voila! Instant inlay. If any tiny air pockets open up when you flatten the surface, just fill them with more epoxy and dye.
Again, in the example above, once I planed my black stripe flat, I cut a second kerf next to it and filled that with red. A second planing produced what you see.
Pretty cool, huh?
I’ll be using this technique in a Dremel-sponsored eZine project that will go live on Black Friday (Nov. 26). Keep your eye out for that. And, when you need a quick fix for pinstripes, give this technique a try. It’s fast and fun, even if I’m bending all the inlaying rules. Hey, maybe that’s what’s fun about it…
Catch you in the shop,
Chris Marshall, Field Editor


