How to cut a straight edge on rough, waney, live-edge or waney stock boards.
The first step when milling rough lumber into usable stock is getting that first straight edge; most of the procedures that follow rely on it. Here are two ways — one with a reusable jig, the other a quick trick — to get a perfectly straight edge every time.
Rough lumber can come in just about any condition, and rarely does it include a straight edge. However, to cut rough material down to size when milling it into smaller workpieces you almost always need at least one edge that’s straight and true. Your table saw’s fence needs it, for example. And it’s not just fresh-from-the-tree wood that lacks straightness, either. Even boards that are otherwise nicely milled with squared edges and smooth faces can change over time while languishing in your lumber rack, with crooks being one of the most common and problematic types of warping — if the board is crooked, the edges just won’t accurately or safely rest against the fence while cutting. Let’s take a look at two ways to tame unruly boards. The first is a simple straight-line jig you can use over and over to mill a whole stack of lumber. But if you have just one piece, no problem; there’s a quick and easy way to cut that board, too.
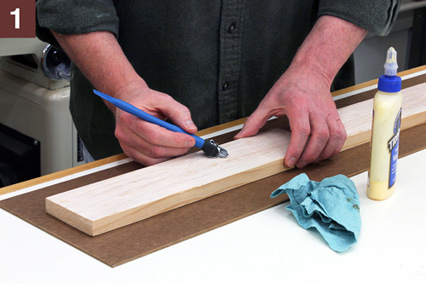
STEP 1: Let’s start with the jig, which consists of only two parts and a few toggle clamps. The base of the jig is a piece of thin hardboard, while the fence/clamping strip is a length of standard 1×3. The jig shown here is 8-1/2″ wide and 48″ long to match the type and size of lumber I typically mill (between 5″ and 12″ wide, and maybe 4 to 6 feet long) but size yours to suit your needs. Begin by applying glue to one face of the 1×3 as in Photo 1. Now flip the 1×3 over and align it with one edge of the hardboard and clamp up till dry. By the way, most hardboard is smooth on both sides, but if your hardboard is smooth on one side and rough on the other, orient the hardboard so the smooth side is face down.

STEP 2: Attach the toggle clamps, evenly spaced along the length of the fence (Photo 2). For me, three clamps work well, but if you frequently cut shorter pieces that wouldn’t engage the clamp on one end, spacing them a bit closer together and adding a fourth clamp would be handy.
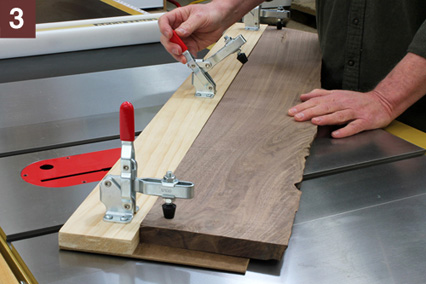
STEP 3: Place your lumber on the jig with the roughest edge out; that’s the side we’ll cut off to create our straight edge. In Photo 3, you can see that the other edge of this walnut board isn’t straight either — it’s slightly concave — but it’s still resting against the fence at the front and back. Adjust your clamps as needed to accommodate the thickness of the lumber, and toggle each clamp to securely hold everything solid. I recommend that you use your table saw’s guard whenever possible, but to make the procedure easier to follow I’ve temporarily removed the guard so you can clearly see the process in the photos. Although the guard is removed, the low-profile riving knife is still in place and will keep the offcuts safely away from the blade.

STEP 4: Adjust the table saw’s fence for the cut. Ideally, to keep the board as wide as possible you want to remove the smallest amount you can and still achieve a continuous straight edge. With the distance set, lock down the fence and adjust the blade to the proper height for the cut. From this point forward, treat the jig and workpiece as a single unit, and start it through the saw just as you would if making a cut on a regular board (Photo 4). The clamps make handy push points when feeding the stock through.
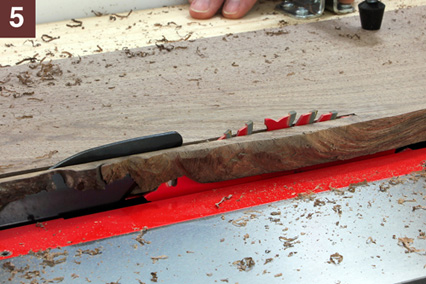
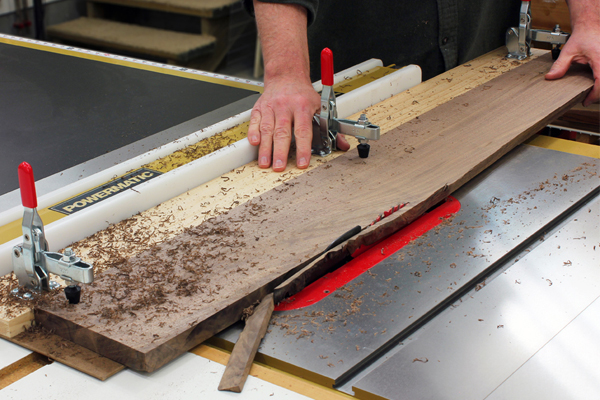
STEP 5: Continue feeding the material through the blade at a steady rate. In Photo 5, you can see how I’ve set the fence so that at the board’s narrowest point it takes off only a sliver of rough wood; at other points where the board is wider, the offcut will be correspondingly thicker. With the cut made, release the clamps, remove the board and set the jig aside. Now, flip the board around so the freshly cut straight edge rides along the saw’s fence, adjust it as needed, and trim the opposite edge.
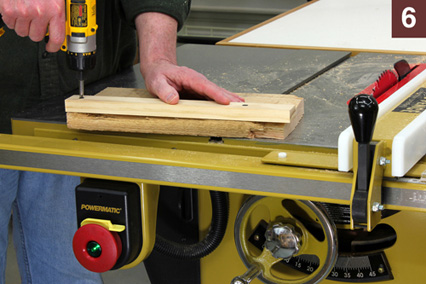
STEP 6: You’ll find that having a straight-line jig like the one described above will considerably speed milling chores, especially if you frequently need to mill one board after another. But what if you only need to true up a single piece now and then, or if the piece that needs a straight edge is just too short for the jig? For this example I’ll use a cutoff from a larger piece of red oak. When I used the original piece I just lopped off this bad end, which was rough and uneven on both sides, but there’s still some sweet wood in the middle. To put a straight edge on this oddball piece, I attach a narrow strip of scrap to the edge that will work as an outrigger (photo 6); the scrap is straight, and that will register nicely against the saw’s fence. It only takes a few seconds to attach the scrap outrigger with screws through what will be cut off later — no worries about the screw holes.

STEP 7: With the outrigger secured, set up your rip fence and blade height as before, fire up the saw and run the piece through. Unlike the walnut board in the earlier example, the edge of this piece is pretty chewed up a full inch into the board, so I adjust the fence accordingly to eliminate all of the bad wood (photo 7).
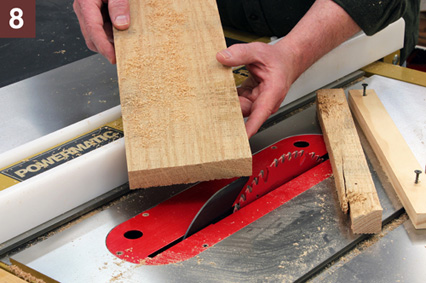
STEP 8: After completing the cut, just unscrew the outrigger and reset the saw’s fence, then flip the board around with the fresh edge against the fence, and make a second cut on the other bad edge to trim it clean and square (Photo 8). All that’s left to do now is run the piece through the planer, and then cut it into the final workpieces.


