Turning bowls from green wood is a centuries-old practice. Such a bowl will warp oval as it dries. This does not detract from its usefulness, but today’s man or woman on the street sees an oval bowl as quaint. Modern turners solve this problem by rough turning a bowl to a wall thickness that is about 10% of the diameter — a 10″ bowl would have a 1″ wall thickness. After letting the blank dry for about three months, they re-turn it round and to a pleasing wall thickness.
Why not just let the blank dry and turn a bowl from it once dry? This has to do with wood’s dynamic limit: how much it will bend before failure (checking) occurs. Every material has an amount it can bend before breaking. With most materials, a thinner section can bend farther before reaching the dynamic limit — and a wall thickness 10% of the diameter is generally below that limit.
Important to this discussion is that wood only shrinks about 0.1% along the grain. However, it shrinks 4.39% from the center of the log to the outside (the radial shrinkage). The same log also shrinks 7.95% in circumference (the tangential shrinkage). The specific numbers are an average of all species worldwide, but the point is that the average log loses circumference at about twice the rate it loses diameter. This means that circular stress is going to build around each annular ring. Takeaway: to reduce checking, it’s important not to have a complete annular ring in any blank you gather.
Also, as your roughed-out bowl is sitting on a shelf drying for three months, the end grain will lose water faster than the face grain areas. This causes faster shrinkage in the end grain, making checking likely.
Wrapping a freshly turned green bowl in sheets of newspaper or putting it in a paper grocery bag can create a sufficient vapor barrier to allow face grain to dry at about the same rate as the end grain. Some turners also paint the freshly turned blank with wax-based wood sealers used by the forestry industry. (Anchorseal® and Sealtite are two popular brands.) This will cause uniform drying, but it adds a month or two to the drying time.
Speaking of time, many turners want to reduce that three-month drying period. With that in mind, I’ll take a look at methods that either speed up drying or improve the end results.
(Take note, though: while practicing the science related to wood drying will greatly increase the probability of good results, in real world practice, you will sometimes get a failure even from theclearest of woods coated with wax. At other times, a funky piece of wood thrown in the corner with no paper or wax will dry just fine. That’s just the way things go …)
Method 1 — Detergent:
In this process, you soak rough-turned bowls in a simple solution of one-sixth concentrated dishwashing liquid, such as Dawn® or Joy® (NOT automatic dishwasher detergent). Chemically, detergents are surfactants, substances that reduce the surface tension of a liquid.
You can get wonderful results from soaking your bowl overnight, but three days is the optimum time. After soaking, you have two options. The first option is to finish turn the bowl to a thinner wall immediately. The surfactant makes the final turning go much easier, with much less tearout in the end grain by the tools. There is also an improvement in sanding, with less clogging of the sandpaper. The detergent seems to further reduce checking in clear wood.
The second option is to allow the rough-turned blank to air dry before re-turning. Drying time is reduced and checking becomes nonexistent — even without wrapping in paper or waxing. It seems the surfactant is accelerating the water transfer across the cell membranes.
Despite Internet claims of a reduction in warping during drying, there is no change in the ultimate warping of the wood. There is, however, some debate on the process changing the color of the wood. I have personally found no change in color or how the wood accepts a final oil finish, but I have received reports of various lacquer finishes reacting badly to the detergent.
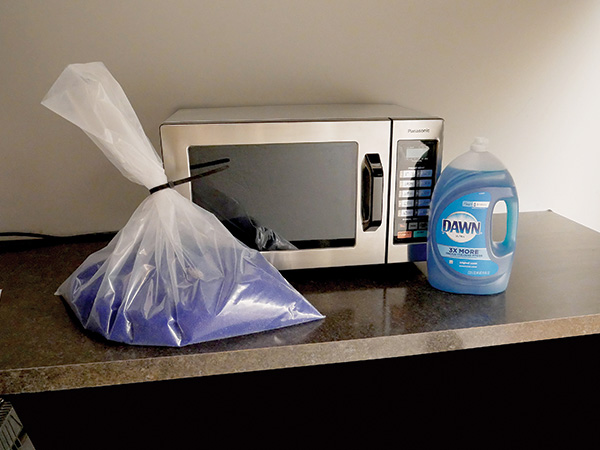
Method 2 — Microwaving:
This method involves placing your rough-turned bowl in a plastic bag and microwaving it on a defrost cycle until you start to see steam. The blank is removed from the bag and allowed to cool to room temperature. The process is repeated again and again, until you no longer see steam and there is the predictable warping, or until the weight of your wood has dropped by one-third.
Even with the most careful finding of the right power setting on your microwave, allowing complete cooling out of the bag and reversing the bag to dry the moisture out of it, you may get some checking.
I’ve used this process when I absolutely had to get a bowl out the door but have rued the procrastination that caused me to have to resort to it. (Plus, it takes an entire evening, so pick one when you don’t care about watching the big game.) Overall, I consider it an emergency triage method only!
Method 3 — Desiccant:
Desiccant pellets are used widely in industry to dry items quickly and to keep them dry during shipment. The pellets come in a plastic bag sealed in a screw-top pail with a rubber gasket which keeps them dry until you want to use them. The pellets have a chemical indicator that makes them turn reddish as they absorb water and become expended.
They can, however, be used over and over: once they have turned red, they may be heated in an oven, which brings them back to new condition. A convection oven works best, with the pellets spread in a thin layer on cookie sheets. They are in new condition in two to two-and-a-half hours. Dry them at 250° Fahrenheit; if you heat them above 260°, the chemical indicator will not tell you when they need drying again. (They will still work, but knowing when they are expended will be problematic.)
Once you have rough turned a bowl — or, if you’ve got a bowl that you intend to be oval, you’ve turned it to its final thickness — bury the bowl in the desiccant pellets. (Note that the desiccant method is limited to bowls with 1″ wall thicknesses.) The bowl must be completely buried, with its inside full and at least one inch of pellets in all directions. Incomplete burial will result in checking.
How long exactly a given bowl will take to dry is dependent on a number of factors: how wet the blank is, how thick the wall and the species of wood all factor into the equation. A beech bowl will take longer than a cherry bowl, and a rough-turned blank will take longer than a finished turned one.
How do you know when your bowl is dry enough? The best way is to first place your freshly turned bowl on a kitchen scale and weigh it. After 24 hours, weigh it again. When it has lost at least one-third of its weight, you can apply finish to a once-turned bowl or re-turn a roughed-out bowl.
Overall, for thin final walls, leaving the bowl in for about 24 hours will usually do the job. On a rough-turned blank, drying will usually take about 48 hours.
You can also immerse a finish-turned bowl in the desiccant for a couple of hours, then remount it in the lathe for finish sanding. This saves time and sandpaper, because the surface is sufficiently dry to sand well without clogging the sandpaper. Then place the bowl back in the desiccant for final drying before you apply finish.
The desiccant process effortlessly speeds things up immensely. You can order a kit of the desiccant from rockler.com.

