See More on CA
The conversation on cyanoacrylate glue begun in a previous eZine’s Q&A and continued in last issue’s Feedback also resulted in an essay on the subject by finishing expert Michael Dresdner. –Editor
Brushing Up On Brushes
Last issue’s Q&A on when to change the brushes on power tools also brought additional advice from eZine readers. – Editor
“I was in the power tool business in sales and management for 38+ years. I started with Black & Decker. If [your tools] are the old type with the spring attached to the brush, the rule is change them when they reach half of their original length. Some brushes come with a line at the halfway mark, making it easy. If there is no mark, the only way is to measure when new and make a note in the manual.
“The reason you want to change them is that, as the brush wears, the spring loses tension and the brush jumps more, which begets more arcing which shortens brush life.
“This is why Black & Decker turned to the stainless steel ‘window shade” type spring when they introduced the first saw with a brake. The brake worked as a switch that turned the motor into a generator that wanted to run the motor backwards. When the motor stopped, there was no voltage to run, so it stayed stopped. However, that reversal caused a large current increase, and the old style brushes would jump too far. They began using the special spring manufactured by T.M. Hunter.
“The advantage of the window shade spring is that as the brush wears (less mass-less weight), the spring winds up and the tension INCREASES. Super idea.
“My 8″ Super Sawcat from around 1966 has been used all over and is still on the original brushes.” – Tom Gould
“There is one thing you failed to address concerning checking the motor brushes in a power tool. If you remove the brushes and they still have some life, make sure you orient them the same way they came out of the brush holders when you put them back.” – Tom T.
Wheelie Easy Way to Make Wheels
We also heard from an eZine reader who makes a lot of wooden wheels for toys. After reading the Tricks of the Trade entry in eZine 239 about resawing wheels on the table saw or band saw, he shared his own method. – Editor
“I make lots of toys for both giving away and for craft shows for sale. I have found that there is an easier way to make wheels and to save lumber, and make them very consistent. I first select a board that is of the correct thickness for the wheels that I want from 1/4″ to about 1-1/2” and, for diameter, I select the appropriate hole saw.
“I first cut through the board much as the trick author did, but only about 60 percent of the way through I then cut through the board from the other side. I cut from both sides for two reasons: 1) the reduction of tearout which occurs when the saw cuts through and by cutting from both sides it eliminates it and 2) when you cut halfway through the wheel blank then cut through from the other side there is only about half of the blank within the hole saw and it is then easy to remove. (Sometimes the blank is tight in the saw, but it is easy to back out with a large channel lock pliers.)
“There is often a bit of charring and/or discoloration on the surface of the blank, but it is not on the edges but where the two cuts meet. This discoloration does not detract from the appearance of the wheel as it is on the edge.
“Sanding of wheel blanks is very easy and quick to do. I use an old Phillips Screwdriver and put a wheel blank on it (it fits loosely) and hold the blank against the moving belt of a 4 X 36 stationary belt sander. The belt spins the wheel blank as it smooths the roughsawn surface and does not cause flat spots. With a bit of practice, you can round off the edges on the belt sander. When done with the circular surface, you can sand the sides of the wheel and have a finished wheels in no time.
“The advantages of cutting through from both sides are numerous. 1) The thicknesses can be more easily consistent. 2) Any scrap with the right thickness can be cut into a wheel and the board need not be capable of being re-sawed. 3) When you use a standard thickness board such as 3/4″ or 1 1/2” commercial lumber scraps you can make them ahead of time and in bulk when you have the lumber scraps.
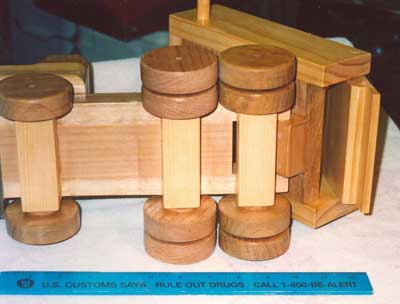
“See attached pictures of toys made with shop-made wheels cut with a hole saw on a drill press and sanded on a belt sander using a screwdriver.” – Marc Woods
What’s That Tool?
Finally, one of your fellow readers is asking for some help. He lost his tools in a fire and would like to replace a specific one – except he can’t remember what it’s called. – Editor
“Help! I recently had a fire in my shop and lost most of my tools.I had an aluminum straightedge approx. 50″ long with a T-slot on the back side that accommodated a plastic square head and an angle head. I sure would like to replace it, but I can’t recall where I got it.” – Norbert Hartman


