There is no question that a narrow crown staple gun is a useful building tool, but there are a few other ways to use this tool that you might find very handy.
Making Bent Laminated Parts
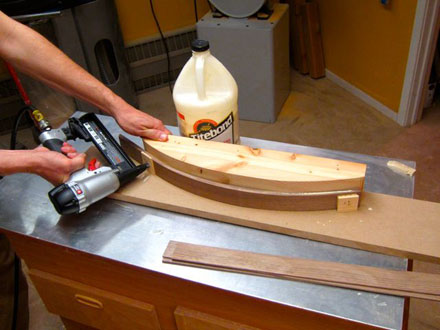
Laminating thin strips of wood together in a curved form is something that chair builders and other woodworkers have done for a long time. You need a mold of some sort and usually a bunch of clamps to make it happen. But if the curved lamination is not too complicated, say a simple arched slat on a chair back, you can use a narrow crown stapler to speed up production and free up your clamps for other tasks.
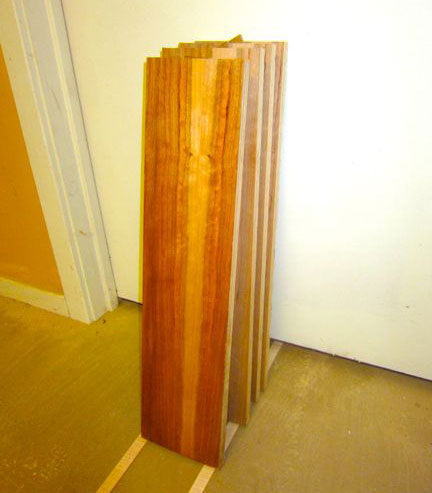
Simply form your mold, here made of 2X pine attached to an MDF base. The mold and the base have a thin coat of wax on them to keep them from becoming part of the glue-up. Make your laminations (here made of 1/8″ walnut strips) but leave them overlong. Make some 1/4″-thick pieces of wood to use as “clamping cauls,” if you will. As shown in the photo above, apply your glue to the laminations. Secure one end of the bundle to the mold with staples driven through the caul and the walnut laminations into the mold itself. Bend the laminations smoothly around the mold and then secure the other end in the same way. Allow the glue to cure, pull the cauls free, bringing the staples with them, and pop the bent lamination off the mold. Now it’s ready for the next one.
Small Project Spraying Rack
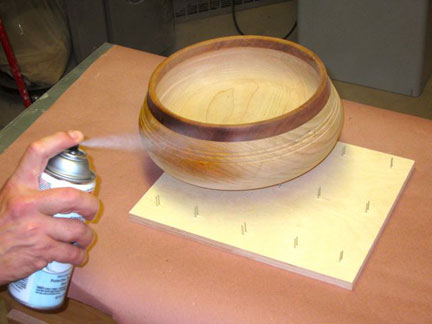
Drive a regular pattern of staples through a scrap piece of 1/2″ plywood. Because the staples will stick through the plywood at a perfectly uniform height (the crown of the staple ensures this), they will form a great place to put a small project on while you spray it. The piece will sit above the surface far enough to allow the sprayed material to flow around it (Figure 1). Any drips will not flow down and “glue” the piece in place as can happen on a flat surface, and it allows you to easily reach under the piece to lift it by the dry area. It is an inexpensive and super-practical little shop fixture.
Two Wet Surfaces Finishing Trick
Very often there is a collection of shelves (or cabinet doors) that need to be finished for the same project. One problem that comes up is that putting finish on just one face of a shelf and letting it dry before you put a finish on the other face can get you a warped shelf in a hurry. This is especially true if you leave the pieces overnight to cure. But if you put finish on both faces at the same time, how do you stack them so they won’t “weld” together as the finish dries? Or, if you put one face down, it can easily get marks in the finish from the drying rack.
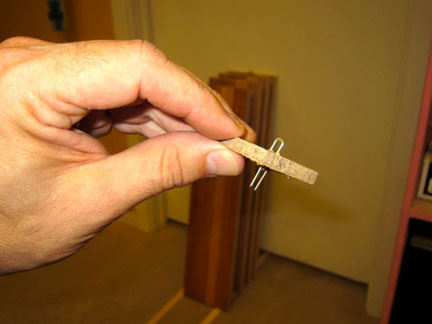
Here’s a little finishing tab that can be a real shop helper in this situation. It is simply a 1/4″ x 1-1/2″ x 1-1/2″ square piece of hardboard with a staple sticking out above both faces of the tab (Figure 2). Shoot staples into a strip of the hardboard or plywood, spaced evenly across it. Cut them free from one another and then push the staple back through about halfway.
To use, apply finish to one face of a shelf; then, using a version of the spraying rack above, flip it over and apply the finish to the other face. Leave the edges free of finish for now. Then stand the shelf up on end (put thin spacer strips on the floor) and use one of the tabs to hold its face off of the wall. The small point of the staple in the tab will leave no mark in the finish as it dries. Apply finish to the next shelf and lean it up, taking care that no surface touches the first shelf, and put a tab between the two pieces. You can lean several shelves or cabinet doors up in this manner as they cure (Figure 3). It’s a great way to get a lot of finishing done in a short time.