Put an end to tearout, splintery corners, blown-out edges and ragged profiles with a few simple routing tips.
No tool is better at decorating an edge than a router, and it’s ideal for cutting dadoes, rabbets and other joinery. But, tearout is a router bugaboo you’ll want to avoid at all costs. Generally, tearout happens when routing across the grain, turning corners or removing too much material in one pass. Don’t let tearout spoil a perfectly good piece of wood… or your peace of mind. A few good router tips are all you need.
Tip #1: Dial it back and slow down
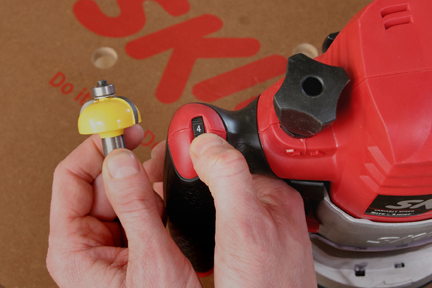
Most routers nowadays have variable speed control, and it’s there for a reason. The larger your bit diameter, the faster it spins at the cutting edges. When you are routing splinter-prone woods like cedar or oak with a large bit, turn your router’s speed dial down a few notches (see below). You’ll cut cleaner edges with fewer burn marks. Remember to slow your feed rate when approaching the corners of a workpiece or if you hear the router start to tear the wood instead of cut it. Don’t make routing a race to the finish. A steady and smooth feed rate is the goal.
Tip #2: Rout like clockwork
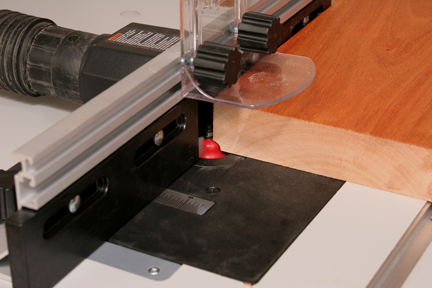
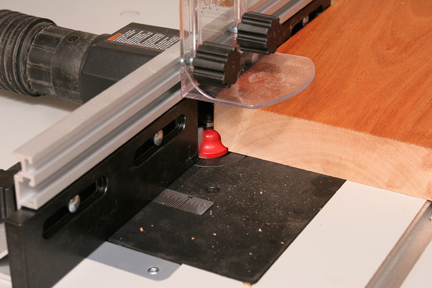
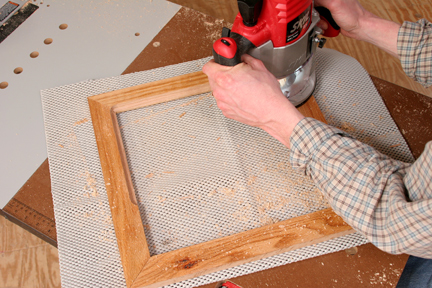
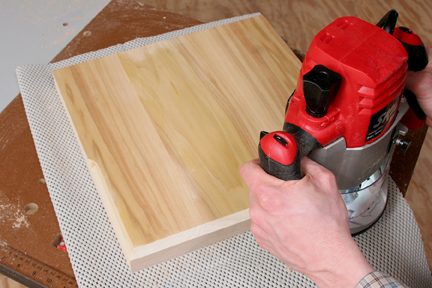
For most applications, the correct way to feed a router is against the bit’s rotation. This tip has more to do with safety than avoiding tearout, but it will improve your router’s cutting performance, too. When routing around the inside of a workpiece, such as a picture frame, feed the router clockwise (see Photo 2). Switch directions when you’re following an outside edge, and move the router counterclockwise (see Photo 3). You’ll know you are feeding correctly if the router gently resists your efforts. If it jerks forward and pulls through the cut, it’s a telltale sign that you’re heading the wrong way and making a climb cut. Climb cuts are unsafe for ordinary passes where you are removing a lot of wood.
Tip #3: Sometimes a climb cut works wonders
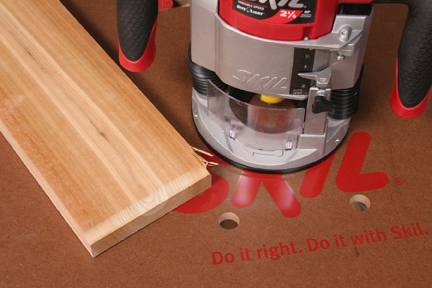
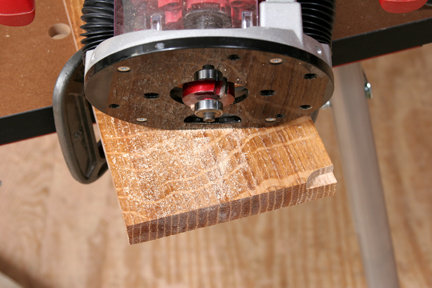
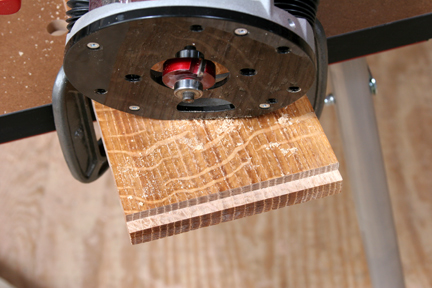
If you are routing across just the end grain of a board, be careful of the exit corner. When the bit breaks through those weak fibers, it’s a prime opportunity for tearout. One way to avoid the problem is to start your routing pass at the exit corner and make a short climb cut to remove the corner material first (see Photo 4). Ease the router gently into the corner and pull it slowly back toward you a half inch or so. Then, stop the tool and start the cut where you normally would, routing across the end grain to meet your climb cut (see Photo 5). Presto… no tearout!
Tip #4: Crossgrain calls for backup
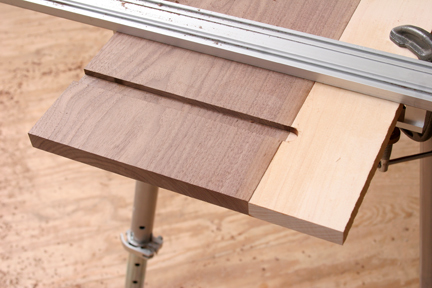
Routing dadoes can result in a nasty blowout where the bit exits the wood, especially if you are hogging out a lot of material. Before you plow the dado, clamp a piece of scrap to the outboard edge first. Then, rout across your workpiece and slightly into the scrap – it will support the fragile edge grain resulting in a crisp, clean exit cut (see Photo 6).
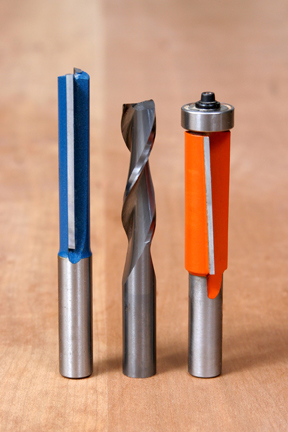
Tip #5: Consider investing in shear-cutting bits
Ordinary straight bits (left in Photo 7) have cutters aligned with the axis of the bit, and they chop wood like a chisel. That chopping action is fine for softer long-grain fibers, but it can tear out or crush bits of hard end grain and leave a ragged cut. A better option is to use spiral bits or straight bits with cutters set at an angle to the bit’s axis (center and right in Photo 7). Either of these styles will produce a shearing cut, similar to a hand plane, to help you tame that difficult end grain.
Tip #6: Take smaller bites on big profiles
Trying to remove too much stock in one pass is a recipe for torn grain and sloppy profile cuts. The best remedy is to rout big cuts in several passes of increasing depth. Set the bit low for the first pass (see Photo 8), then expose more of the cutters in the next pass or two until you reach the amount of profile you want (see Photo 9). Make the final pass whisper thin to shave away any minor burn marks or torn grain. Shallow passes allow your bits to cut properly, and they’ll help your router breathe a little easier, too.