Make short work of cutting tenons with a stacked dado blade.
The best method for making mortise-and-tenon joints is to start with the mortise, then mill the tenon to suit it. Your goal is to make the tenon slightly larger than the mortise, then “sneak up” on a perfect fit by planing or filing it to final size. Tenon-cutting is often done with a standard blade and tenoning jig, but a dado blade is a fine alternative if you don’t have the fancy jig. Here’s a short course that will have you cutting terrific tenons in no time.
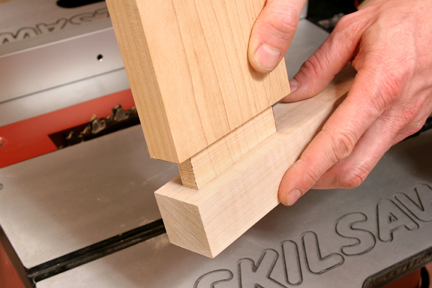
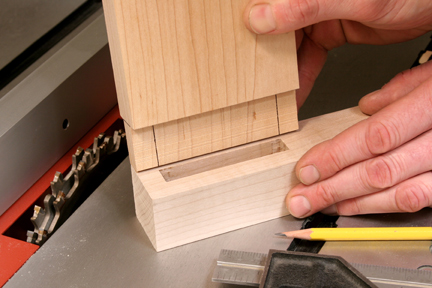
Step 1: Mark the tenon’s thickness on the end of the workpiece using the mortise as a reference (see Photo 1). The narrow areas on either side of the tenon are called the shoulders. Generally, the sizes of opposite shoulders should match. Check to be sure with a combination square. When the shoulders match, you’ll know the tenon is also centered on the workpiece.
Step 2: Install a wide dado blade in your table saw, and raise it so the teeth meet the layout lines you made in Step 1. Then, lower the blade just a tad to make the tenon slightly thicker than it needs to be.

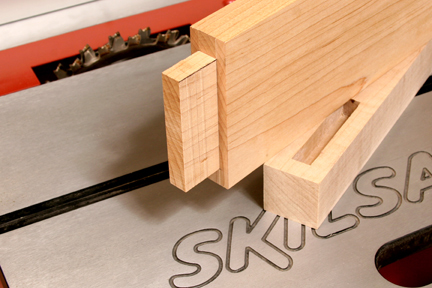
Step 3: Measure the depth of your mortise, subtract 1/16 in. and mark off this distance on the faces and edges of your tenon workpiece. This will establish the final position of the tenon’s shoulders as well as its length. Adjust and lock your rip fence so the outer blade teeth meet these shoulder lines (see Photo 3). By making the tenon slightly shorter than the mortise depth, it will seat fully and leave a little clear space at the bottom for excess glue.
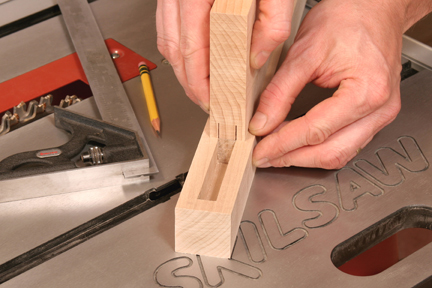
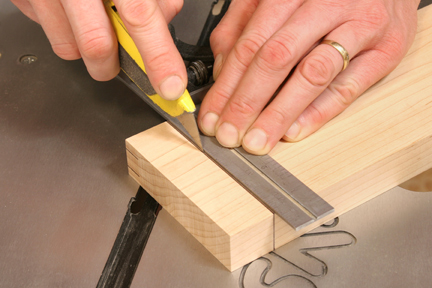
Step 4: A well-made tenon should have crisp, tearout-free shoulders. One way to achieve this is to score the shoulder layout lines with a sharp knife before you begin sawing (see Photo 4). This is a nifty trick for splintery woods like oak or cedar or if you don’t use a zero-clearance throatplate with your dado blade.
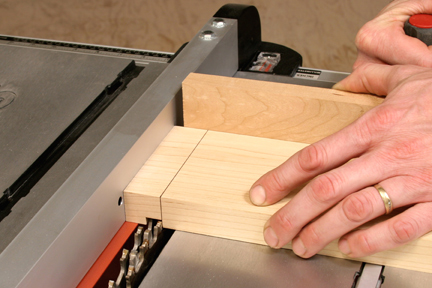
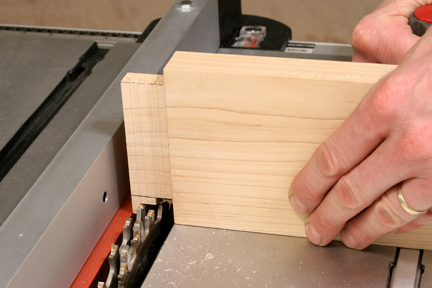
Step 5: Fasten a scrap of wood to your miter gauge fence to serve as a backup board for the workpiece during cutting. Now you’re ready to begin cutting the tenon. With the workpiece pressed against the rip fence, make the first cut to the shoulder line (see Photo 5). The top of the cut will also create the tenon’s cheek.
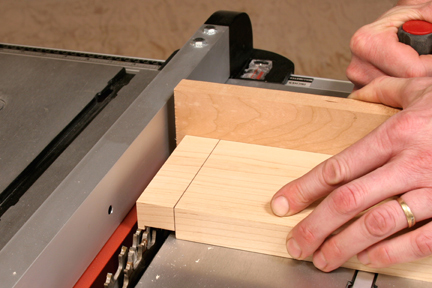
Step 6: Slide the wood away from the rip fence to line up more of the waste area with the blade, and continue cutting the cheek with a second pass (see Photo 6). Make additional passes as needed until the first shoulder and cheek are finished.
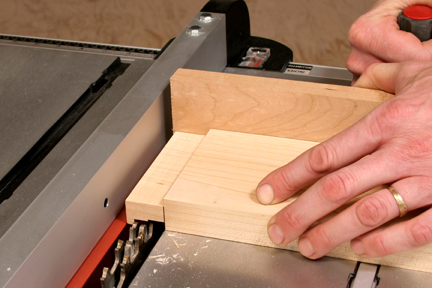
Step 7: Flip the workpiece to the opposite face, and repeat Steps 5 and 6 to cut the second shoulder and cheek (see Photo 7).
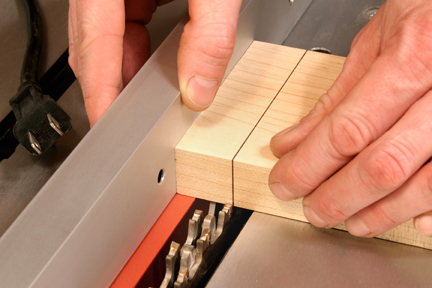
Step 8: Once the broad shoulders and cheeks are done, your tenon probably has two short shoulders and cheeks to finish up. Use the mortised workpiece again to lay out the positions of these cuts (see Photo 8).
Step 9: Adjust the height of the dado blade as necessary to meet the short cheek lines, but leave the rip fence locked right where it is. Stand the workpiece on-edge against the miter gauge, and cut the cheeks just as you did in Steps 5 through 7 (see Photo 9). Voila! You’re done with the sawing process.
Step 10: Test the fit of the tenon in its mortise (see Photo 10). If it takes force to push things together, the tenon is still too large. Use a rabbeting or shoulder plane, or a file, to pare the cheeks down until the tenon slides into the mortise with just a bit of friction. Once you get the hang of it, you’ll probably agree that a well-fitting mortise and tenon joint is one of woodworking’s simple pleasures.