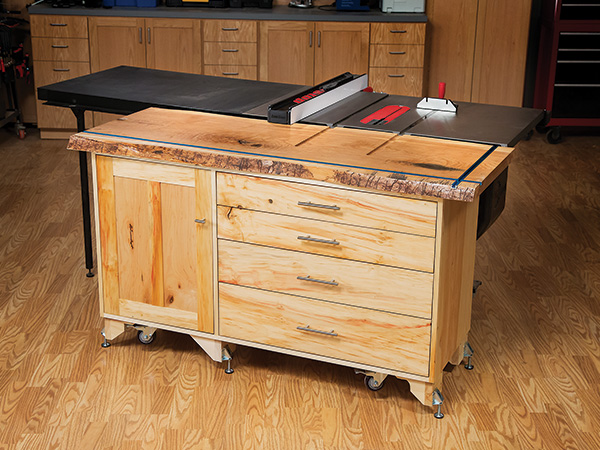
An outfeed table is a great functional improvement to a table saw. No longer do you need to worry about workpieces falling off the back of the saw — or trying to keep them from falling as you wait for the blade to spin down. The outfeed table top, especially when combined with the table saw top, provides ample additional working surface, while putting a cabinet underneath it efficiently increases shop storage space. As you build your own outfeed table, you can also plan for additional work holding options.
First, Some Table Considerations

The overall size of an outfeed table surface should depend on the shop setup, the size of table saw it will be used with and the length of stock you typically use in your projects. The biggest factor is shop size. None of us have unlimited space, so we ought to make sure we use the space we do have as efficiently as possible. In other words, a huge outfeed table might be nice, but if it doesn’t fit in your shop, then it isn’t going to be all that effective.
For other design considerations, take a look at your shop layout and how you have your table saw positioned. In my shop, for instance, I have an outlet against the wall that can’t be blocked. Further, my jointer’s infeed table is adjacent to where the outfeed table must go. So, an outfeed table with drawers or doors on the end would be impractical for my shop’s layout.
The next factor to think about is how wide to make the outfeed table. This will again depend on the size of your table saw and overall shop layout. It might make sense to make the outfeed table as wide as your table saw so, no matter what the rip fence is set to, the workpiece will be fully supported. If you rarely make cuts that wide and would rather use the extra space behind the saw for storing something else, a narrower table might be better for you.
Finally, don’t forget to think about the amount of overhang between the saw and the cabinet. Most saws have their dust collection port extending out the back, so clearance for a dust hose is important. If the saw is on a mobile base, there could be other clearance issues as well. With my table saw, I needed to account for both the dust port and my mobile base. I opted to design the cabinet so it would have space underneath to nest over part of the mobile base. This reduced the amount of overhang I needed, while also reducing the amount of dead space between the saw and the cabinet.
Building the Cabinet
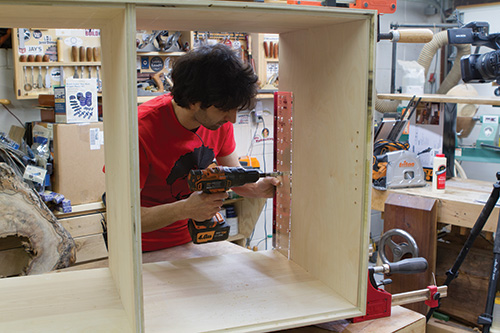
The cabinet carcass is made from 3/4″ plywood and joined with rabbets and dadoes. I broke the sheets down into manageable pieces with a track saw before bringing them into the shop and cutting them down to final size at the table saw. Mill rabbets on the top and bottom edges of the side panels to connect with the cabinet top and bottom panels. The sides, top and bottom will also need a 1/2″-wide by 3/8″-deep rabbet along their back edge for fitting the back panel into place. Lastly, plow dadoes across the top and bottom panels to fit the vertical divider; be sure to adjust the width of these two dadoes carefully to match the thickness of your plywood — these days, it’s typically 23/32″ wide and not a true 3/4″.
Next, dry-fit the cabinet pieces together, and cut the back panel to fit its opening. The rabbets make everything come together easily, as all the parts are self-aligning and self-squaring. Drill rows of shelf-pin holes into the walls of the left cavity. After a final check to make sure everything seems in order, you can glue up the case. Gluing in the back panel further helps to square the case and reinforces the structure, which will help keep the cabinet from sagging.
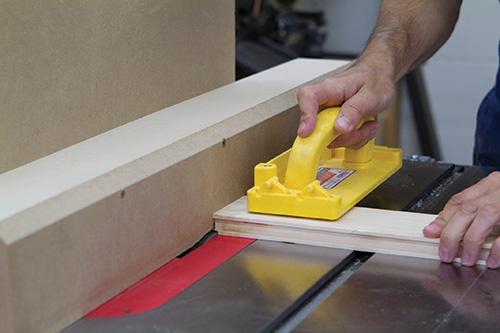
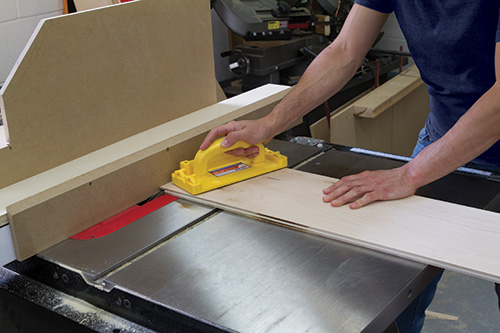
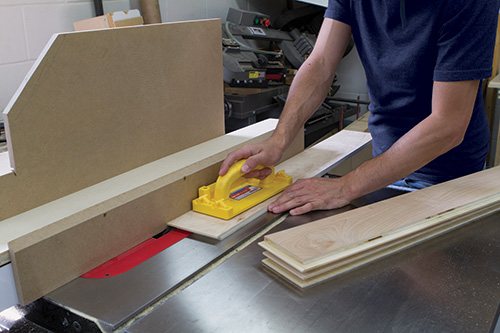
Rip and crosscut pieces of 3/4″ x 3/4″ edge banding from solid wood to cover the exposed plywood edges on the cabinet front. Glue and clamp them in place.
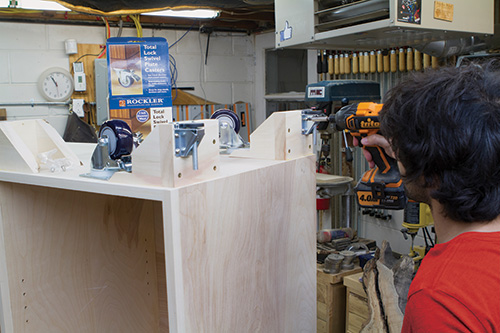
Because I hate limiting my options, I added both leveling feet and casters to the base of the cabinet. The leveling feet provide a stable base and make it very easy to bring the outfeed table up to the right height for the table saw. When the cabinet needs to be moved, I can simply lower it onto the casters.
Adding the Door
I built my cabinet door using simple frame-and-panel construction. First, run a 1/4″-deep, 1/2″-wide groove along the edges of the rails and three stiles to fit the panel stock.
Then cut mating tongues into the ends of the rails and center stile. This creates the door frame.
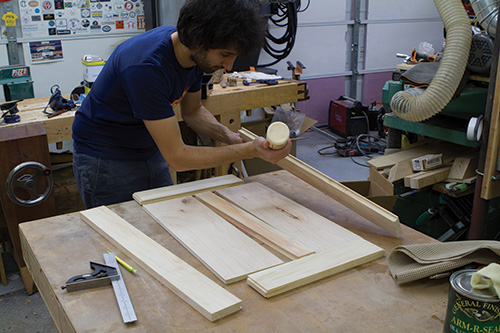
Since the panels are plywood and don’t need to float to allow for wood movement, the door can be glued up as a solid unit.

When the glue has dried, trim the door to final size to fit the opening (you’ll want the gap sized similarly to that of the drawers), and hang it on its hinges. Add the shelf to the cabinet cavity, which also serves as a doorstop.
Constructing the Top
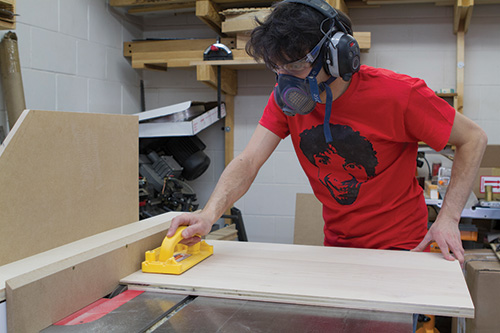
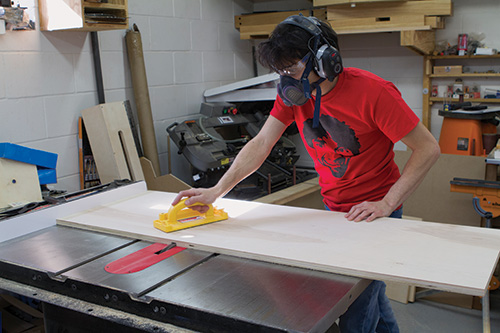
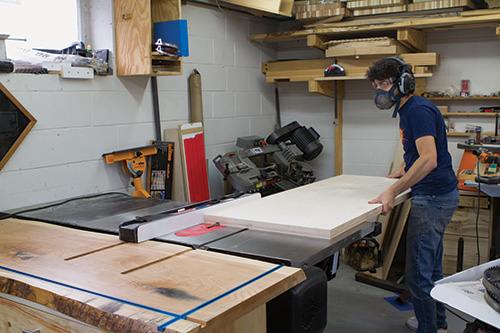
I wanted to make the top fairly substantial so it would hold up well as a work surface. I considered doing a laminated strip top (like a workbench) but opted instead to use a single slab with a live edge. This gives the outfeed table a unique look, and orienting the live edge so it slants toward the top also works as a functional detail: it allows materials to slide onto the table easily. A few years ago, I cut a boule of ash slabs (the slabs are cut from one log and kept together in the order of sawing) with my chainsaw mill. The log was a bit short, which made the slabs the perfect length for this project. If you do the same, flatten and surface the top, attach it to the cabinet and cut a pair of dadoes to extend your table saw’s miter slots. To give this top more versatility as a work surface, I also installed two lengths of T-track at 90° to each other along the side and front edge.
Another option, if you don’t have access to slab lumber, would be to double up a couple sheets of 3/4″ plywood for the top.
Adding the Drawers
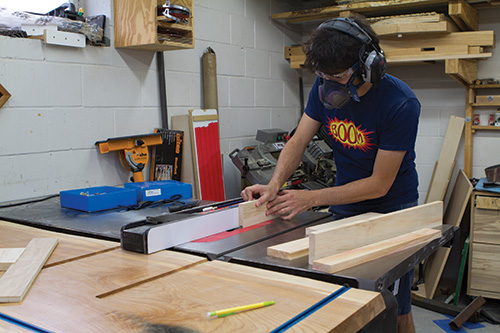
I made the four drawer boxes the same way as the cabinet, by breaking down some 1/2″ plywood into strips for the sides, fronts, backs and bottoms, then rabbeting the drawer fronts and backs to receive the sides. Here’s how to make sizing the drawer for its opening extremely foolproof: after the front and backs are cut to rough length, place them into the case beside the drawer slides and evaluate the fit — whatever you get at this step will be the fit you get once the drawer is assembled. Adjust the part lengths, if needed. Then mill rabbets into the ends of the drawer fronts and backs, as well as along the bottom inside edges of the fronts, backs and sides, to fit the drawer bottoms.
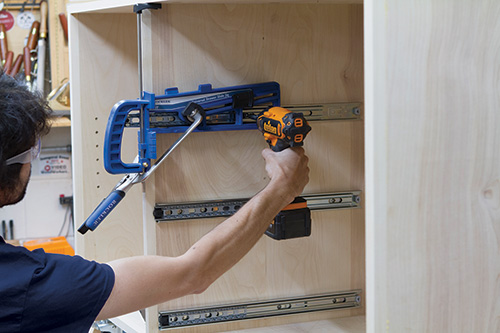
Hang the cabinet-side components of the drawer slides in the case next, and fasten the drawer slide components to the drawer sides. Now, glue and bradnail the drawer boxes together, and hang the boxes in the case before the glue sets. I do this so that each drawer’s geometry fits the case’s geometry — if the case is a little out of square, the drawers will be equally out of square but will operate flawlessly anyway.
Cut the four drawer faces to length and width, and install them on the drawers with a few screws. To make setting gaps around the drawers easy, I cut a full-length thin strip of wood to act as a spacer. Placing the strip between the drawer faces as you work your way up the stack ensures that the gap will be consistent between each drawer and all the way from left to right. Since I built my cabinet when the humidity was low, I used a 1/8″ gap. That way, the drawer faces will have plenty of cross-grain expansion space as they get wider when the humidity goes up.
Finishing Up
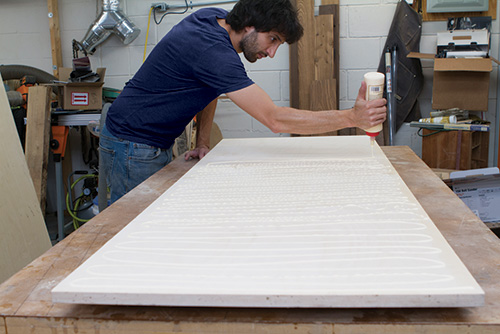
At this point, it’s up to you whether or not to apply a finish. Shop projects are a great opportunity to use up the last bit of finish that might be sitting in a can on your shelf. In this case, I applied two coats of a wiping varnish. The first coat really brought out the color and figure in the wood, and the second coat helped to even out the sheen. I added a coat of paste wax to the top to further protect it from glue and to make workpieces slide across it more easily. Once the finishing is done, you can reassemble everything and install the door and drawer pulls.
My outfeed table was a much needed shop upgrade. I’m loving having the functionality of the workpiece support without having to set up roller stands or worry about catching parts before they fall off the back of the saw. And, of course, having more drawers and shelf space for storage has really helped cut down on the clutter of small items that otherwise just seem to float around the shop. The project’s slab top is also fantastic to look at, which further adds to the inviting nature of my shop. Shop projects don’t always have to be pretty — an argument can be made for making things quickly and roughly — but a little curb appeal never hurts, either.
Shop projects are also great for practice: if you make a mistake, you’ll see it every time you’re in your shop as a constant reminder not to make that mistake again. When you move on to more demanding projects, you will have the process all figured out and can proceed more confidently and effectively.
Click Here to Download the Drawings and Materials List.
Hard-to-Find Hardware:
3″ Heavy-Duty Polyurethane Casters (2) #38865
Heavy-Duty Lifting Leveler (2) #81239
Blum® Soft-Close 110° Inset Hinges (1) #34807
Stainless Steel Naples Pulls, 96 mm (4) #52127
Stainless Steel Naples Knob, 39 mm (1) #56737
Nickel 1/4″ Shelf Supports (1) #33860
18″ 75-lb. Full-Extension Drawer Slides (1) #48022
Rockler 4 Ft. Universal T-Tracks (2) #20054
Rockler T-Track Intersection Kit (1) #22209
We’ve also assembled a list of optional, suggested accessories that will increase the usefulness of your table:
Rockler T-Track Inline Cam Clamp (2) #52145
Rockler T-Track Corner Stop (2) #81239
Rockler Hold Down Clamp (2) #35283
Rockler Auto-Lock T-Track Hold Down Clamp #54280
Rockler Bench Cookie Plus Master Kit #56071
Rockler Bench Cookie Plus Risers #46311
Rockler Vacuum Clamp Pod Kit (2) #56071
Rockler Vacuum Pump Kit #57519


