This article, “Sanding with a Lubricant,” by Mike Peace, is from the pages of American Woodturner and is brought to you by the America Association of Woodturners (AAW) in partnership with Woodworker’s Journal.
You would not wet-shave without soap, would you? And yet, many woodturners are perfectly willing to sand without lubrication. Sanding with a lubricant, or wet-sanding, has been around a while, but many woodturners still have not tried it, despite its advantages. In this article, you’ll learn why you should use wet-sanding techniques for some of your woodturning, and how to wet-sand properly. We’ll also discuss different sanding lubricants— and how to make your own.
Why Wet-sand?
Probably the most significant advantage is that wet-sanding all but eliminates sanding dust. The dust mixes with the lubricant to form a slurry that keeps the dust trapped and out of the air so you do not have to breathe it.
Breathing fine dust is a major longterm health hazard we woodturners want to avoid. Avoiding fine dust is especially critical when sanding rosewoods, many other exotics, and woods known to be irritants or sensitizers that set us up for respiratory problems down the road. We avoid breathing the most dangerous very fine dust particles with a combination of approaches like a dust collection system, air filtration units, dust masks, and powered respirators. Adding wet-sanding to our arsenal can be a major benefit to our lungs.
Another benefit is that the fine dust and lubricant creates a slurry that fills the pores of the wood to provide a smoother surface. If that lubricant is one that hardens, as discussed below, it can help seal the surface. The lubricant also helps keep the abrasive from loading up, or clogging, allowing the abrasive to cut better and thus sand faster.
In addition, the heat caused by conventional sanding can cause heat checks, those small cracks in the wood that go deep and are almost impossible to sand out. Using a lubricant reduces heat from friction in two ways. Because the lubricated abrasive cuts better, one does not have to sand as long, and a lubricant also helps keep the surface cooler.
Finally, almost any liquid applied to a wooden surface can help reveal scratches. This is especially true when you focus a concentrated light on the surface at a raking angle. Shining the light at about a 45-degree angle to the wetted surface reveals the highs and lows and shadows of tool marks and scratches.
Tools of the Trade
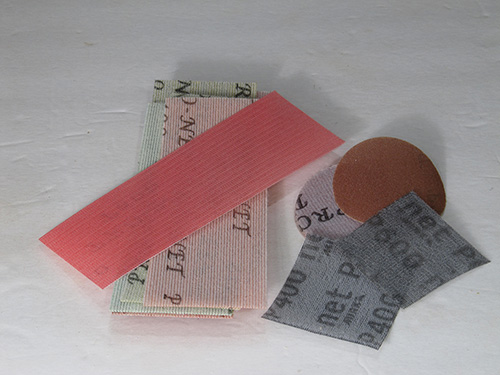
I use the term abrasive and not sandpaper because typically the backing of sanding products we use for our turnings is not actually paper. Paper backing on common sandpaper just does not hold up for very long when wet. The backing used for many of the abrasives favored by woodturners is typically cloth. Alternatively, the backing for sanding disks may be Mylar®, which provides a very flat and long-lasting support for the abrasive. Then there are open-mesh products like Mirka Abranet and Wonder Weave. These open-mesh abrasives contain aluminum oxide grain resin-bonded to a durable and long-lasting fabric. The open mesh contains thousands of small holes, which allow you to easily wash out the slurry from wet-sanding. Open-mesh abrasives perform great when sanding wet, or green, wood. They simply will not clog like other abrasives.
Common Sanding Lubricants
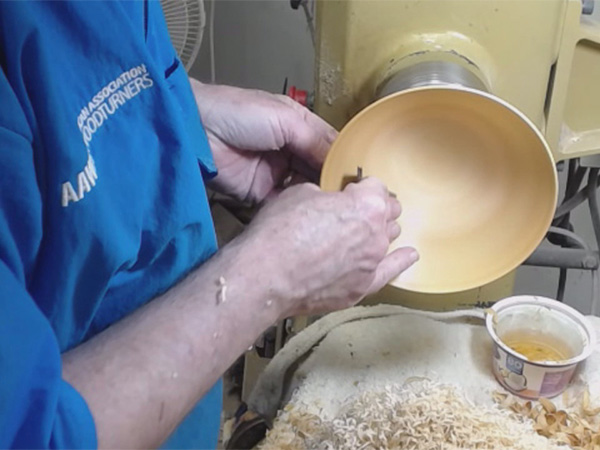
The most common sanding lubricant is water. Water can be especially useful when sanding green wood that already contains water and thus is not likely to readily absorb an oil. I especially like using water when sanding very thin, once-turned bowls from green wood. Using water as your lubricant allows you to use any final finish you want after the wood is dry.
Some turners prefer to use a solvent like citrus degreaser or mineral spirits. Mineral spirits will not interfere with any finish after it dries but is more toxic than other choices. One of my favorite lubricants for wet sanding dry wood is a sanding paste you can easily mix yourself from mineral oil and beeswax. (Mineral oil is known as paraffin oil overseas.) It traps the dust well without the use of a solvent. It is compatible with almost any drying oil finish such as tung oil, Danish oil, or Antique Oil.

Other turners like to use their final oil finish as a sanding lubricant. The friction heat generated using the final finish as the lubricant helps cure the oil slurry mix that is forced down into the pores of the wood.
I primarily use Antique Oil as a finish and it works well over an oil or oil/wax lubricant. If you use non-oil finishes like lacquer or wipe-on polyurethane, you may want to do a test to ensure they are compatible or wipe off the piece with a solvent like mineral spirits before applying the finish. Another option is to apply a coat of shellac, which sticks to just about anything and is compatible with any finish.
DIY Sanding Paste Recipe

Here is recipe for making an inexpensive and effective sanding paste from mineral oil and beeswax. Mineral oil is a liquid by-product of refining crude oil to make gasoline and other petroleum products. It is a common ingredient in baby lotions, cold creams, ointments, and cosmetics. It is colorless, odorless, and tasteless. In the U.S., mineral oil is readily available at your pharmacy since it is sold as a laxative. Baby oil is just mineral oil with some perfume added, and it can be used, too. Beeswax is available in bar or pellet form from your local beekeeper, craft stores, or online.
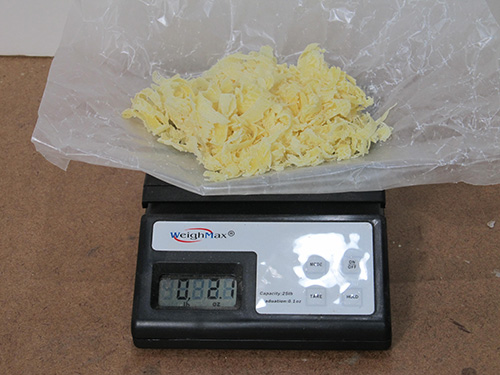
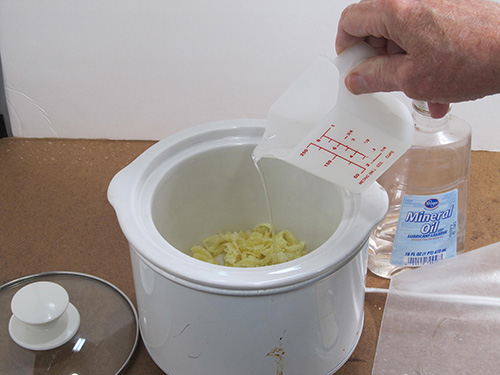
I use a 1:4 ratio of beeswax to mineral oil by weight. To make 10 oz (283 g) of sanding paste, melt 2 oz (57 g) of beeswax in an old crock-pot. Wax melts faster with a larger surface area, so it is best to grate or shave the beeswax or chop it into smaller pieces if it is in block form. If you don’t have a crock-pot to spare, an alternative is a double boiler, easily made by placing a smaller pot on top of a larger one so it is heated by steam. Or place a smaller pot or can inside a larger pot, resting it on something to create a layer of water between the larger pot and the container holding the wax. Beeswax has a relatively low melting point—about 146° F (63°C)—so keep the heat on low and stir occasionally.
For safety, never leave the mixture unattended while heating. Flash point is a descriptor used to distinguish between flammable fuels (any liquid having a flash point below 100° F, or 37.8° C, such as gasoline) and combustible fuels, such as diesel, which burn at a higher temperature. The flash point of beeswax is relatively high, 400° F (204.4°C), so it is a combustible but not flammable liquid. Even though you are unlikely to start it burning, discoloration occurs if you heat the beeswax above 185° F (85°C).
Since mineral oil has a lower density than beeswax, it actually takes 9.5 fluid oz (281 ml) of mineral oil to weigh 8 oz (227 g) for this 1:4 ratio. Therefore, you can either weigh the portion of mineral oil you need or, more conveniently, just pour in 9.5 fluid oz (281 ml). It doesn’t matter if the oil is mixed in before or after the wax is melted. A wooden paint stirrer works well for this, or use a wooden spatula from the kitchen that needs a renewed coat of utility finish! Stir occasionally until the mixture is fully blended.
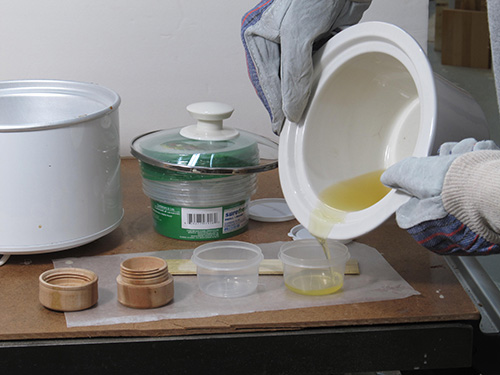
Pour the sanding paste mixture into containers. I find a re-purposed plastic butter tub or similar container with a lid works well. You can also use lidded plastic containers from a discount store, short wide-mouth canning jars from a craft store, or round lidded metal containers available online.
If you find the paste is too soft, you can simply re-melt it and add more beeswax. If it feels too hard, soften it up by adding more mineral oil. Because mineral oil does not dry out like most drying oils, your sanding paste should maintain its consistency with a very long shelf life.
DIY Abrasive Paste Recipe
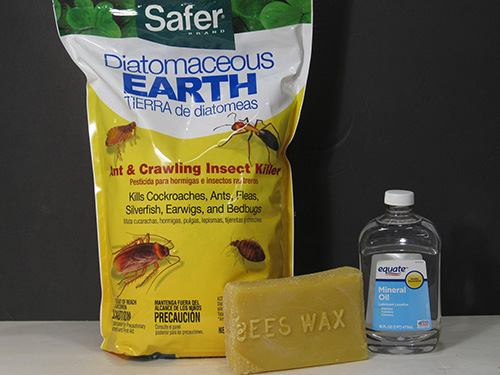
Credit goes to woodturner Daniel Vilarino for the following abrasive paste recipe, which calls for one part beeswax, one part diatomaceous earth, and four parts mineral oil by weight. Diatomaceous earth is a naturally occurring, soft sedimentary rock containing fossilized microalgae, which crumbles easily into a fine white to off-white powder that is a very fine abrasive.
Follow the process described in the DIY Sanding Paste section for making the sanding paste. The only difference here is that you will add a quantity of diatomaceous earth equal to the amount of beeswax. Weigh all the proportions for this 1:1:4 recipe, or use the liquid measurement of 9.5 oz instead of weighing out 8 oz of the mineral oil. Because we use mineral oil instead of the harsh solvents found in some commercial abrasive pastes, the final product is more “green” and does not have any harsh odors.

After thoroughly mixing in the diatomaceous earth, remove the mixture from the heat and continue to stir it with a spurtle or paint stick. Because the abrasive needs to stay suspended in the mixture until it cools, keep stirring while the mixture cools and hardens to a soft paste consistency. Be patient, as this may take up to twenty minutes. Then you can spoon it into containers for use. Unlike the wooden spoon you may have used for stirring the sanding paste, do not plan to return to the kitchen any utensils used in making the abrasive paste.
This abrasive paste provides a soft, smooth surface similar to that obtained by using a buffing system. This should not be surprising, since Tripoli buffing compound is also made from diatomaceous earth. The surprise is that diatomaceous earth is readily available at your home development stores as a mechanical insecticide. While it is food safe for humans, exercise caution so as not to breathe the abrasive powder while pouring or stirring it.
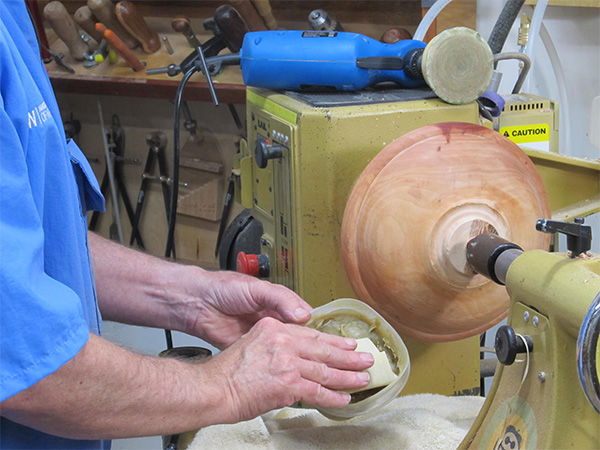
How to Wet-sand
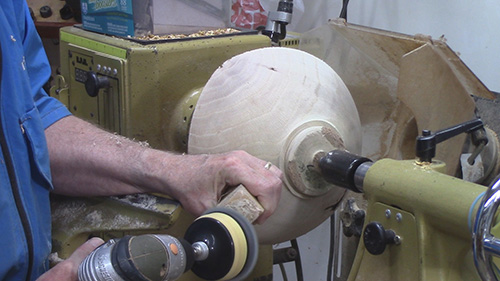
Apply the lubricant liberally to the surface of the wood and sand as normal. You can use a non-woven abrasive pad like Scotch-Brite™, a paper towel, or paper shop rag. Do not let the surface get too dry. Apply more lubricant to the abrasive as necessary to keep the surface coated as the slurry develops. Between grit changes, wipe off the surface of the wood to remove the slurry from the coarser abrasive before user a finer-grit abrasive.
If you are using water as the lubricant, you can easily clean the abrasive by washing it in warm water. If using a solvent lubricant, soaking the abrasive in the lubricant should help clean the abrasive. You can clean a sanding disk by holding a sanding belt cleaner stick against the spinning disk on your power sander.
Using an Abrasive Paste
To achieve a very fine finish after sanding to 320 or 400 grit, consider using an abrasive paste. Apply a liberal paper towel with the lathe off. Use it as you would any other abrasive by keeping it moving. The abrasive continues to cut as the grit breaks down into smaller silica particles in use, leaving a silky smooth surface. The last step after your final abrasive, whether wet-sanding or using an abrasive paste, is to use a few drops of lubricant to thoroughly clean up the surface with a clean paper towel.
Abrasive pastes are available commercially, but you can make your own easily and inexpensively. Using the abrasive paste recipe offered here is roughly equivalent to taking your last sanding grit and tripling it. For example, if you finish-sand to 320 grit, using an abrasive paste as described in the DIY Abrasive Paste Recipe section can give you a surface amount to the woodturning with a similar to finishing with 1000 grit or even finer. It will provide a finish similar to using the familiar Tripoli compound on a buffing wheel.
So if you have not yet tried wetsanding, try it. I think you will like the results, especially when finishing with a sanding paste you can easily make yourself.
Mike Peace is active in three woodturning chapters in the Atlanta area. He is a frequent demonstrator and regularly uploads woodturning educational videos to his YouTube channel, Mike Peace Woodturning. Before retirement, Mike worked as a software project manager. After serving on active duty in the U.S. Army, he continued service in the reserves, retiring with the rank of Lieutenant Colonel. For more, visit mikepeacewoodturning.com.

