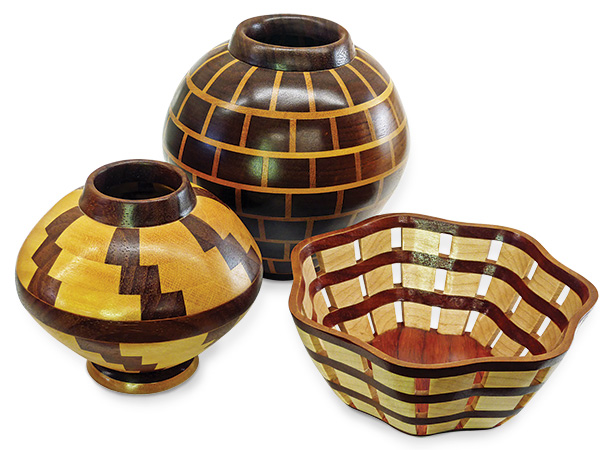
In searching for new possibilities for scrolled bowls, I discovered two different ways to simulate the types of segmentation associated with lathe-turned bowls.
Both methods are easy to learn and far less demanding than traditional approaches. The first produces segmented bowls with solid sides; the second creates open segmentation.
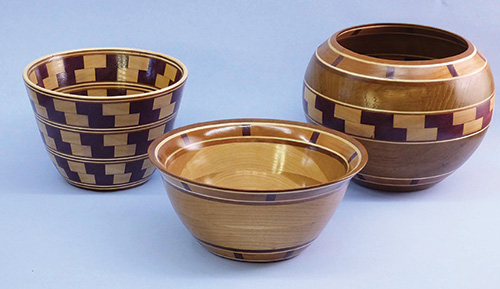
Segmentation with Solid Sides
My method for creating this type of bowl eliminates the need to cut many small pieces at precise angles. Instead, it relies on stack cutting, a standard scroll saw technique, to create the blank.
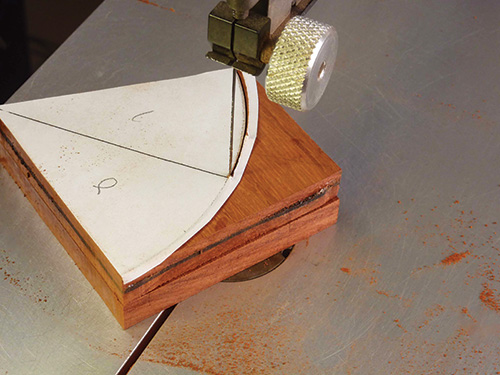
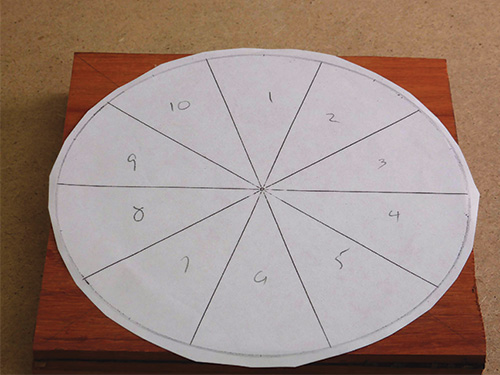
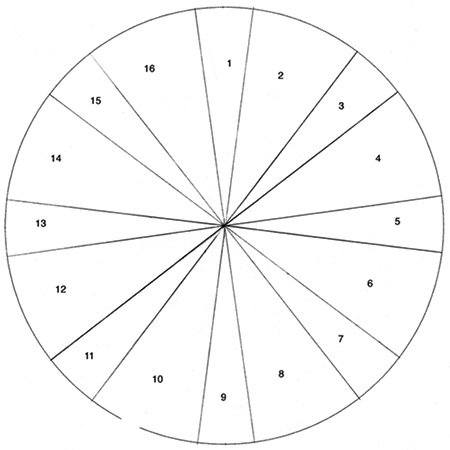
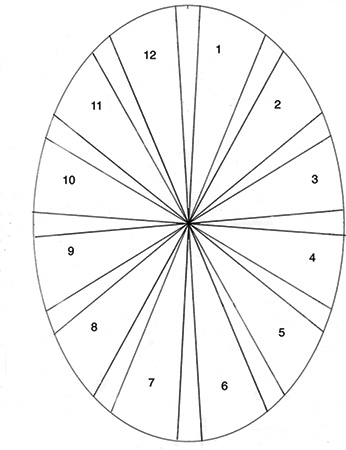
The basics are simple: two contrasting blanks, typically between 1/4″ and 1/2″ thick, are attached with double-sided tape. A pattern, consisting of a circle divided into a designated number of segments, is attached; the circumference and segments are then cut to shape.
Once cut and numbered, alternate segments from each set are exchanged to form two multi-colored circles. Because all pieces are stack cut, deviations in any piece are compensated for by complementary deviations in the adjacent pieces.
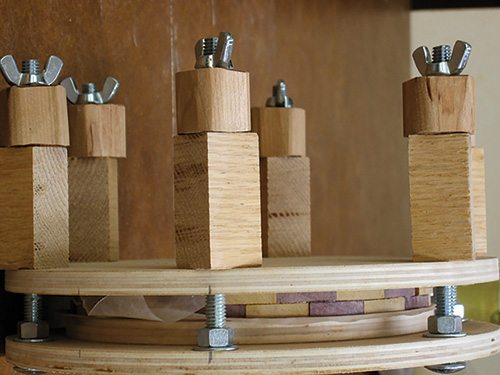
The segments are glued at their edges to form two circles and sanded lightly once the glue has set. They are then glued together to form the blank.
The blank can then be cut in the same way as any scrolled bowl, or rings cut from it can be used as decorative elements in a multi-blank project.
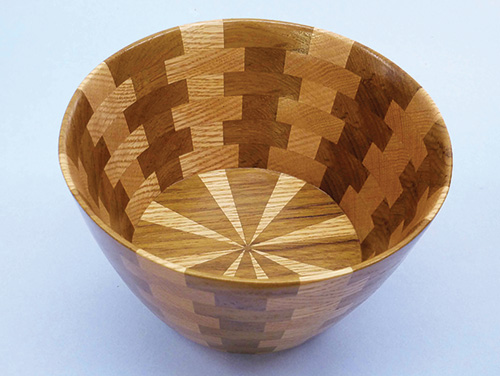
Open Segmentation
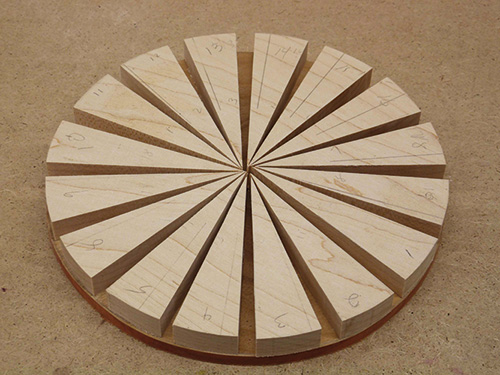
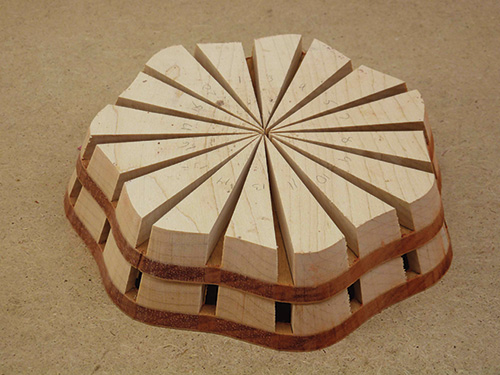
It was challenging to design a blank that would look like open segmentation when cut into rings, but the solution turned out to be quite simple. The blank is constructed from wedges cut from a circle, then glued evenly around a thin substrate.
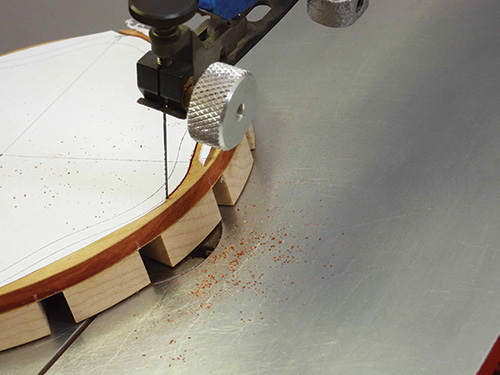
A pattern is attached to the substrate side and the rings are cut at predetermined angles. The cutting process creates rings with a regular pattern of slices and spaces.
Depending on size and purpose, the bowl can be cut so that the wall thickness remains uniform throughout, or cut so that the wall thickness increases slightly with each successive ring.
Walls of even thickness are ideal for smaller bowls, especially those that are primarily decorative, while those with increasing wall thickness have a greater gluing surface — a consideration for larger bowls or those intended for regular use.
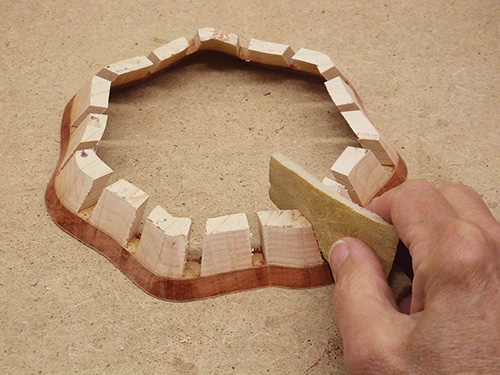
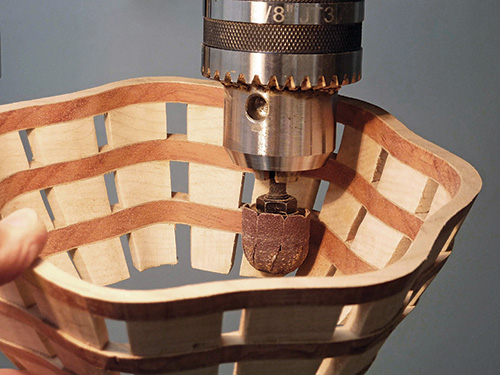
Sanding of an open segmented bowl is standard, with two notable exceptions. First, care must be taken to avoid catching the sander on the edges of the segments; the slits at the bottom of the round inflatable sander are especially vulnerable. For this reason, I use the smaller of the two inflatable sanders: the openings in their abrasives resist snagging better.
Second, the center section of the blank, usually used as the base, has wedges on its underside. These must be sanded off for the piece to be used. If this is not feasible, cut a new base from the same wood as the substrate.
Variations to Explore
This versatile method for open segmentation can be used for rounded square and wavy bowls as easily as for round ones. With a slight pattern adaptation, it can even be used to make oval bowls whose segments remain evenly sized all around the circumference.
Once you’ve mastered the process for making a basic scrolled bowl, it’s an easy transition to variations that no one will believe were made with a scroll saw.


