Centuries ago, our woodworking forebears spent a great deal of time with hand planes such as the #8 jointer in order to take the twist, cup, bow and crook out of their lumber. Hand planes ensured that boards could be made flat, straight, square and smooth, and doing that work by hand was the only real option they had. Those capabilities haven’t changed, of course, and these days you can still prepare lumber this way. A good deal of practice with a collection of hand planes will yield excellent results.
But, if you want to produce flat faces, edges and square reference surfaces in a fraction of the time, a power jointer will get the job done with minimal skill and effort. For most of us, it’s the more practical approach for processing rough lumber. And I’ll bet that if our predecessors had had the option to use a jointer, many of them would have been happy to trade their hand planes for a powered alternative. Here’s a quick study on this most beneficial machine.
What It Can and Can’t Do
A jointer is designed to flatten and square; those are its primary tasks. Preparing rough stock typically involves jointing a reference face first, then flattening an adjacent edge. A jointer is not an accurate thicknessing machine — that’s a planer’s job — nor will it keep two faces or edges parallel to one another. It’s possible to cut rabbets, tapers and chamfers on a jointer too, but generally, other tools are better choices. So, a jointer’s vitae of skills is actually rather short. But what it does well is crucial to woodworking.
How a Jointer Works
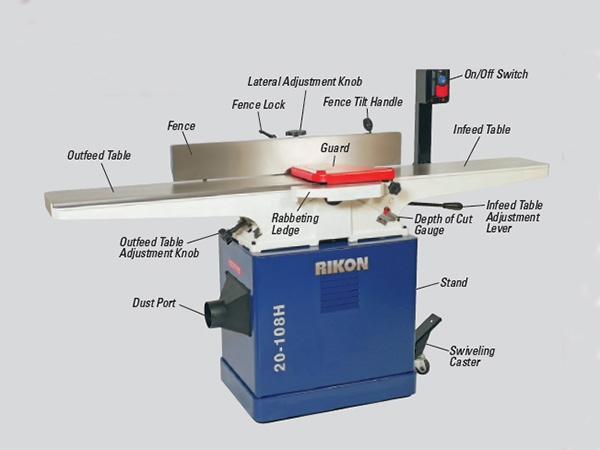
If you flip a hand plane upside down and face its knob to the right, you’re on your way to understanding how a jointer works. Its iron frame is made up of three big components: a center base casting and two movable tables. The infeed table on the right (on a hand plane, the portion of the sole ahead of the blade) supports workpieces as they’re fed into the machine’s rotating cutterhead, and the outfeed table on the left (the rest of the hand plane’s sole behind the blade) keeps stock stabilized and on track as it exits the cutterhead.
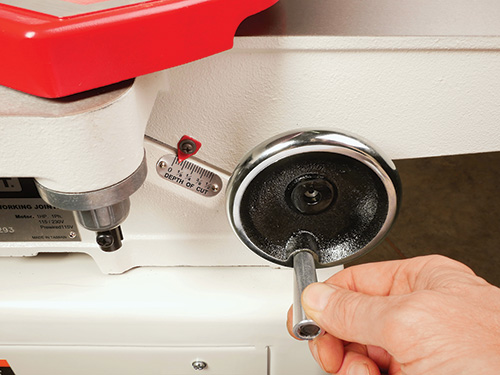
There’s a dynamic relationship between the infeed and outfeed tables and the cylinder- shaped cutterhead. When a jointer is properly tuned up, the surface of its outfeed table is precisely flush with the jointer’s knives or cutting inserts at their highest point of rotation (called top dead center — TDC). That way, boards leaving the cutterhead continue to be supported at the same elevation as they were milled, ensuring flatness. The infeed table, on the other hand, must be adjusted lower than the cutterhead’s TDC in order for surfacing to occur. This depth-of-cut can be set from just thousandths of an inch to 1/8″ or more, depending on how much stock you want to remove with each pass.
Regardless of depth of cut, it’s critical that both the infeed and outfeed tables are parallel to one another across their width and along their length. If they aren’t co-planer, the machine can’t render board surfaces flat.
A jointer’s cast-iron fence, located beside the tables, can be adjusted laterally across them for working with narrow stock or to expose only a portion of the cutterhead. It also can be tilted off of square for joining angled edges. However, the fence is typically kept at 90° so the machine can do its main task of squaring faces to edges.
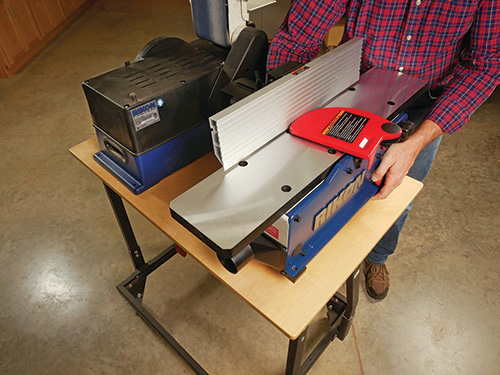
Located beneath its spring-loaded, pivoting guard, a jointer’s cutterhead spins at around 5,000 to 6,000 rpm to help deliver smooth cuts and minimal tearout on any wood grain. One or two drive belts deliver power from the machine’s motor, hiding inside the closed stand. Stationary jointers employ quiet, long-lasting induction motors. Benchtop models have noisier universal motors, similar to corded circular saws and routers.
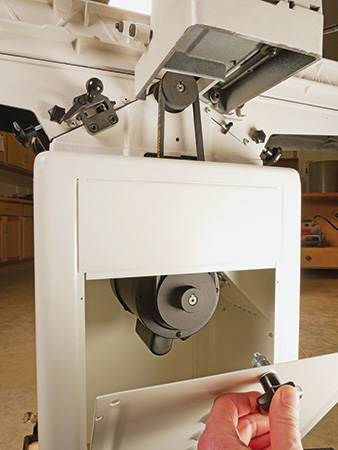
As surfaces are flattened, accumulating debris falls down a ramp inside the stand and out through a 4″ dust port. Jointers create a mountain of wood chips and dust in no time — second only to a thickness planer or lathe. So, for shop cleanliness and cleaner air, they need to be connected to a dust collector with as short a run of hose or ductwork as possible.
If you’re lucky enough to have a spacious wood shop, your jointer might be able to stay in one place all the time. But when it has to be moved — and sooner or later that time will come — you’ll appreciate having casters underneath to help roll its hundreds of pounds around. Some machines come with casters built into the stand. Or, you can add an aftermarket mobile base to any jointer.
Cutterhead Options
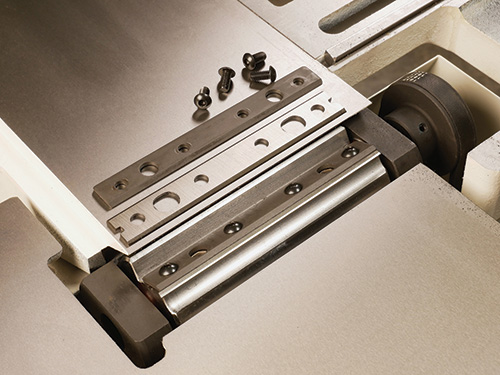
Up until the early 2000s, the cutterheads on all but industrial-size jointers had the same basic design: three or four single-edged, straight-bladed steel knives that sat in pockets in the cutterhead. You can still find these cutterheads today on some jointers. As long as those knives are sharp, the design works fine. But, as soon as the knives nick or dull, the task of servicing them becomes difficult. That’s because reinstalling and setting fresh knives can require the patience of Job and the precision of a Swiss watch maker. Each knife must be set square to the jointer tables from end to end and at precisely the same height as one another. Combinations of springs, recessed set screws and gib bars with multiple screws holding the knives in place only compound the problem of installation. Unless you do it often, setting traditional jointer knives is a big hassle.
Jointer cutterhead maintenance and performance took a quantum leap forward when manufacturers began to offer helical (also often called spiral) cutterheads with replaceable inserts as options. Unlike a straightknife head, spiral heads are equipped with rows of carbide inserts that have four sharp edges. Pockets in the cutterhead automatically set them to correct TDC, and a single star-drive screw holds each insert in place. When an insert nicks or dulls, it has three more sharp edges that can be accessed as easily as loosening the screw and rotating the carbide. Inserts are also cheap to replace.
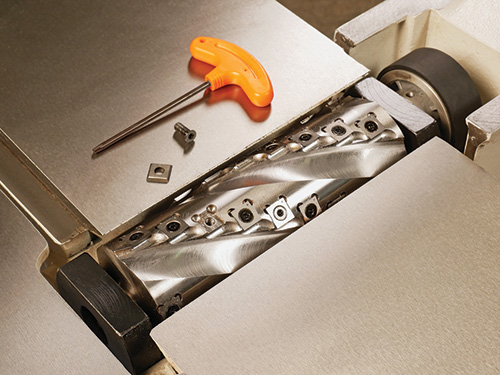
Each row of cutters presents itself at a bias to the wood, instead of straight across, to create a shearing action that cuts figured and interlocked grain more cleanly. While purchasing a helical-equipped jointer will cost hundreds of dollars or more than a conventional straight-knife model, it’s an investment you’ll appreciate — both for maintenance and when you’re jointing figured or difficult-grain stock. It’s an improvement that surely will make straight-knife cutterheads obsolete on new jointers at some point, probably sooner than later.
Machine Sizes, Styles
If you’re in the market for a jointer, its cutterhead style is one important consideration. Another decision you face is its maximum width of cut. Jointers are manufactured with 6″, 8″, 10″, 12″ and even 16″ cutterhead lengths. The size determines how wide a board face you can join in a single pass. Obviously, longer cutterheads offer more capacity and can prevent you from needing to rip wide stock narrower in order to flatten it. As cutterhead lengths go up, so does the overall table length of the machine, to a point. So, while a 6″ jointer might offer a 50+”-long table, an 8″ model usually provides several more feet of table length. Longer tables are a big advantage when you need to flatten longer stock.
The counterpoint here, not surprisingly, is cost. As machine sizes increase, their price tags spike upward, too. For instance, an 8″ helical-head jointer may cost around $1,500, but a 12″ machine with the same cutterhead style can set you back $4,000. With those numbers in mind, occasional ripping and re-gluing may be a fair trade-off to buying a more-than-you-really-need jointer. A good compromise between capacity and cost is the 8″ size. I’ve used one for 15 years and have rarely needed more.
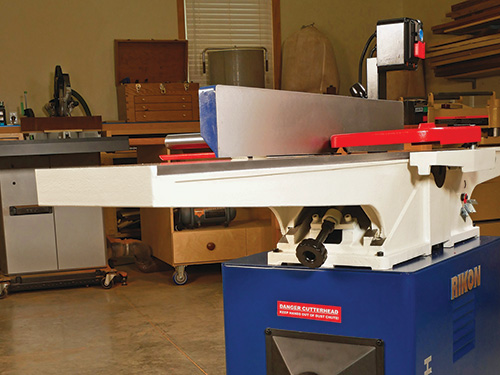
Jointers are also manufactured in two table styles: wedgebed and parallelogram. Wedgebed jointers have tables that slide up and down on sloped dovetailed ways in the casting. If the machine’s center casting looks somewhat like a triangle, the jointer is a wedgebed. Its infeed and outfeed tables are mounted and held in place along their inner edges only.
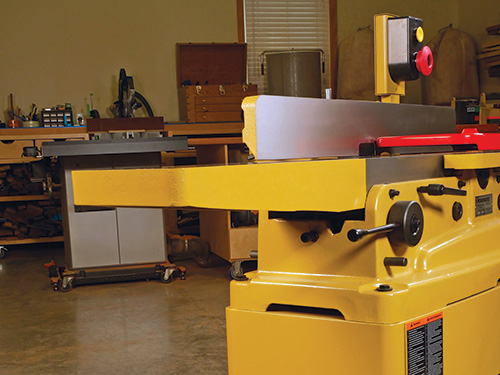
By contrast, the tables on a parallelogram jointer raise and lower on pivoting braces in the center casting. Each table is equipped with two braces along its length. Some experts suggest that parallelogram jointers are better able to maintain a co-planar table relationship, thanks to the added support these braces provide. But, wedgebed jointers that are used carefully and set up properly have served woodworkers well for as long as jointers have been made. Generally, they’re also more affordable. Regardless of design, if you buy your jointer from a reputable manufacturer, either style should serve you well.
Setting Up a Jointer
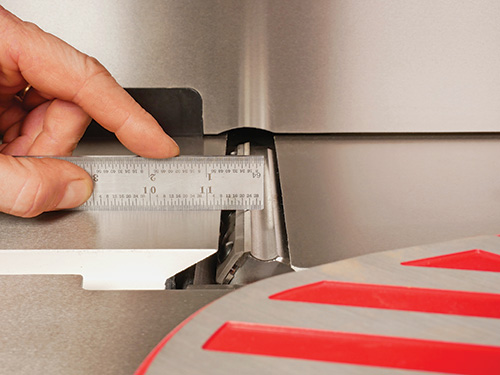
Aside from cranking down the infeed table to establish your desired depth of cut, there are only a couple of adjustments you might need to make to ready the machine for use. For one, it’s imperative that a jointer’s outfeed table is flush with the cutterhead’s TDC. To check, hold a straightedge against the outfeed table so it extends over the cutterhead. With the machine unplugged, rotate the cutterhead; the knives or inserts should just “kiss” the straightedge, touching but not lifting it. Adjust the outfeed table up or down slightly to dial it in as needed. Once TDC is established, you shouldn’t have to check it again unless you move the machine, bump the outfeed table significantly or drop something heavy on it.
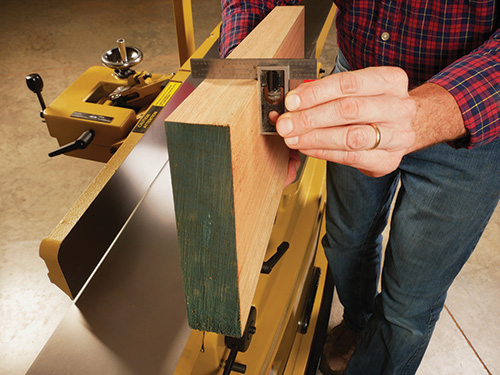
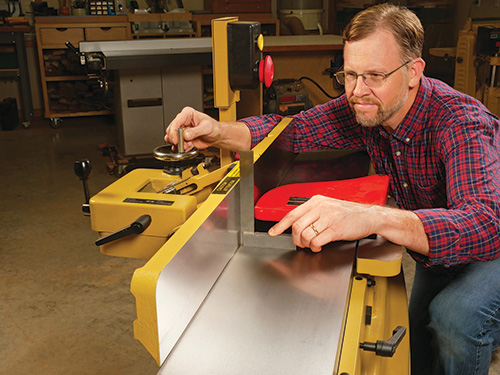
For edge-jointing and squaring, you’ll also want to adjust the fence so it’s perpendicular to the tables. Do this by holding an accurate combination or engineer’s square against the fence and table, just past the cutterhead on the outfeed side. Adjust the fence so there’s no gap between the square’s blade and the fence face, and tighten the table setting.
The fence also needs to be moved laterally so it will expose enough of the cutterhead to join the stock width at hand. I leave my jointer’s fence cranked as far back as it will go most of the time; this way, I’m always ready to use the machine on wide material. Be sure to check for fence squareness again every time you move the fence in or out — any “play” in its mechanism can throw the fence out of squareness with the table again.
What about the “correct” depth of cut? To some degree, that’s a matter of personal preference. The deeper you set the infeed table, the more stock the machine will remove. On roughsawn lumber, a 1/16″ depth of cut will quickly skim off the oxidized, rough outer layer of the wood. It will rectify lumber defects such as cupping or bowing with fewer passes, too. But, deep cuts can also lead to more tearout on interlocked or figured grain. So, you may need to experiment with a cutting depth that best suits the particular stock you’re joining.
Generally, I leave my jointer set for about 1/32″-deep passes, regardless of the condition of the material or the species I’m surfacing. It requires me to make more passes to get stock flat, but the tearout is minuscule, provided I’m feeding the wood “with” the grain direction and not against it. Whatever you decide, however, never exceed a 1/8″ cutting depth for ordinary flattening and squaring operations — it increases the risk of kickback and torn-out grain.
Play It Smart: NEVER Do Either of These Things!
Jointers are the wrong tools for machining end grain. Severe tearout on the back corner is almost inevitable, and the cutterhead could grab and propel the wood backwards. Don’t do it.
Likewise, never put your hands at risk by joining stock thinner than 1/2″, narrower than 3″ or shorter than 12″.
Body Language
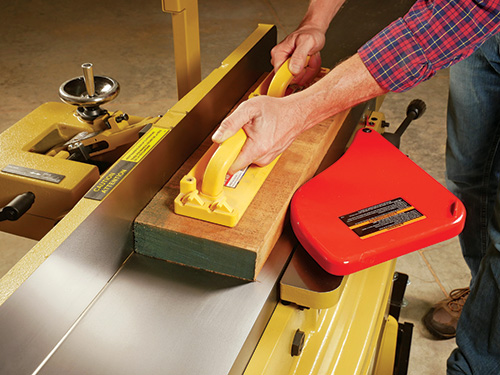
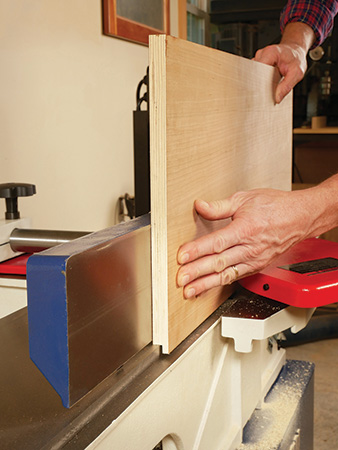
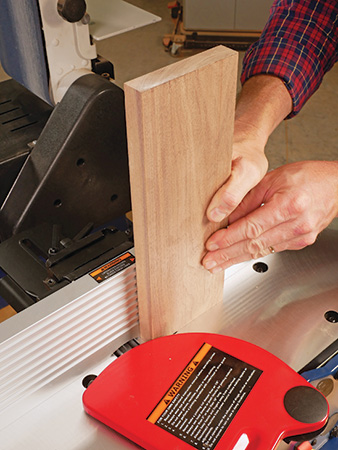
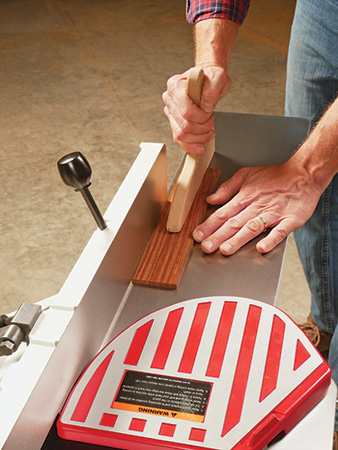
Using a jointer is a bit like learning a dance step, and it takes some practice. Whether you’re jointing faces or edges, you’ll stand beside the machine on the infeed side and feed stock into the cutterhead with it firmly held against both the infeed table and the fence. Your left hand guides the workpiece from above, while your right hand feeds it forward from behind.
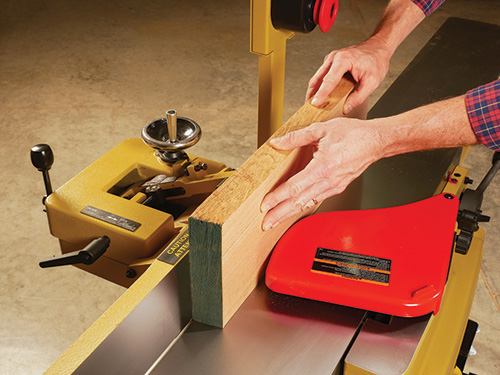
Once the stock begins to pass through the cutterhead, it’s safe and appropriate to move your left hand to the outfeed table to continue guiding it along. That might mean taking a step or two forward, alongside the machine, which is why it’s important to orient yourself so you can move with the wood, if needed. This is particularly important when joining long or heavy lumber.
Above all, maintain your balance and sure-footedness. Feed the material across the machine in a fluid, continuous motion to help ensure that faces and edges will be milled flat and smooth.
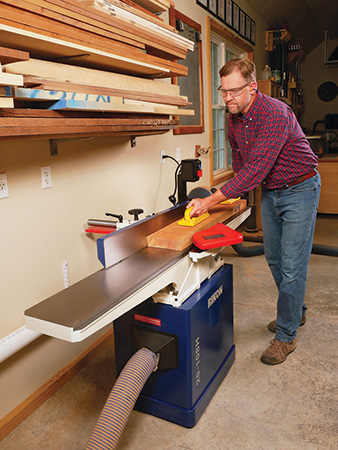
Then, there’s the matter of safety — the cutterhead won’t know the difference between wood or your fingers. Be sure the machine’s casters are locked so it can’t accidentally move during use. Roll up long sleeves and use push sticks or push pads for face jointing instead of your hands. NEVER operate a jointer for flattening faces or edges without the guard in place and functioning correctly. A jointer is a fantastic shop asset. Use it wisely.


