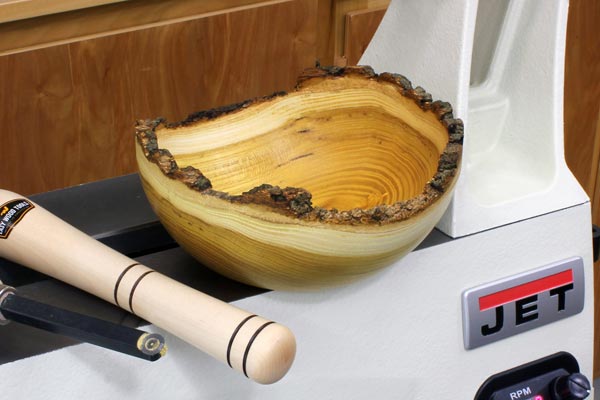
With their bark-topped rims and gracefully curving grain, natural-edge bowls make heads turn unlike any other project.
Few lathe projects are more attractive than natural-edge bowls. The irregular shape of the top nicely complements the smooth rounding of the bottom, while the tree bark remaining around the bowl rim adds detail and interest. Made from a section of log, natural-edge bowls are most often turned from freshly cut trees. You can use just about any hardwood (walnut, cherry and maple are favorites), and I’ve selected a piece of mulberry from a neighbor’s recently downed tree. The damp wood turns wonderfully — be prepared for long, ribbon-like tendrils of shavings shooting from the tips of your chisels — and keeps the wood more flexible. This is important, as a natural-edge bowl is typically made from the blemish- and crack-prone stock you’d normally trim away from most turning blanks. For turning a bowl from a section of green wood, success depends on properly preparing the blank. In fact, most of the hard work in turning a natural-edge bowl takes place before your chisels ever touch the wood.
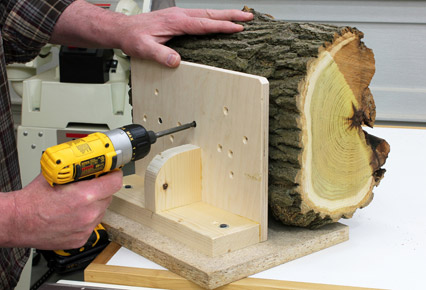
STEP 1: All natural-edge bowls start with a portion of log, and you can’t really mount that on the lathe without a bit of cutting first. Your band saw is the tool of choice for this, but a chunk of log is too irregular and unbalanced to just slap onto the saw table and start cutting. A simple right-angle jig (Photo 1, above) makes the task easy. Attach the log to the jig with a couple of screws placed in an area that will be turned away later. (You can see from all the screw holes that I’ve used this jig several times before.)
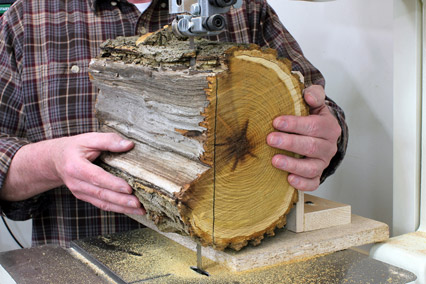
STEP 2: Run the jig and log through the blade to create a perfectly flat face on what will be the bowl bottom, as in Photo 2. I’m cutting below the pith here, and while we’ll use the pithy portion for mounting on the lathe, it won’t be included in the final bowl.
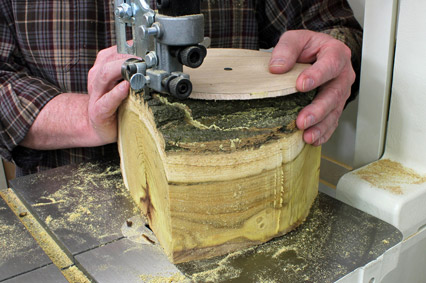
Step 3: Now, let’s save a lot of lathe work by making a round blank. Remove the workpiece from the jig, and with the flat side down, attach a cutting guide to the upper bark side. In Photo 3, I’ve used an 8″ circle of thin scrap plywood and just screwed it to the workpiece, but heavy cardboard will also work.
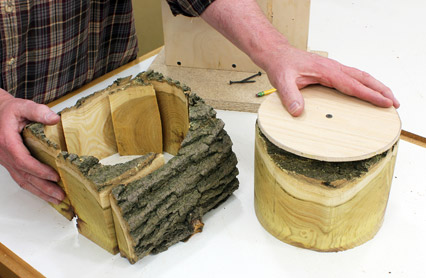
Because the log is still, well, log-shaped, it’s difficult to cut a good circle, and the guide will help orient the workpiece as you cut. Take your time here — green wood is pretty resistant to cutting — and remove the waste in sections if you need to. When you’re done, you’ll have a round blank with curved bark on top and a flat bottom (Photo 4, above).
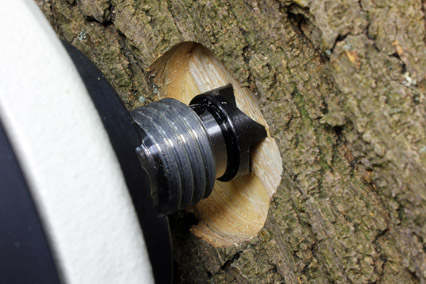
STEP 4: Your lathe’s spur center can’t get a grip in bark — it’s way too soft — so use a Forstner bit to drill down to solid wood in the middle of the blank. This will allow the spur center to bite firmly into the blank as in Photo 5.
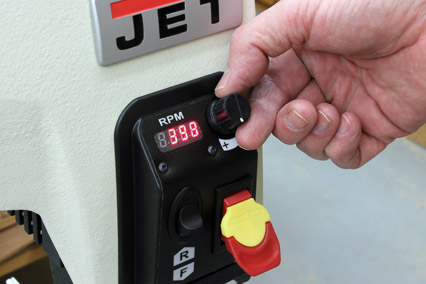
STEP 5: Now, no matter how well you cut the blank, it’s still going to be unbalanced until you can true it up, so cut the speed down before you start roughing (Photo 6). I like to start out at a speed below 400 rpm, and then kick it up once everything is running smooth and true.
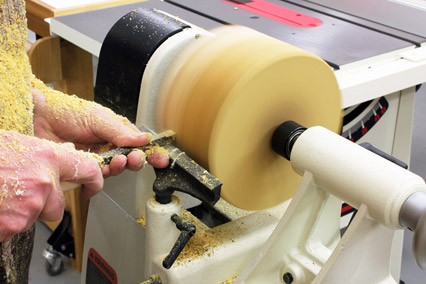
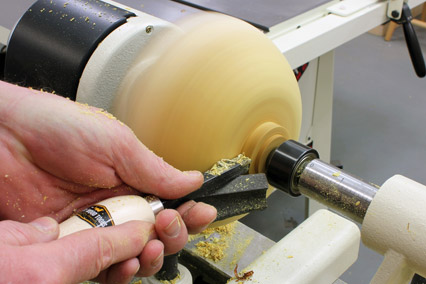
STEP 6: With a few differences I’ll note in a moment, from this point forward turning proceeds as it would for doing any bowl by first roughing the blank to a perfect cylinder as in Photo 7.
STEP 7: Create the overall shape of the outside of the bowl, finishing the shape by forming a tenon (Photo 8) for mounting in a chuck when we turn the workpiece around to do the inside of the bowl.
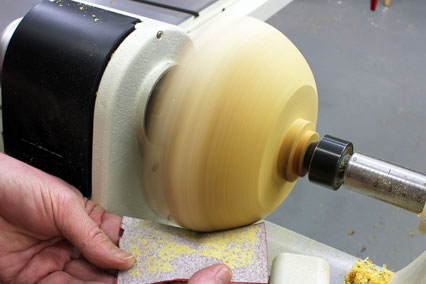
When you’re satisfied with the shape and have the tenon sized to match your chuck, give the workpiece a good sanding (Photo 9).
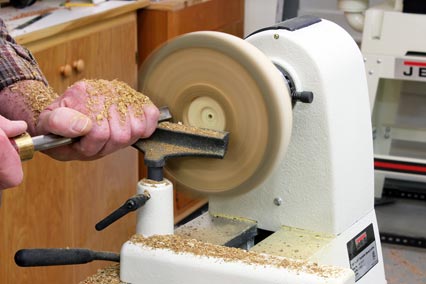
STEP 8: With the workpiece flipped around and securely mounted in your chuck, bring the tool-rest around to the front of the bowl. If you bumped the speed up for the shaping and sanding earlier, bring it back down a bit to make your initial cuts through the bark. Take your time here on the bark side — not only is this side of the bowl not flat (it’s still curved from the log shape, remember), but the bark could not possibly present a more uneven surface. Be aware that chunks of bark can really go flying here, so if you have a facemask you should definitely be using it. You want the bark intact on the rim of the bowl, so start your cut about 1/2″ in. We’ll make the rim thinner later, but for now concentrate on getting rid of the bark in the middle by making smooth, sweeping cuts from the edge to the center (Photo 10).
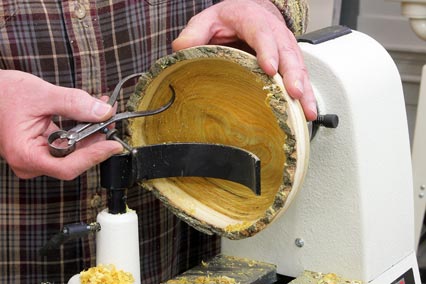
STEP 9: Once the bark is removed, continue shaping the inside of the bowl. Keep in mind that your bowl has a ragged edge, so take extreme care at all times. With most of the interior waste removed, begin forming the bowl walls to the desired thickness. Again, this is best done by making smooth, sweeping cuts from the bowl rim to the center, thinning the walls evenly on each pass. Stop the lathe frequently and check your progress with calipers as you work (Photo 11). When you have the walls to your desired thickness, give the inside a good sanding. As before, be aware of the bowl’s rough rim.
For greenwood, natural-edge bowls, you’ll enjoy the most success if you turn the walls to less than 3/8″ or even 1/4″. Why? Well, not only are thinner walls more attractive, but you’ll experience less potential cracking as the wood dries. While thicker walls have a tendency to crack, thinner walls are very flexible and tend to reshape themselves rather than split. In fact, what starts out as a perfectly round bowl when you take it off the lathe may end up a more oval shape, which only adds to its charm and beauty.


