This article, “A Pro’s Guide to Turning A Simple Bowl,” by Glenn Lucas, is from the pages of American Woodturner and is brought to you by the America Association of Woodturners (AAW) in partnership with Woodworker’s Journal.
When traveling around the world, I am often invited to critique the turned work of others, and I have always been especially keen to help new woodturners improve design and basic skills. One of the things I notice is that the newbie turner tends to over-complicate pieces by adding extra details, such as beads and other forms of decoration, which can prove difficult to cut cleanly, leaving a rough surface, even after sanding.
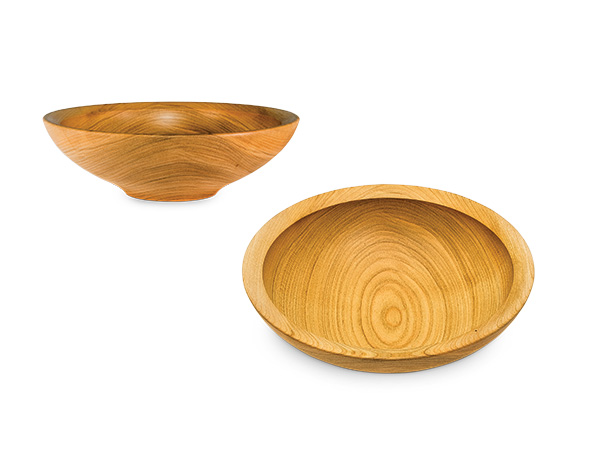
Shape can also add to the challenge, especially on the interior, so choosing a closed form such a calabash bowl is setting the bar very high. An open-form bowl with a simple but classic design can look great and prove a lot easier to turn and sand. When technique improves, then a little extra detail can enhance a bowl, particularly one with an uninteresting grain pattern.
I learned the hard way when it comes to shape, finish, and design. My mother has plenty of my early bowls on display to remind me of where I started. It is worth picking up a few books on pottery, a great source of shape inspiration that has helped me over the years.
Having turned bowls for just less than thirty years, I have come to the conclusion that simple is best. My ongoing bowl sales over these years have proved that this approach works well.
My Bowl Gouges
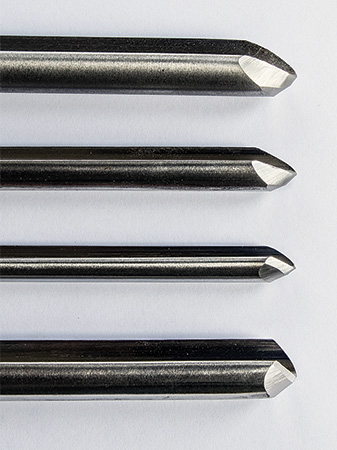
Here are the bowl gouges I use to turn a simple bowl, in order of use from top to bottom.
- 5/8″ Irish-grind bowl gouge, 55-degree bevel. Roughing and shaping cuts.
- 1/2″ Irish-grind bowl gouge, 45-degree bevel. Finishing cuts.
- 3/8″ bowl gouge, 45-degree bevel. Delicate cuts on rim and interior.
- 5/8″ bottom bowl gouge, 60-degree bevel. Inside bowl bottom.
Note that all of these tools have a secondary bevel, which reduces the likelihood that the tool’s heel will rub and leave ridges on concave cuts.
Getting Started
When I make a bowl in production, I normally turn it in two stages. The first is to roughly shape an unseasoned piece of wood close to the shape of the finished form. I allow extra material for the bowl to distort as it dries in a kiln or by air and then re-turn the dry bowl at a later date. This can be a little disheartening for the beginner, who just wants to get turning straight away, rather than waiting for wood to dry. The advantage of working this way is that it is easy to shape wet wood and also is so much cheaper than kiln-dried material, especially in larger sizes.
For this project, the bowl blank is 3″ (8cm) thick and 9″ (23cm) in diameter, cut round on the bandsaw. This size blank is easy to source dry so you can start and finish the project in one day. I selected a piece of Irish cherry and inspected it for defects, avoiding wood with cracks, loose knots, and ingrown bark, as these can lead to voids in the finished piece—not ideal if the bowl is to be used for food.
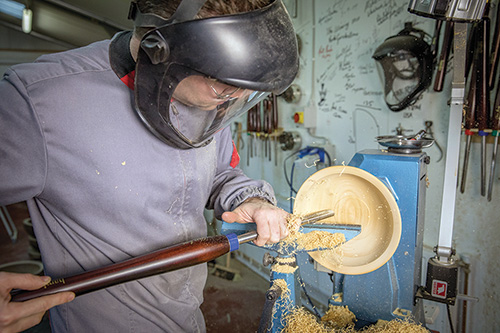
I always wear a full faceshield, and most of the time I wear a respirator to protect my lungs, even when not sanding. It is also very important that you sharpen your tools before you start the project and just before you make the finishing cuts.
Mount the Bowl Blank
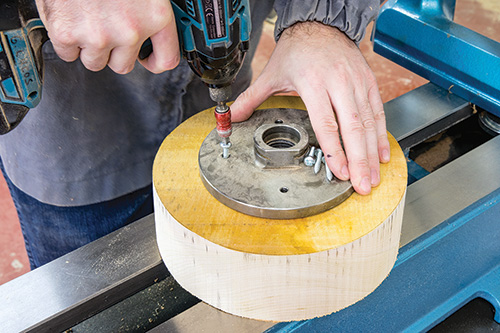
The first step is to mount the bowl blank on the lathe using either a screw chuck or a faceplate. A large faceplate offers a lot of security and less vibration because there is broader support behind the cuts being made. I use sheet metal screws that are about 1-1/4″ (30mm) long. I then make the decision as to which side of the blank will receive the faceplate. If the wood has nice figuring, I try to make sure it is not turned away. If it has minor defects or bark inclusions, I try to position the blank such that I can remove them while shaping the outside. For the project in this article, I decided to mount the faceplate closest to where the bark had been, leading to pleasing oval growth rings appearing at the bottom of the bowl when the interior is finished. This mounting is an example of “faceplate,” or sidegrain, orientation, with the woodgrain running perpendicular to the lathe bed.
I set the speed of the lathe to about 800 rpm and increase it to a maximum of 1200 rpm as the bowl gets lighter for the finishing cuts.
Begin Shaping the Outside

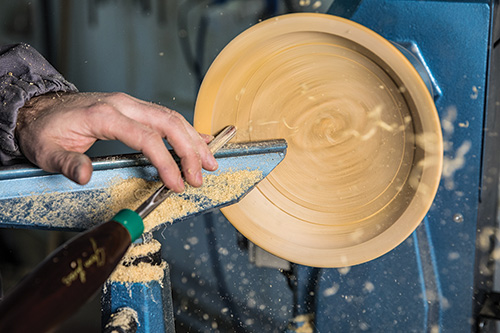
The first tool I use is a 5/8″ (16mm) bowl gouge sharpened with my own version of an Irish grind. It has a 55-degree bevel angle, which is easy to achieve on any of the popular sharpening jigs. Use a red marker to draw a line down the flute. This will help remind the new turner that red means danger — if you see the red line as you make a cut, then there is a chance of a bad tool catch.
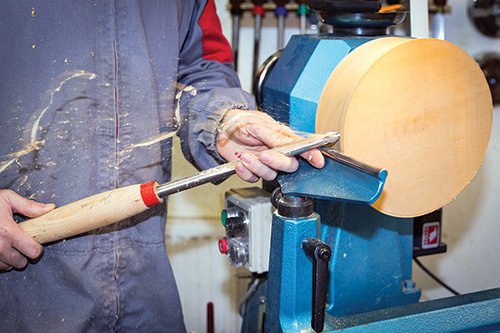
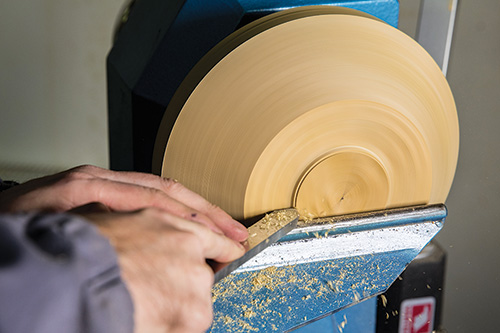
It is helpful if all surfaces of the bowl blank are trued up prior to shaping, to allow for measurements to be applied. Truing up the rim, or outer edge, first, I rotate the tool in the direction of the cut, checking that the red line is not visible from above. I then push the tool away from me, riding the bevel on the heel.
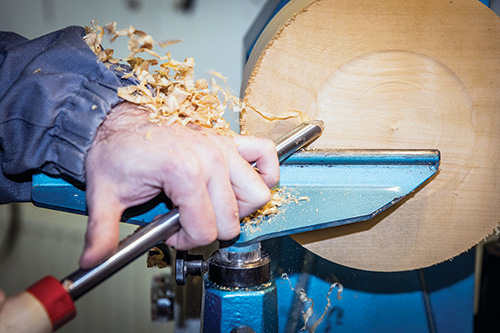
Move the toolrest to the bottom of the blank to true up that surface. I pull the gouge towards me, pressing firmly onto the toolrest and not against the wood, as this can lead to vibration from contact with the uneven surface. Standing with my right foot forward, I lean backwards as the tool travels along the toolrest. The toolrest height is also important; adjust it so the tool cuts on center.
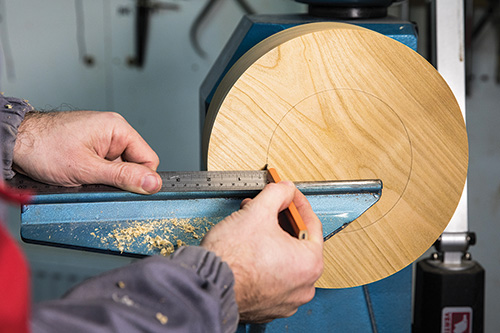
From the bottom outside edge, measure 2″ (5cm) in on both adjacent surfaces and draw a line. Adjust the toolrest so it lines up with the two pencil lines, and then remove the wood in this area.
Drop the tool handle to about 45 degrees, allowing for a shear cutting action, which is easier on the wood, your body, and the lathe.
There is a good reason why the French guillotine had a cutting edge of approximately 45 degrees—less resistance in use, allowing for a more efficient cut.
Form a Tenon
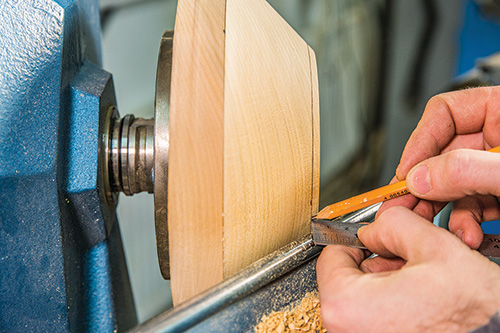
Measuring in 1/4″ (6mm) for the depth of tenon, I then choose a chuck and jaws that will allow the base size to be about one-third of the overall rim diameter. Measure the chuck jaws when they are almost closed, in a position close to a perfect circle.
This allows for a really secure grip and full contact all around on the tenon, rather than opening up a smaller set of jaws, which would only contact the wood on eight points. When taking the measurement of the jaws with the dividers, allow an extra 1/8″ (3mm).
Transfer the chuck jaw size to the bowl, making a light mark with the left point of the dividers. Ensure the right point does not touch the wood, which is moving upwards and could send the dividers flying, causing injury. The right-hand side is lifted off the tool rest, so the measurement is made through the centerline. A little trial and error is necessary until the line scribed is the same dimension as the dividers.
The gouge is then pushed in several passes toward the headstock to remove material around the tenon, always cutting into side grain. The tool I use to precisely form the tenon is a diamond-point scraper, shaped to 77 degrees to match the
dovetail jaws of my chuck.
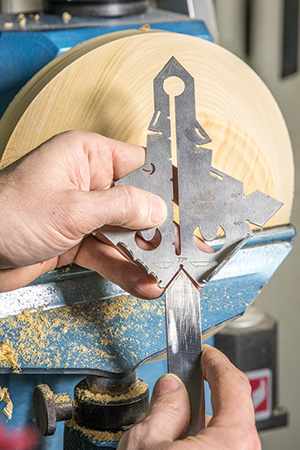
Remember that the shape and angle of the jaws on the different chuck brands will vary from profiled jaws with serrations to smooth dovetails jaws. The angles of the various dovetails can range from 75 degrees to 80 degrees.
To achieve security and accuracy in my production business, my preference has always been to use dovetail jaws, which have proved to be very secure if the tenon is shaped correctly.
Finish Shaping the Outside
With the tenon formed, measure and mark the width of the base, approximately one-third the diameter of the rim. Then refine the outside shape of the bowl, leaving the base area intact. I create an ogee at the bottom and a convex shape towards the rim. Once I am happy with the shape, I make a push cut from the base to the rim using a 1/2″ (13mm) bowl gouge sharpened to a 45-degree angle.

This cut can prove challenging for many woodturners. Alternatively, you could use light shearing, or “shear-scraping,” cuts to give you a smooth finish. The shearing cut is made with the left wing of the tool, keeping the handle down towards the floor in the 45-degree position. Raising the tool rest will make this cut easier, especially on smaller lathes, where the tool handle may come in contact with the locking levers.
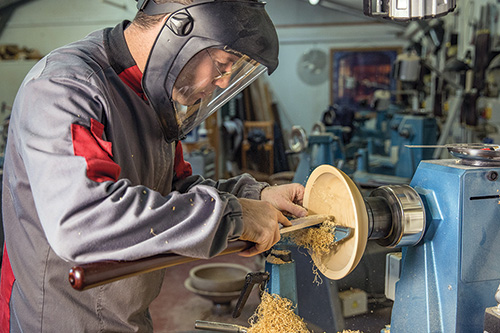
It is not always easy to see if you have created a pleasing shape when the bowl is mounted sideways on the lathe, so either screw off the faceplate to check if you are satisfied with the profile in the upright position, or just rest your hand on the stationary bowl to feel how the shape flows.
Wet-sanding with Oil
The outside of the bowl is now ready to be sanded, but first I will apply a coat of oil with the lathe off. I am opting to wet-sand using oil, which is very efficient and produces no dust. It is important, if using this sanding process, to work with oil that does not cure quickly, such as a walnut oil or a mineral oil-based, food-safe finish. The abrasive will last a long time, provided it is dipped occasionally in the oil. I use a flexible, cloth-backed abrasive with grits 120, 180, 240, and 320. When sanding, I hold the abrasive firmly with my right hand and use my left hand for additional support. Slow the lathe speed, and let the lathe do the work.
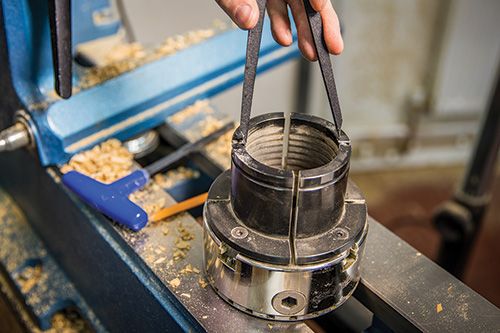
Hollow the Bowl
Remove the faceplate from the bowl blank and remount the blank in the chuck using the tenon turned earlier. I use my thumb to apply pressure to firmly seat the dovetail tenon into the jaws. I then use both hands to tighten the chuck.
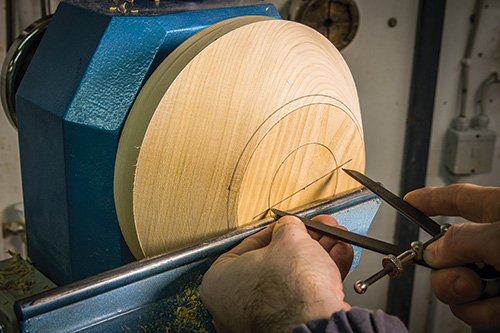
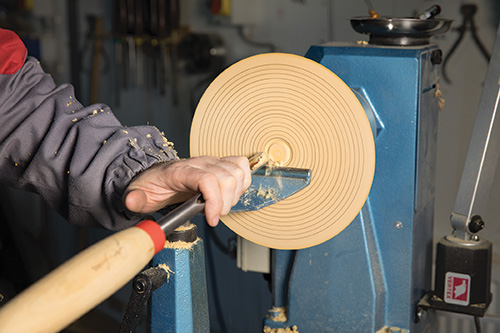
True up the face of the bowl, then mark with a pencil about 1/2″ in from the edge to indicate the rim thickness. Add more lines to the face, about 1/4″ apart; these circles will help guide a new turner through the sequence of cuts.
The hollowing process can be a little daunting at first, for fear of a tool catch that could lead to the bowl coming of the lathe. I avoid using the tailstock for support during this process, as it hinders the movement of the tool. A carefully formed dovetail tenon will hold the bowl securely.
Three Steps for Hollowing
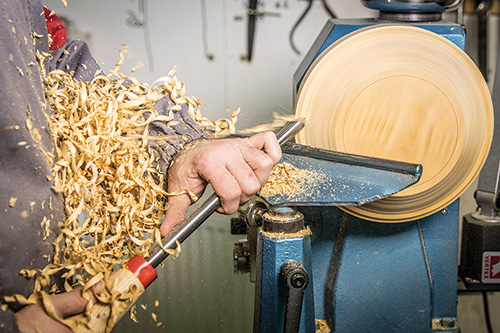
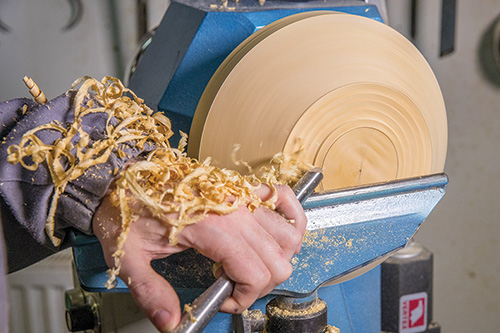
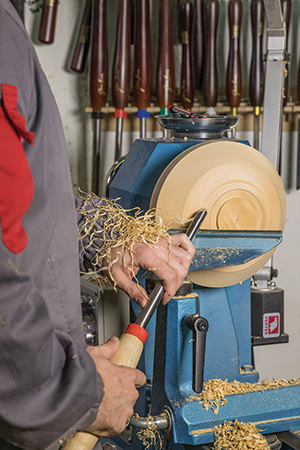
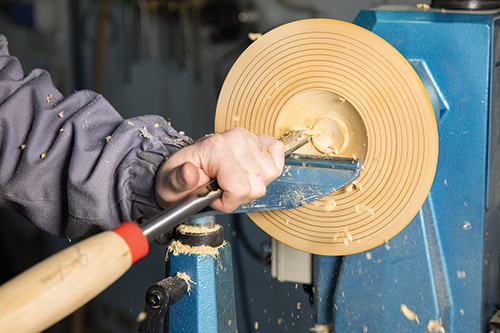
I begin hollowing with the 5/8″ bowl gouge. There are three simple steps to remember here: 1) make a V-groove, 2) rotate the tool counterclockwise, and 3) pull the handle towards your body, standing right foot forward.

1. Make a V-groove by facing the flute, or red line, away from you, keeping the handle horizontal, and pushing into the wood. This means you are cutting into side grain when making heavy cuts and pushing the piece back into the chuck, which does not put much stress on the tenon, leading to less vibration.
2. Rotate the tool towards you, opening up the flute, but stop just before the red is visible from above.
3. Pull the handle towards your body, while pushing the tool firmly onto the tool rest with your left hand.
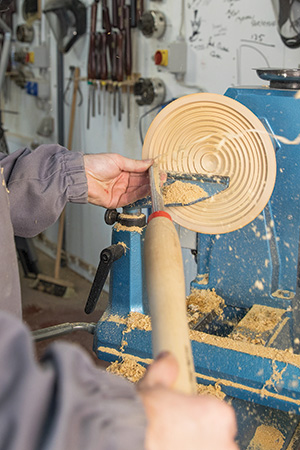
Repeat this process, working in steps, from the center out towards the rim. This process will leave a series of grooves about 1-1/2″ (38mm) deep at center to about 1-1/4″ deep at the rim, stepped up like stadium seating. Position the tool rest so it angles into the bowl and then repeat the process, which now becomes easier, as the steps are already in place to start the next series of cuts.
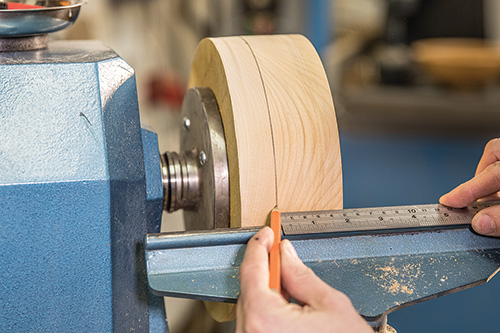
As the hollowing progresses, it is important to keep a frequent check on the wall thickness using calipers, aiming for about 3/4″ (19mm) all around, which leaves enough material to make several light finishing cuts.
The Final Cuts
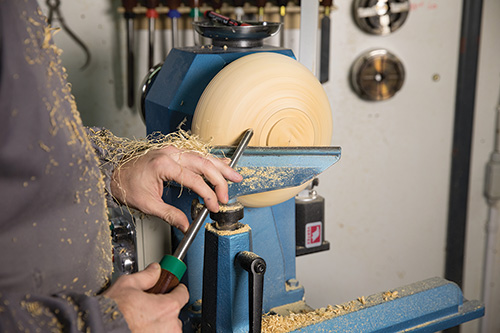
Using a 3/8″ (10mm) bowl gouge, I refine the rim, which I “roll” inward before softening the outside edge. I then angle the tool rest into the bowl and take several light cuts undercutting the 1/2″ rim, reducing the wall thickness below it to about 3/8″.
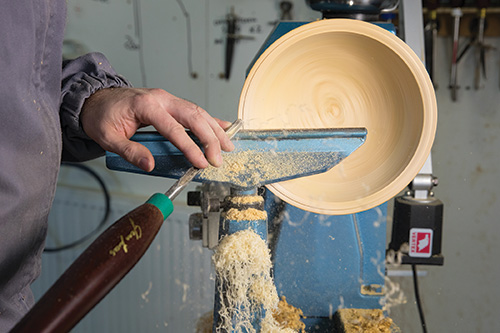
These cuts are very fine, resulting in no tearout when done correctly. However, this small-diameter tool is prone to vibration if the tool rest is not kept close and will not reach the bottom of the bowl successfully. This is where my 60-degree bottom bowl gouge comes into play.
The steeper bevel angle will remain in contact with the wood as you cut toward the center, without the tool’s shaft rubbing against the rim. The handle of this tool is kept in a horizontal position as my left hand pushes the tool down on the tool rest. Make several light passes, and each time bring the handle close to your side for stability as the cut nears the bottom.
With experience, all of this can be done successfully without using a scraper, but making light passes with a scraper will also result in a satisfactory finish. Let the wood come to the scraper, rather than forcing the tool into the wood. Frequent visits to your sharpening system will give the best results.
Repeat the wet-sanding process on the interior and then burnish with a small cotton cloth.
Remove the Tenon
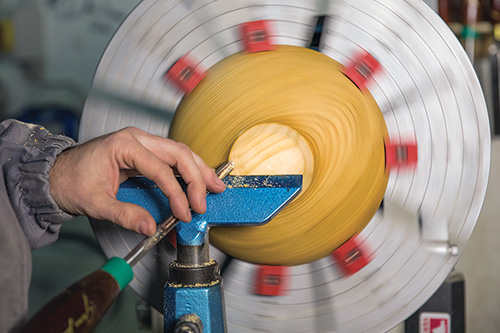
All that remains is to remove the tenon and shape the base. I usually use a vacuum chuck in production, but this can be expensive for a new woodturner. Most chuck manufacturers produce a bowl-reversing plate that will hold the bowl while you shape the base. The speed of the lathe needs to be reduced to about 500 rpm. It is a good idea to read the manufacturer’s instructions before using these jaws.
The final step is to sign the piece, and it is ready for its new home.
– Glenn Lucas has been a full-time production turner since 1995. With a series of successful educational DVDs and a signature tool range, he teaches technique from his woodturning school in Ireland and around the world at symposia and events. For more, visit glennlucaswoodturning.com.
This article has been printed with the permission of the American Association of Woodturners (AAW). The AAW and its journal, American Woodturner, are the foremost advocates for woodturning in the world. AAW members include professional woodturners and wood workers, amateurs, gallery owners, artists and collectors, and wood and tool suppliers. To learn more, visit AAW’s website at woodturner.org.

See More from