Cutting your own bowl blanks can save you a lot of money. Here’s how to safely cut them with a chain saw.
Turning a bowl from kiln-dried wood is problematic due to the sparse availability of 4″ or thicker planks needed for a decent bowl. And if you do find some, expect to pay $14 or more a board foot. That’s why most turners turn green wood from blanks they chainsaw from freshly fallen logs. Historically, this was the way bowls were turned, so I don’t think our ancestors thought anything of a bowl being oval. That was the way it was supposed to look!
Many turners, myself included, keep the tradition alive by turning green wood bowls to final dimension and allowing them to warp oval. If this bothers you, it is only slightly more work to leave your bowl a bit thicker initially and allow it to dry for about three months. You then re-chuck your dried blank and make it round with a normal wall thickness in a second turning session.
VIDEO: Cutting Bowl Blanks – Chain Saw Safety Tips
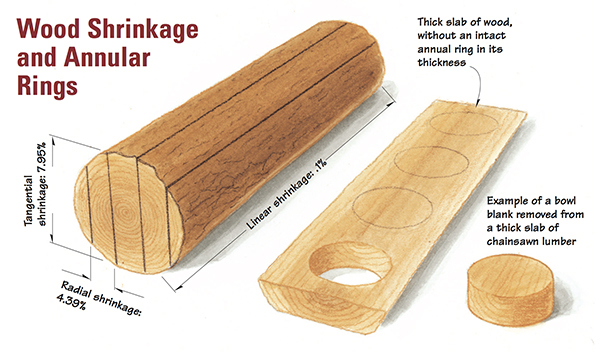
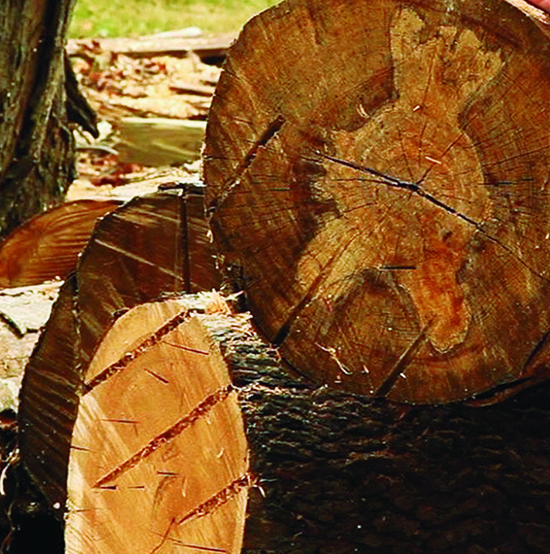
As shown in the Drawing (below), a log does not shrink very much along the grain: only 0.1%. However, it shrinks up to 8% tangentially along the annular rings, and slightly more than 4% in the radial plane, which is at right angle to the annular rings. If left as a log, cracks (called checks by lumbermen), will soon appear. The nature of these cracks depends on the wood. One huge crack can appear in a wood like pine, while elm or beech will have a myriad of small cracks, as in the photo at right. The lumber industry deals with this by cutting logs into boards that do not have a complete annular ring. Think of it as the cardinal rule of the cardinal rules: leave no complete annular ring in your bowl blanks.
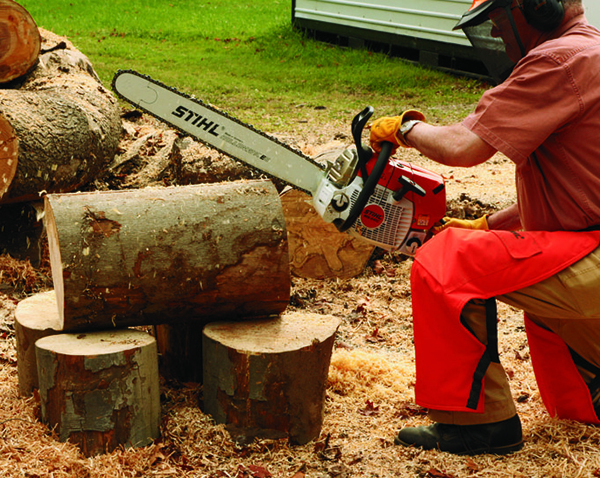
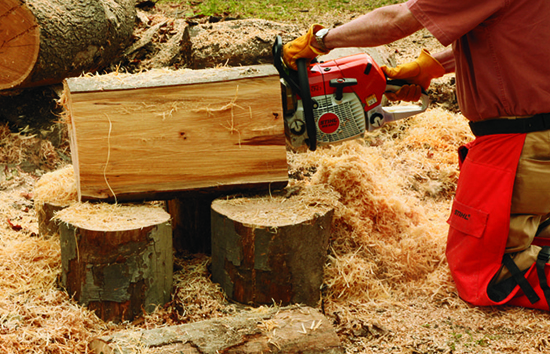
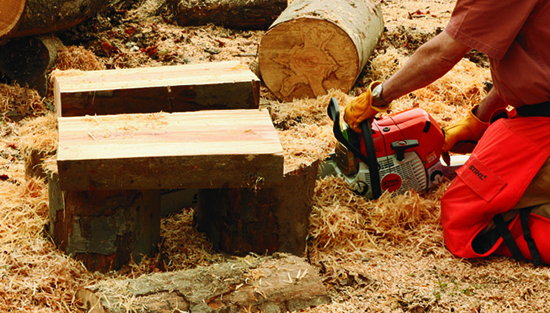
To do this, I will crosscut a section of log slightly shorter than my chainsaw bar — this is called “bucking” by tree cutters. Support this log on a cradle, which you can nail up from construction material or improvise from short sections of logs. Next, I’ll rip boards from the log section, after first ensuring that my chain is very sharp!
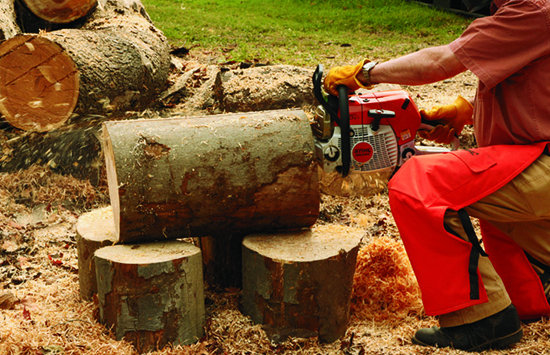
I rip down the middle first, but do not cut all the way through. I stop about 1″ to 2″ shy of the bottom. For a small log, I make a center rip, trying to cut through the center or pith of the tree. More specifically, for larger logs, I make two rips, one to each side of the center so as to completely eliminate the center of the log. I stop both cuts 1″ to 2″ shy of completion. Next, I rip planks of the desired thickness to either side of the center cut or cuts. On a smaller log, I will get two planks, but on a larger log I can get four or six planks. On larger logs, I work from the outside to the center.

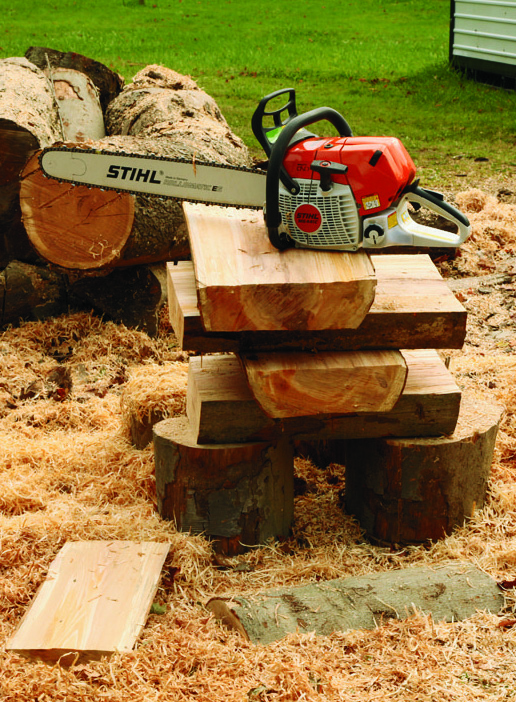
I do enough of this type of work that I have a very powerful chainsaw: 70cc’with a 25″ bar, what the manufacturer, Stihl, catalogues as “a saw for extraordinary cutting needs.” I can get two good-size bowls out of each plank I rip with this saw. The average home or farm duty saw will typically have a 12″ to 18″ bar so you will more likely yield one bowl per plank.
After ripping the planks from my log, the next chore is to band saw a circle to create a blank. It’s straightforward, but you need a coarse blade. I use a wide, four-tooth, skip pattern that cuts very aggressively. You must now turn your freshly cut blank before it dries or store it in such a way that it will not dry out.
This brings a second caveat to wood drying — the elastic limit of the material. If I bend a thin strip of wood, it will bend a good deal before breaking. A thicker strip will not bend nearly as much. I’m dealing with very thick planks here, and they will almost certainly check during drying if left as is. But if I turn a freshly minted blank to a bowl with a reasonably thin wall, the wood will be able to bend much more readily as it dries. A good rule of thumb is the wall needs to be 10% of the bowl diameter, or less. This means that a 10″ bowl needs a 1″ wall to survive drying. If you want to turn your bowl a second time after drying oval to achieve a round vessel, 10% gives sufficient wall thickness to do so.
If you want round bowls, turn your blank to a 10% wall thickness and let it dry for about three months. Wrapping it in several sheets of newspaper, or a brown paper bag, for the first month further reduces checking because the end grain loses water faster than the plank grain. The paper creates a sufficient vapor barrier to equalize this. If tomorrow is someone’s birthday, you can dry the wood rapidly in a microwave. Directions abound on the Internet for microwave drying — but I just wait three months. I have a big pile of blanks drying — handy.
More often than not, I simply turn the bowl to a pleasing wall thickness. I then sand it and apply an oil or an epoxy finish. (See my article on Clear Coat online.) The finish creates a vapor barrier and does the same thing as newspaper. The bowl dries oval over the succeeding week, but it is just as useful as its round cousin.
A final scheme is to drop your freshly bandsawn blank into a plastic trash bag and tightly seal it. This will prevent any water from escaping and give you between a one- and a six- month window to get to the turning. Temperature has much to do with how big that window is. All wood contains anaerobic microbes that cause spalting (which is rotting). Cutting off the air accelerates this process, as does heat. In the summer, or in Florida, you may only have a few weeks. Long-term storage can be achieved by throwing your bagged blank in a deep freeze. Tell your significant other that it is fresh game from a recent hunting trip and there probably won’t be any peeking.
Safety First
Chainsaws are a dangerous tool, so I would like to enumerate some important safety considerations (sidebar, previous page), the most important being what causes a kickback. The most common cause is for the upper quadrant of the nose of the bar to contact a limb or another log. This will drive the bar and saw upwards and rearwards and can hit the operator in the face. For this reason, you must always be cognizant of where the tip of the bar is. It is also a good reason to wear a hardhat with ear protection and a face shield.
The second reason for a kickback is pinching the chain during a crosscut. Pinching the chain at the top of the bar causes the bar and saw to push back. Pinching the chain at the bottom of the bar causes the saw to pull in. Either can be avoided by studying the log before the cut and cutting in such a way that the kerf opens and does not close. The severity of kickbacks can be greatly ameliorated by the use of safety chain and a kickback bar. All farm duty and homeowner saws come with safety chain, but pro models often don’t.
In addition to the hardhat, ear and face protection mentioned above, you should wear chaps, leather boots and gloves. Chaps have multiple layers of protection and really do work well, and they are a lot cheaper than a trip to the emergency room!
Chainsaw Safety
1. Never use a chainsaw left-handed. It is a right-handed tool only.
2. A chainsaw is only to be used by one person at a time. All observers should stay a good distance away.
3. Never use a chainsaw alone.
4. Never use a chainsaw above your shoulders or on a ladder.
5. Always ensure that the chain is tight before starting work and check it frequently.
6. Make sure your chain is sharp — a dull chain is more prone to accidents.
7. Always cut at a high throttle setting. Cutting at partial throttle is more prone to kickback.
8. Use a ground start or a knee start — never a cowboy start.


