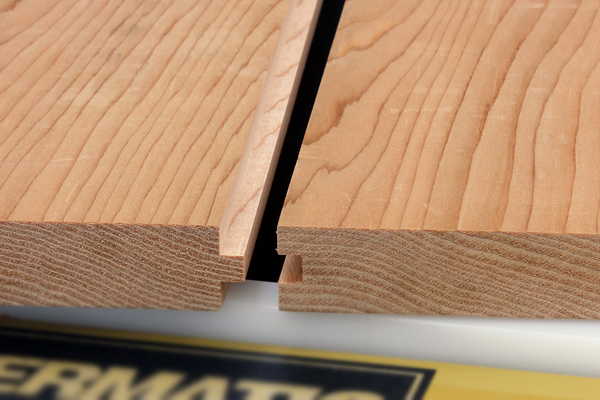
The tongue-and-groove joint adds strength and exact alignment.
Tongue-and-groove joints are really mortise-and-tenon joints — just really, really long ones — with different component names that more accurately describe their appearance and nature. The tongue is analogous to the tenon, and is sized to exactly fit into a matching open-sided mortise, the groove. However, where mortise-and-tenon is used to impart strength and rigidity to workpieces typically connected at right angles, a good tongue-and-groove joint shines at joining parallel workpieces. As such, it’s the joint of choice when gluing stock edge-to-edge to create larger panels. A tongue-and-groove is stronger than simple butt joints due to the increased gluing surface and mechanical interlocking of the two mating pieces. As a bonus, the tongue also serves to perfectly align the workpieces during the glue-up for a smooth surface. The tongue-and-groove is one of the most basic and useful joints; every woodworker should be familiar with cutting them on the table saw.
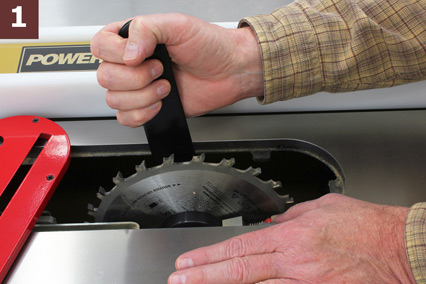
STEP 1: The cuts made when creating the two mating workpieces of a tongue-and-groove joint are non-through cuts, meaning that the saw blade never goes all the way through the wood. Because of that, this is one of the rare times you’ll have to take the blade guard off your table saw. Fortunately, the wood itself covers the blade at almost all times during the cuts. Like its cousin the mortise-and-tenon, a good tongue-and-groove joint is sized similarly with the tongue being roughly 1/3 the thickness of the material being joined. For a typical panel of 3/4″, then, a tongue and matching groove of 1/4″ works well. To make these cuts, I’ll install one of the outside blades of my dado set, which is 1/4″ in thickness, into the saw.
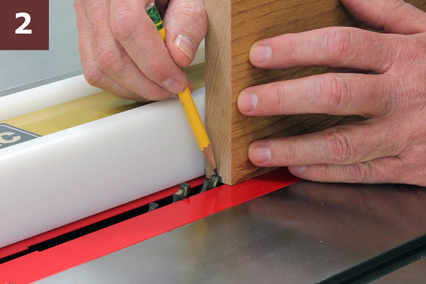
STEP 2: Raise the blade to 1/4″ and lock it. Now, loosen the rip fence, and with the workpiece against it, adjust it so the blade falls into the center of the wood as in Photo 2. No need to measure here: just eyeball it till it looks centered, and lock the fence in place. The truth is that even with meticulous measuring, it’s incredibly difficult to center this cut perfectly, so we’ll use an old cabinetmaker’s trick.
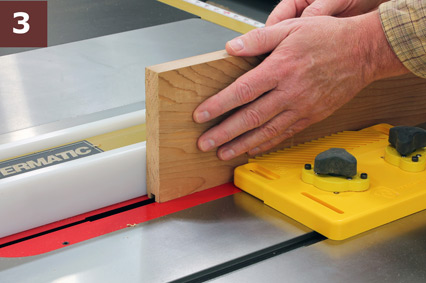
Step 3: Turn on the saw and run the workpiece through to create the groove. In Photo 3, I’m using a magnetic featherboard to keep the workpiece firmly against the rip fence. Now, let’s fine-tune that groove to center it exactly. With the fence and featherboard still in place, flip the board around with the opposite face against the fence and run it through a second time. The twin passes create a groove that is perfectly centered.
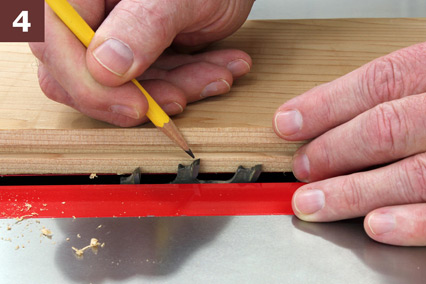
STEP 4: Now, let’s set up the tongue cut in the mating workpiece. Since we ran the first workpiece through twice, that groove is probably just a hair larger than 1/4″. No problem, just move the fence away and lay the first workpiece down against the blade as in Photo 4. Unlock and adjust the blade height, if needed, so the high point of a tooth comes just to the edge of that groove and lock it again. Whatever you do, don’t raise the blade too high, or you’ll have a tongue that’s too narrow. If you’re unsure, err on the low side; if the resulting tongue is too thick, you can always make it thinner.
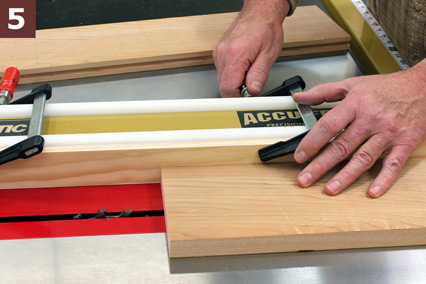
STEP 5: To set up for the cut, once again we won’t bother to measure. Instead, install a sacrificial face to the side of your rip fence. Note in Photo 5 that I’ve placed the workpiece against the fence to accurately set the clamps. With the sacrificial face attached, slide the rip fence over till it just kisses the blade. Not tight, not loose — you just want the wood of the sacrificial face to barely make contact, and then lock it down. That 1/4″ blade will cut a tongue exactly 1/4″ high, matching the depth of the groove cut earlier.
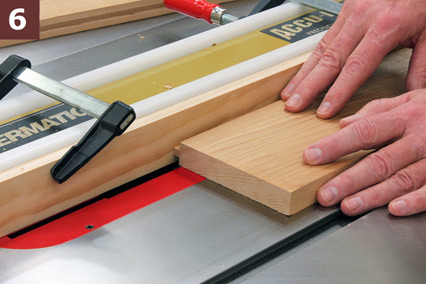
STEP 6: Turn on the saw and run the workpiece through to cut the first face, creating a rabbet down the edge to form half the tongue. With that cut complete, flip the workpiece end-for-end and repeat the cut on the same edge of the opposite face, forming the finished tongue.

STEP 7: Check the fit of the resulting joint by slipping one workpiece into the other, as in Photo 7. If you erred on the low side and the tongue won’t go in, raise the blade slightly and repeat both cuts. Take care to adjust the blade only a hair at a time; it’s easy to go too far and end up with a tongue that doesn’t fit firmly into the groove.
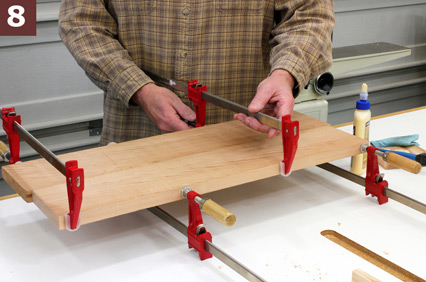
STEP 8: To assemble the panel, apply glue to the mating edges of the joint, and slip the tongue firmly into the groove. Now, just clamp up the assembly and allow to dry as in Photo 8. There are two important things to note in this last photo. First, see how I’ve put the clamps on opposite sides of the panel? This helps to evenly distribute the clamping pressure. If you put all the clamps on the same side, it tends to pull the panel edges in that direction, resulting in a cupped panel once the glue has cured. Alternating the clamps one side to the other helps prevent this. You can also see that I’ve made no attempt to line up the ends of the workpieces; in fact, one workpiece is slightly longer than the other, because that’s just how I trimmed the working stock. It’s always best when making panels to use workpieces that are somewhat oversized, and then trim the whole panel to size. This creates a very smooth panel end with no variation across the joint between the two workpieces.


