I’ve always admired traditional woven wood baskets made from hardwoods like oak, ash and hickory. Not only are they attractive, they’re amazingly strong and light. But the technique of pounding thin wood splints from logs, then shaving and weaving the green strips, takes a lot of skill and know-how to accomplish.
So when I set out to make myself a woven wood picnic basket, I needed to devise a whole new way of building it. What I came up with combines the classic look of woven wood with more builder-friendly frame-and-panel style construction. Unlike traditional techniques, my woven wood panels don’t require the use of green lumber, or even steam bending.
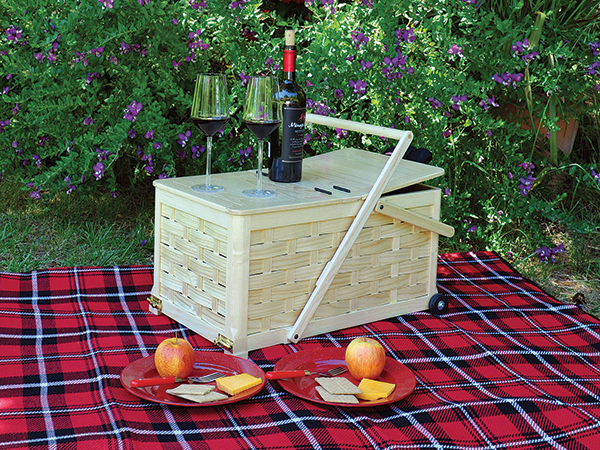
The overall size of the basket is 22″ long by 13″ wide by 10-3/4″ high: big enough to hold all your typical picnic supplies (dishes, glasses, silverware, blanket, etc.) as well as a small insulated bag for food and drinks. There’s even enough room for a bottle of wine or champagne. Two hinged lids that open at either end of the basket lend easy access to the contents and create a large flat surface on which to set plates and glasses or to use as a cutting board for slicing cheese, fruit, etc. Despite its large size, my basket weighs about the same as a large wicker picnic basket, thanks to its thin ash frame, lid and woven side panels.
Although I gave my picnic basket a pair of conventional style fold-down carrying handles, its coolest feature is that you don’t always have to carry it: the basket has small wheels at one end, and a long handle folds down and locks at the other end, allowing it to be pulled along flat ground, just like a rolling suitcase.
Even if you decide not to build my picnic basket, the technique of creating a woven lattice in a frame can be used for making other functional containers — laundry hamper, recycling bin, etc. Alternatively, you can use woven lattice as a decorative panel in a frame-and-panel door.
Cutting the Weaving Strips

Start by selecting ash boards with the straightest grain possible, as this assures that your weaving strips will have the least breakage when they’re bent. For the horizontal strips, cut several 1-1/8″-wide, 20″-long blanks, plus a few that are 1-1/8″ wide, 22-1/4″ long. For the 3/4″-wide vertical strips, cut a 17-3/4″-long blank and plane it down to 3/4″. To save time, the latter two blanks are more than twice as long as needed for the 11″ horizontal and 8-3/4″ vertical strips they produce; they are cut to final length after resawing and planing.
To prepare for resawing the blanks, set up your band saw with the widest blade it will handle, ideally a 1/2″- to 3/4″-wide, 3- or 4-tooth-per-inch, hook tooth blade of sharp, premium quality. Set the saw’s rip fence to produce strips that are 1/8″ thick. Make sure that the saw’s guide blocks and thrust bearings are properly set and that the blade tracks smoothly. Take a couple of test cuts; if the thickness of the resawn strips varies over their length, adjust the angle of the fence to account for blade drift.
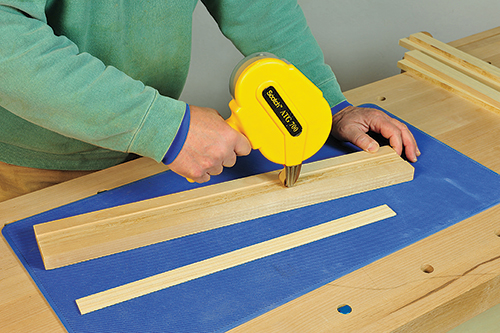
After cutting a strip off of each blank, flatten and smooth the sawn surface of the blank using a jointer or thickness planer. Cut a couple of extra strips from each blank, just in case there are rejects.
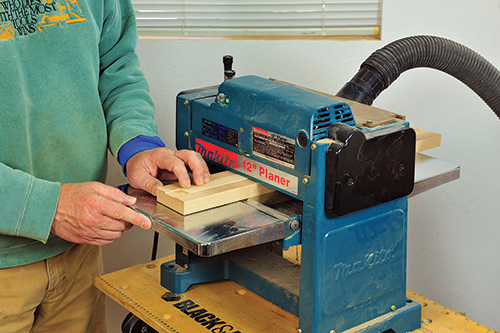
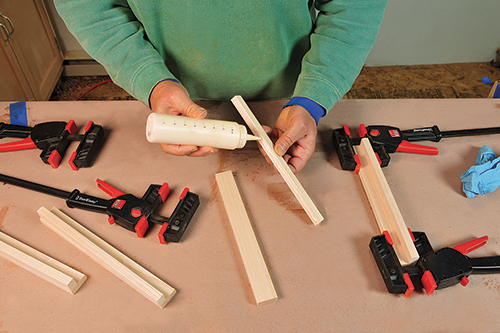
When resawing is complete, it’s time to plane the weaving strips to final thickness. As most thickness planers aren’t capable of planing parts thinner than 1/8″, it’s necessary to create a carrier board for planing the strips down to 3/32″. Making the carrier is really easy: Start with a board that’s about 28″ long, 4″ wide and 3/4″ to 1″ thick. Using a dado set, plow a groove lengthwise down the center of the board that’s 1/8″ deep and a skosh wider than 1-1/8″. Now run the board, groove side up, through the thickness planer until the depth of the groove is exactly 3/32″. Lock this planer setting and don’t change it.
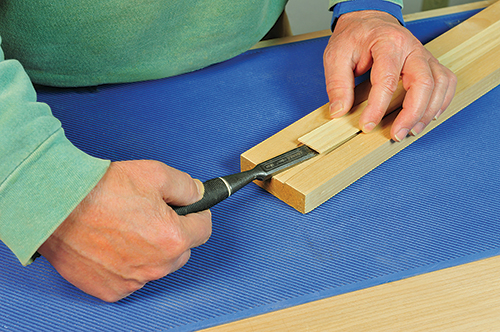
To use the carrier board, apply a strip of double-sided tape or adhesive transfer tape to the groove. Set one of the weaving strips into the groove sawn-side-up, centered lengthwise on the board, and press it onto the tape. Now run the carrier through the planer, then use a chisel to pry the strip out of the groove. Once the tape loses its stickiness, peel it off and apply a new piece. Repeat this with all the weaving strips (including the narrower vertical strips, which work fine with the wider groove), then cut the vertical and shorter horizontal strips to final length.
Making the Basket Frame
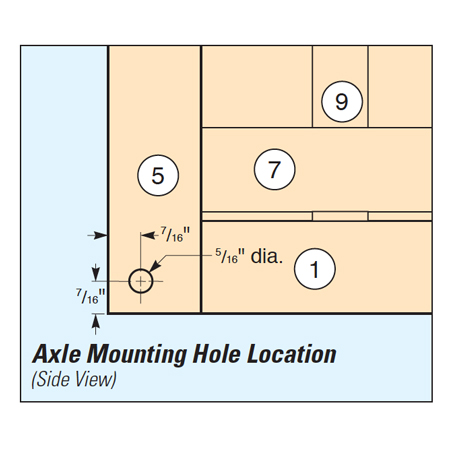
The basket’s basic frame is made of 1/2″-thick, 1-1/4″-wide rails that join corner stiles which are “L” shaped in cross-section. Cut all the frame parts to size as per the Material List and mark the outside surface of each rail; you’ll keep this surface facing down during joint cutting. Each of the picnic basket’s corner stiles is made from two pieces, glued together at a right angle. Start by drilling a pair of 5/16″ dia., 7/16″-deep holes in the two 1-1/4″ x 10-3/4″ corner stile pieces, located as shown in the Drawing (the holes are for mounting the basket’s wheels later). Assemble the corners by butting and gluing the 3/4″-wide piece to the 1-1/4″-wide piece. Note that one pair of corners is longer than the other pair — keep them matched up.
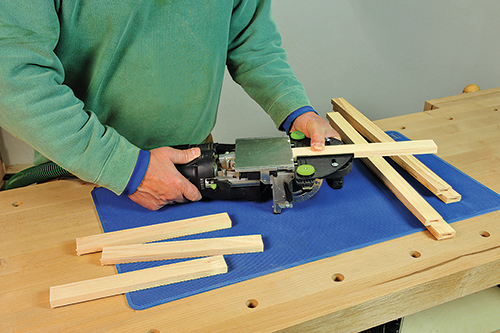
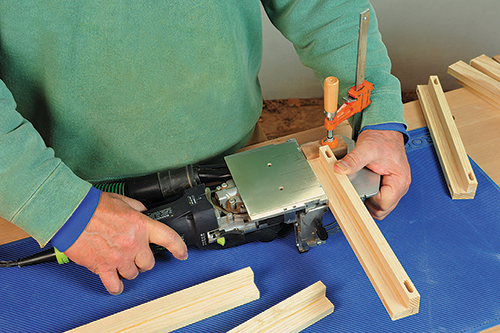
Next, create the mortises for the loose tenons that join the frame members (I used 6 mm x 40 mm tenons from Festool’s Domino system for this; you could rout the mortises with a router instead or substitute other joinery if you wish). Starting with the horizontal rails, chop the mortises so they are centered on the ends, both width- and thickness-wise. Chop matching mortises on all the corner stiles, the only exception being the mortises at the bottom of the longer stiles. Position these mortises so that the stiles extend 1/2″ past the bottom edge of the lower rails.
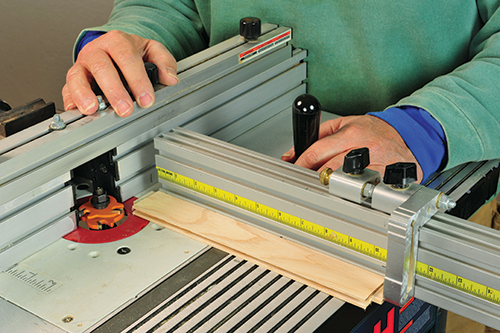
To prepare the rails and stiles for the weaving strips, rout a 1/4″-deep groove using a slot cutter bit in the router table. Ideally, the groove should be just a hair wider than the 3/32″ thickness of the strips, so the grooves need to be routed in two passes using a 1/16″-wide cutter. For the first pass, set the bit’s height so that the cutter’s bottom edge is 13/64″ above the table. Rout one edge of each rail first, cutting the groove so that it runs the full length of the rail. Make sure and keep the marked face of the rail down against the table during routing. Next, rout a stopped groove into each edge of the corner stiles; each groove should start and stop at the mortises.
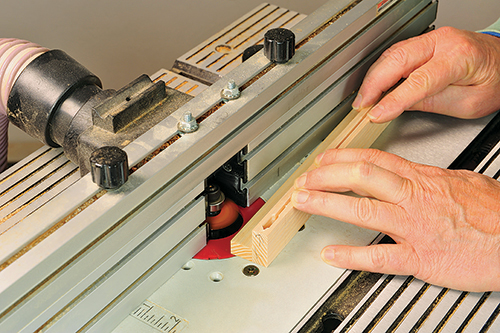
Once all frame members have been routed once, raise the height of the slot cutter enough to make the resulting groove just a hair more than 3/32″ wide. Take a second pass on all the frame members, once again taking care to keep the marked faces of the members facing down.
Weaving and Assembling the Sides
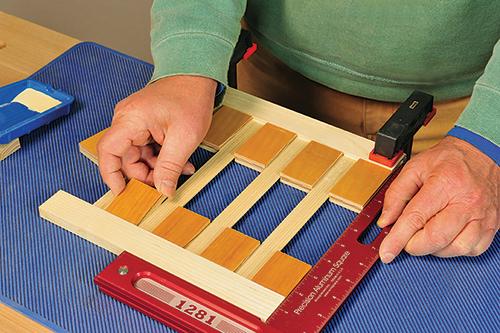
The process of weaving the picnic basket’s sides starts with gluing the vertical weaving strips into the groove in the bottom frame rail. (You can see the entire wood weaving process in my online video.) To keep the strips evenly spaced and square to the rail, cut 18 blocks that are 1-1/2″-wide from scrap plywood to set between the strips as they’re glued in place. Use a large square to confirm that all the strips are square to the rail before setting it aside to dry for an hour or so.
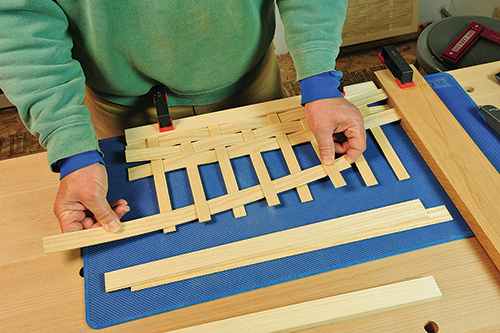
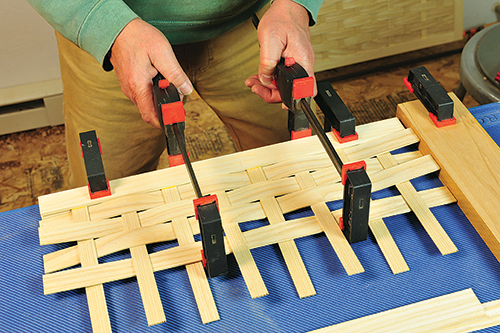
Once all four lower rails are done, you’re ready to create the wood weave. First, clamp one of the rails to the edge of the workbench, and a straight fence board a little less than 1/4″ away from the left end of the rail and perpendicular to it. Feed the first horizontal weaving strip into the vertical strips, passing it alternately over and under them. Press the strip all the way to the left so that its end is flush to the fence board, then push it down against the bottom frame rail, using a pair of quick-action clamps to gently move the strip.
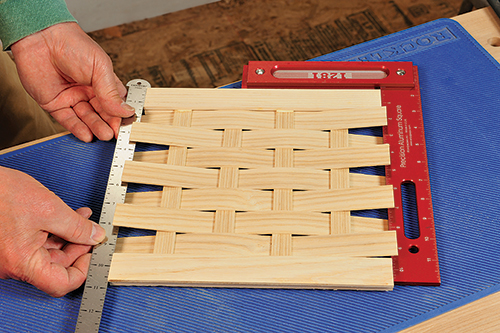
Now you’re ready to glue on the top frame rail. After brushing a light coat of glue on the ends of the vertical strips, angle the rail slightly and press the left-most strip into the frame groove. As you work your way down, you’ll need to flex the strips side-to-side a bit, to get them to go into the groove. Once all are in, press or pound the top rail down to seat all the strips evenly. Check the alignment of the ends of the top and bottom rails, to make sure they’re parallel, and measure the distance between the rails, which should be 10-3/4″. Adjust the position of the top rail as necessary. Repeat this process until all four basket sides are done.
Joining the woven basket sides to the corner stiles is done in a series of steps: First, corner stiles are glued to the ends of each of the long sides, then the short sides are glued on one at a time. Then, finally, the other long side is glued in place.
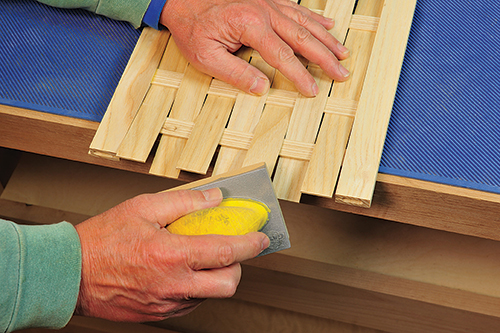
Before starting the assembly, use a hand sanding block and some 80- or 100-grit paper to chamfer the free ends of all the wide weaving strips. Also sand the edges of the all the stile grooves, to chamfer them a bit.
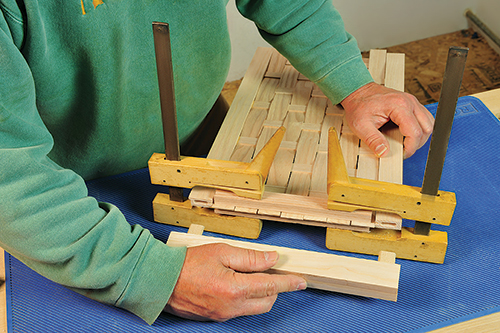
Before you can glue stiles and rails together, you must clamp the ends of the horizontal weaving strips flat, so that you can insert them into their stile grooves. First, cut a couple of 8″-long clamping strips from 3/4″ x 3/4″ hardwood scrap. Set these above and below the strip ends, then use a pair of deep-throated clamps to press them together, thus flattening the strips and bringing their ends into line. After applying glue to the mortises and loose tenons, insert the tenons into the corner stile, then press them partway into the rail mortises. It takes a bit of wiggling to get the weaving strip ends to go into the stile groove: angle the stile slightly, until the strips at that end engage the groove, then work your way down. When all the strips are in the groove, clamp the stile down onto the rails and check the assembly for square before setting it aside to dry.
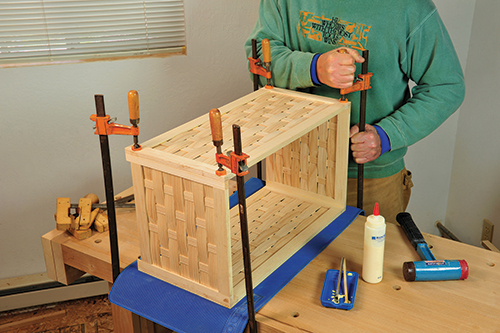
Next, glue the other short side to the same long side, working just as before. In the last step, glue the other long side onto the ends of the short sides. With the basket set across the workbench, glue and clamp one end first, then do the other one, clamping the entire assembly down on the workbench. Before leaving it to dry, measure the picnic basket’s frame diagonally, to assure that it’s square.
To create the basket’s rounded corner edges, use a 3/4″-radius roundover bit chucked in a variable-speed router with the speed set at about 2/3 maximum rpm (this is to keep the large-diameter bit from spinning too quickly). With the frame securely clamped to the workbench, carefully rout each corner stile along most of its length, stopping the cut so that it’s flush with the top edge of each bottom rail.
A piece of 1/4″ plywood provides a nice, smooth, flat-bottom surface on the inside of the basket. The bottom is supported by a rim of 3/8″ x 3/8″ strips, glued and nailed around the bottom inside edge of the basket frame. It’s best to trim and fit the bottom into the opening before attaching the strips, then set the bottom in through the open top of the basket and glue and nail it in place.
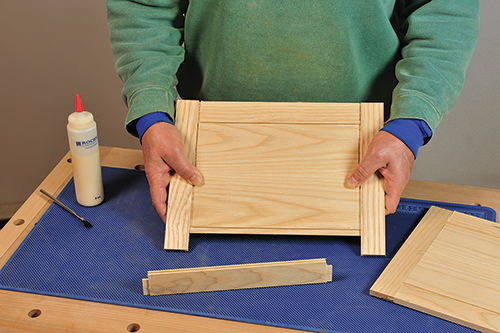
Constructing the Hinged Lid
Each of the picnic basket’s lids is built with solid wood frame-and-panel construction.
After cutting the 3/8″-thick frame members to final width and length, set up your router table with a 1/8″-wide slotting cutter. Use this bit to plow a 3/8″-deep centered groove down the full length of one edge of each frame member (mark one face of each member and keep it down during routing).
Next, cut a stub tenon on both ends of the lid frame rails. This requires a slotting cutter set with an arbor that can accommodate multiple cutters. Stack the arbor with two winged cutters, each at least 3/16″ wide. Between the two cutters, set enough washers and shims so that the distance between the cutter’s tips is 1/8″. With the bit chucked in the router table, set its height to cut a 1/8″ tenon that’s centered on the thickness of the 3/8″ stock. Use a miter gauge in the router table’s miter slot to guide the cut, and set a stop to make the length of each tenon 3/8″ long.
To rout the 1/8″-thick tongue on the lid panels, reset the slot cutter’s height so that the upper edges of the lower winged cutter teeth are flush with the table. Set the router table fence to produce a cut that’s 3/8″ deep. Rout all four edges of each 1/4″-thick lid panel, bottom-side-down. This way, each panel’s top surface will end up flush with the top of the frame.
Before gluing the panels up, mortise the back (non-grooved) edge of each lid’s rear rail, as well as the lid support rail, for two 2″L x 1″W butt hinges. You can cut these 2″-wide, 5/64″-deep mortises (positioned as shown on the Lid Support Rail Drawing) by hand or using a router and jig. Drill holes for the hinge screws with a small self-centering drill bit, using the hinge leaf holes as a guide.
Assemble the lids by gluing the rail’s stub tenons into the grooves on one of the stiles, then sliding the panel in face-up (don’t glue the panel, so it can expand and contract). After centering the panel between the rails, glue the other stile in place and clamp the assembly. When the glue dries, round the two outer-facing corners of each lid off at a 1″ radius, using a band saw or jigsaw. Then, with a 1/8″ radius roundover bit chucked in a router, round over the upper edges of both lids (don’t rout the rear rails), as well as the top ends of the lid support rail. Finally, drill a 1/2″-dia., 1/8″-deep hole in the underside of each outer-facing lid rail, located as shown in the Exploded View. These are for a pair of rare-earth magnets that are glued into the holes and serve to help keep the lid closed. Drill a small hole into the edge of the upper frame rails directly below the magnets and drive large-head roofing nails (clip the shanks off about 1/2″ long) into the holes. File the galvanized finish off the heads of the nails, so the magnets stick better.
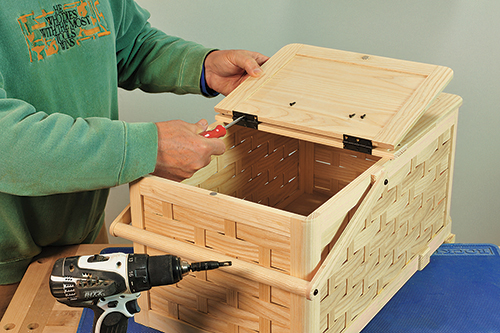
To mount the lid support rail, bore the four countersunk holes at the locations shown in the Lid Support Rail Drawing then screw the rail to the top edge of the basket frame using #8 x 1″ flathead screws. Plug the holes with plugs cut from ash. After the glue dries, trim the plugs flush. To attach the lids, screw the four hinges into their mortises on the support rail first, then fit the lids and screw them in place.
Making the Handles
After cutting the pairs of long and short handle strips to size, drill a 3/8″-dia. hole centered exactly 1/2″ from one end of each strip. Next, mark out a 1/2″-radius half circle at the same end of each strip and cut or sand the end to round it. At the router table, use a 1/8″-radius roundover bit and round the outer-facing edge of each strip all the way around.
On the inside surface of the two long handles, glue on the two strike strips, locating them as shown on the Drawing. Bore a 5/16″ hole, 1/2″ deep into each of these strips (positioned as shown), then mount the metal strike plate (that comes with the sliding barrel bolt) atop the strip, centering it on the hole.
If you’re a woodturner, you could turn the basket’s two handle grips on a wood lathe. However, you can craft a pretty good dowel starting with a couple of lengths of 13/16″-thick x 13/16″-wide ash stock. With a 3/4″ roundover bit in the router table, carefully round all four edges of each strip. A little hand sanding with coarse paper will round each grip nearly round. (If you don’t want to bother with any of this, you can use a ready-made 13/16″-dia. dowel.) Drill a centered 3/8″ hole in both ends of each grip and join them to the handle strips by gluing 3/8″ dowels into the holes.
Four 5/16″-thick spacer blocks provide mounts for the handles that allow them to clear the edges of the overhanging basket lid. After drilling a 1/8″ pilot hole in the center of each block, chamfer its four edges on one side. Glue the blocks to the upper and lower long frame rails, positioning them as shown in the Handle Mounting Spacer Drawing. Also glue the small stops for the long handle to the bottom of the long frame stiles on the long side of the basket. Mount the handles to their spacer blocks using four #8 x 1-1/4″ washerhead screws.
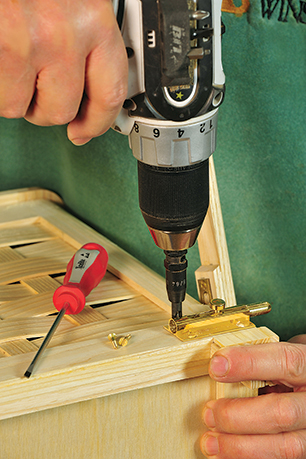
Next, attach the two sliding barrel bolts that lock the long handle in the lower, “rolling” position. With the basket on end atop the workbench, set the long handle so that it’s vertical and seated against the stops. Set the two sliding bolts onto the lower short frame rail, and extend the bolts so that they pass through the strike plates and into the long handle. Mark the position of each sliding bolt, bore pilot holes for its mounting screws, then screw it in place.
Adding the Wheels and Finish
The basket’s twin plastic wheels are 50 mm-dia. replacement wheels for a rolling suitcase (I bought them online from Amazon.com). The bearings that come with the wheels are for a 6 mm shaft, and they require a little reaming out in order to fit the 1/4″ x 1-1/2″ bolt that serves as their axles. The bolts mount to a pair of 1/4″ tee nuts which are driven into the two 5/16″ holes you drilled into the corner stiles earlier.

Before driving them in place, set the tee nut atop the hole and give it a light tap with a mallet. The tee nut’s three prongs will leave small indentations; drill a 1/16″ pilot hole for each prong, to help prevent them from splitting the wood when the tee nut is driven.
To help keep the nut from coming loose, mix a small batch of epoxy and apply it to the holes and the area around the nut. Instead of hammering the nut in, use a bar clamp to gently press it home. Once the glue has dried, bolt the wheels in place, and you’re almost ready to roll. Sand whichever parts haven’t already been sanded to final smoothness and apply a coat of finish; I used spray lacquer, which provided an easy way to finish the convoluted surface of the woven strips.
Hard to Find Hardware
Flat-Tipped Butt Hinges – 2″ L x 1″ W #29234
Sliding Barrel Bolt, Solid Brass #30930
Rare Earth Magnets #30810


