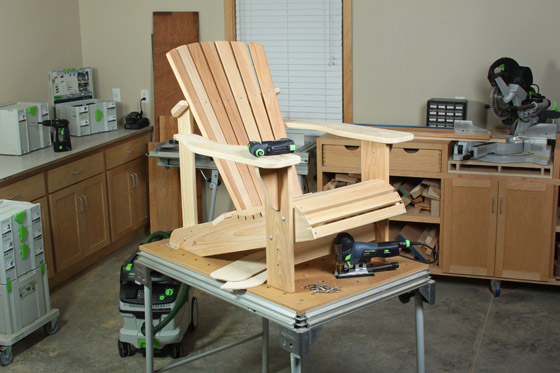
This classic project is fun and easy to build for woodworkers of all skill levels.
VIDEO OVERVIEW
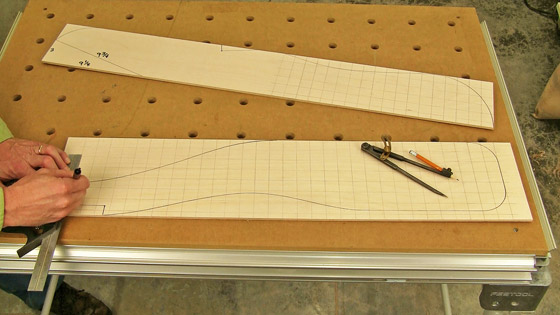
Use the drawings and measurements found in the pdf file plans (download Adirondack chair plans) to help you lay out plywood or MDF templates for the seat frame and arm shapes (see Figure 1). Cut the templates out with a jigsaw, and sand them to your layout lines on an oscillating drum sander or with sanding drums in your drill press.
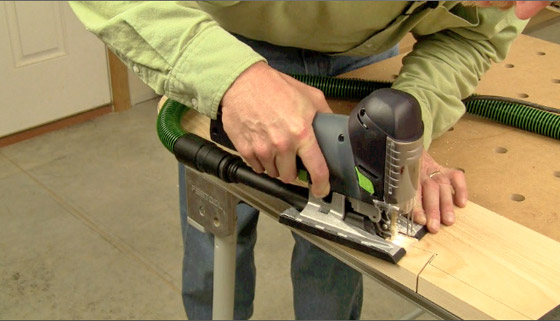
Next, mill enough 3/4-in.-thick stock for all of the chair parts. Trace the two seat frame pieces with your template, and cut them to rough shape with a jigsaw (see Figure 2, below).
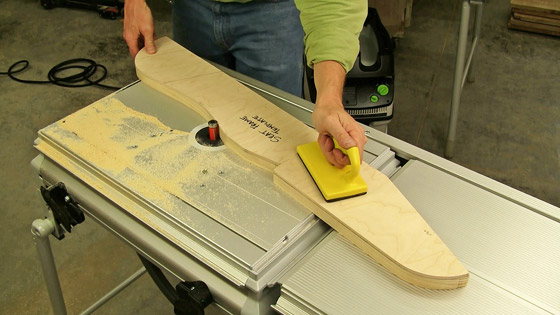
Template-rout the seat boards to final shape, either at the router table or with a handheld router. Secure the template to the workpiece with strips of double-sided tape, and use a piloted flush-trim bit or pattern bit to follow the template (see Figure 3, below).
Mark the outside faces of the seat boards with pairs of lines to set the front leg locations now, while the parts can still be laid flat. The front edge of the front leg is 4 in. from the front end of the seat board. A miter gauge, set to 72 degrees, makes a good layout tool for this step.
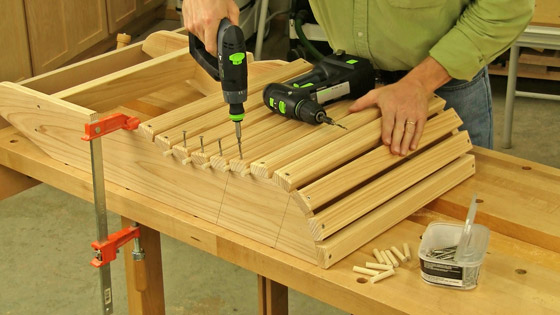
Now, rip and crosscut the back stretcher and the 11 seat slats to size. Use a piloted roundover bit in your router table to soften the top edges and ends of the seat slats.
Fasten the back stretcher between the seat frames and one seat slat to the front bottom end to hold the seat frame assembly together. Attach the remaining 10 seat slats with 2-in. screws driven into countersunk pilot holes. Space the slats 3/8 inches apart before driving the seat slat screws. Use a series of dowels or other spacers to align the slats properly (see Figure 4, below).
With the seat subassembly completed, rip and crosscut the front and back legs to size, as well as the front stretcher, then trim the top ends of the back legs to a 33 degree angle.
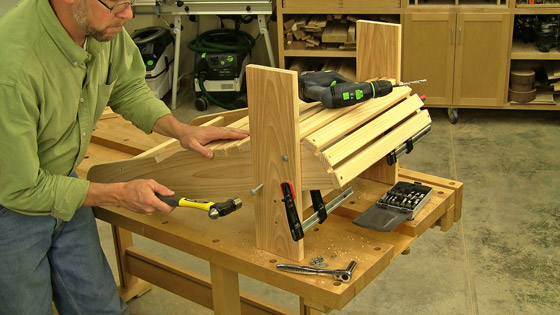
Fasten the front stretcher between the front legs so its top edge is 6 3/4-in. up from the bottoms of the legs. Center the stretcher on the width of the legs. Now stand the front leg assembly on your work surface, and fit the seat framework down inside the legs. Rest it on the front stretcher. Align the legs with the layout lines you drew previously on the seat frames, and clamp the parts together.
Now you can drill a pair of 1/4-in. pilot holes through each leg and seat frame for the 2-in. carriage bolts that will secure these parts. Tap the carriage bolts into place, and use a washer, lock washer and nut to tighten the hardware (see Figure 5). Install the back legs the same way and so the sharp tips at the tops of these two legs point inward toward the chair back. The back legs should butt against the back face of the back stretcher. Use single 2-in. carriage bolts here.
Click Here to continue to Part 2 of this Adirondack Chair Plan.


