Installing the backrest and arm assemblies to complete this Adirondack chair project.
Click Here to go back to Part 1 of Adirondack Chair Plans.
Download the complete project plans, materials list and instructions as a PDF file by clicking the link at the bottom of this article.
PART 2 – VIDEO OVERVIEW
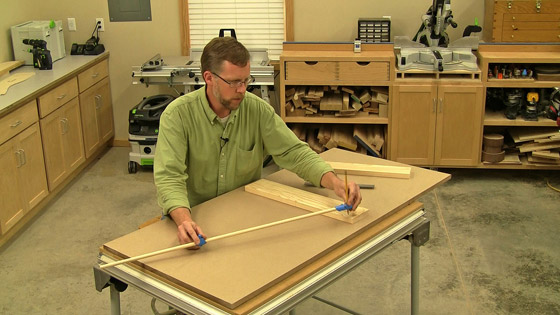
Figure 1: Use an adjustable trammel and a simple layout jig to draw the broad curves on the upper and lower seat frame pieces.
Cut these broad curves on both back frame pieces with a jigsaw, and sand the curves smooth. With that done, attach the upper and lower back frames to the chair with countersunk 2-in. screws. Align the front edge of the upper back frame piece with the front inside corners of the back legs. Drive the countersunk attachment screws.
Next, create a 32-in.-long tapered template for the back slats, starting with a piece of 2-3/4-in.-wide template material. The back slats taper from this width down to 2 in. at their bottom ends. Then trace the template shape onto seven back slat blanks, and cut the slats to rough shape with a jigsaw. Template-rout them to final size with the template secured to each with double-sided tape (see Figure 2).
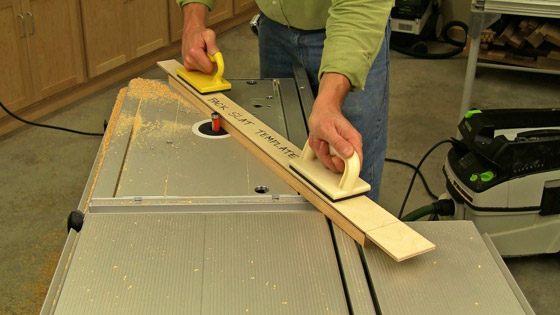
Figure 2: Template-rout the seven tapered seat slats to final shape at the router table, with the template mounted to each workpiece with double-sided tape.
The top ends of the slats need to be shaped into a gentle, 21-in.-radius curve. So, group them together on your workbench with the ends aligned. Clamp the slats together before you draw the top curve with an adjustable trammel. Cut this curve to shape, and sand it smooth.
Now take a few minutes to soften all the back slat edges with a 1/8- or 1/4-in. roundover bit in your router. You don’t want to have splinters here!
Attach the longest middle back slat to the back frame pieces first. Center it on the frames, and align its bottom edge flush with the bottom face of the lower back frame. Attach it with a single countersunk screw to each of the frames. Then position the rest of the back slats. Their spacing at the upper back frame should be about 3/8-in., but only 1/8-in. at the lower back frame.
Tack the slats with a single brad nail into each of the back frame pieces to hold the slats in place, temporarily. Mark the slats for attachment screws, and drive them in, two screws per slat (see Figure 3).
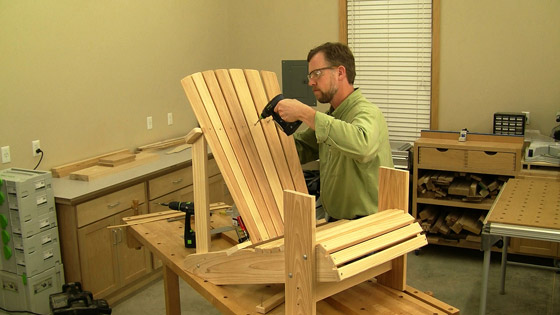
Figure 3: Drive countersunk screws through the upper and lower seat frames to attach the back slats. Locate one screw at each of these joints.
All that’s left to do on your chair is to make and install the arms and their supportive braces. Use your arm template to trace two arms onto wide stock, and cut the arms out with a jigsaw.
Template-rout the arms to final shape, just as you did previously with the seat frames and back slats. Remove the templates, and soften all of the sharp edges of the arms with a roundover bit in either a handheld router or at the router table.
Position the arms on the back legs, aligning them to layout marks drawn 20-in. up from the leg bottoms. The inside front edges of the arms should overhang the inside faces of the front legs by about 3/4- to 1-in.
Drive three countersunk 2-in. screws down through the arms and into the front legs to secure the arms in front. Then, use a long 1/4-in. drill bit to carefully drill through the back ends of the arms and through the back legs. Center these holes on the lengths of the arm notches. Tap in a 3-1/2-in. carriage bolt here, and secure it with a washer, lock washer and nut.
You can draw the pear-shaped arm braces either onto a dedicated template or onto one of the two workpieces and use it as a pattern for tracing the second support after you’ve cut it out and sanded it smooth. Template-rout the supports to final shape. Install them with four countersunk screws, driven down through the arms and through the front legs (see Figure 4).
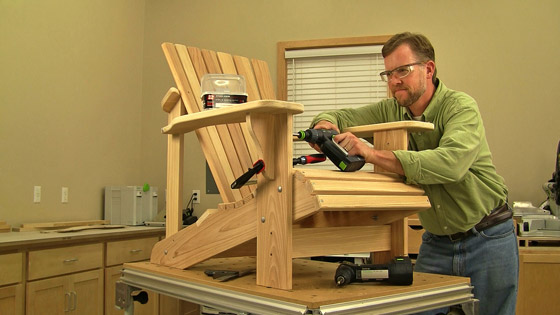
Figure 4: Install the arms and arm supports on the front legs with screws. Secure the backs of the arms in their notched areas to the back legs with carriage bolts, washers and nuts.
Download the complete Adirondack Chair Plan, Instructions and Materials List as a PDF.

