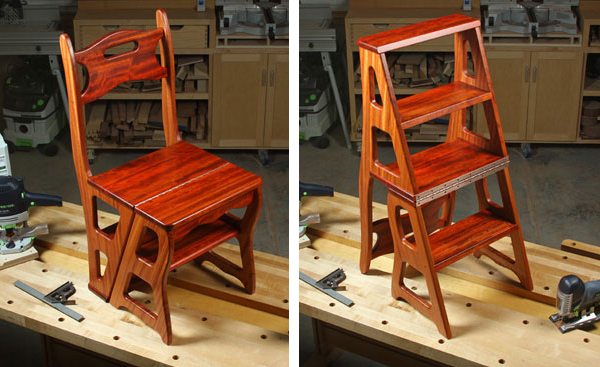
Here’s a classic project that both steps up and provides overflow seating.
Use the gridded drawings provided on the PDF plan Folding Step Stool Chair Plans to create full-size patterns for the upper and lower sides, back and contoured stretcher. Enlarge the PDF grids to 105 percent, then blow those up 200 percent to create the full-size pattern. You’ll need to tape several sheets of paper together to form the complete drawings for the upper and lower sides.
Start the project by gluing up a pair of 12-in.-wide, 4-ft.-long panels; each of these will be large enough to fit an upper and lower side piece. Apply spray-mount glue to the back of your taped-up pattern for the upper and lower side pieces. Lay it down on one of your panels and roll it smooth. If there are any loose edges between the sheets of paper in your pattern, tape them securely with clear, wide packing tape.
One way to cut the spline and step dadoes for this project is to build a simple slotted jig, as shown in the video. You can make it from 1/4- and 3/4-in. scrap plywood. Make the jig’s center slot fit snugly around a 1-in. (outside diameter) guide collar for your router. The collar should slide easily but not loosely from one end of the jig to the other.
Set the slotted jig carefully into position over the spline dado so the dado reference lines are evenly spaced inside the jig’s slot. Clamp the jig down securely against the panel and to your workbench.
Install a 3/4-in.-diameter straight bit and the guide collar in your router. Adjust the cutting depth of your router to about 1/8 in., set the guide collar in the jig’s slot and push the router across the panel cut to make the first spline cut. Then reset the cutting depth and make a second pass to deepen the spline dado to 1/4 in. (see Figure 2).
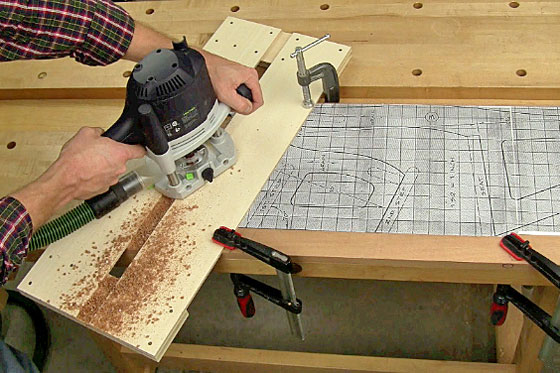
Repeat this process to rout dadoes for the first and third steps in the upper and lower side pieces. It helps to mark the slot-cutting jig with a reference line to show you where to stop each of these two dado cuts, since the router will mostly cover up the cutting path during routing. Cut the step dadoes 1/4-in. deep to match the spline dado.
Once the dadoes are cut, head to your drill press to drill out the curved corners of the cutout shapes in the side pieces. Use 3/4- and 1-in.-dia. Forstner bits for this process. Drilling out these corners will make the jigsawing process easier.
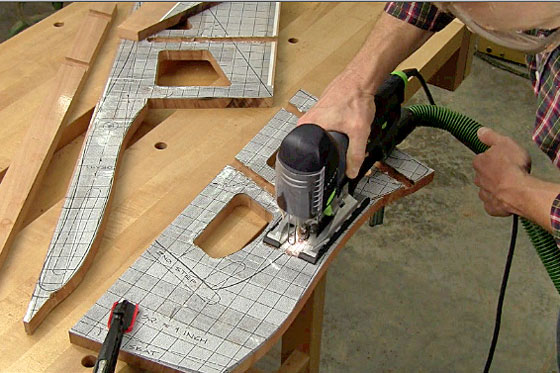
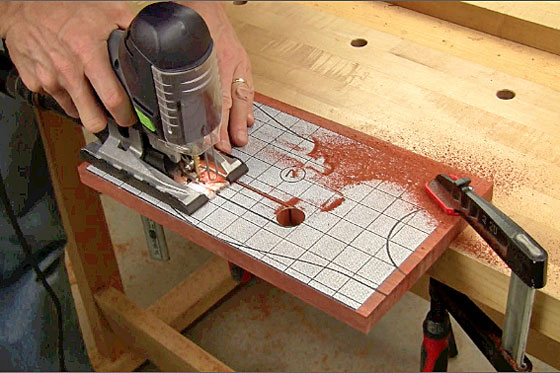
When all the corners are drilled to shape, remove the rest of the waste for the inside cutouts with a jigsaw. Cut just to the waste side of the pattern layout lines so you can sand the cutouts to final shape (see Figure 3).
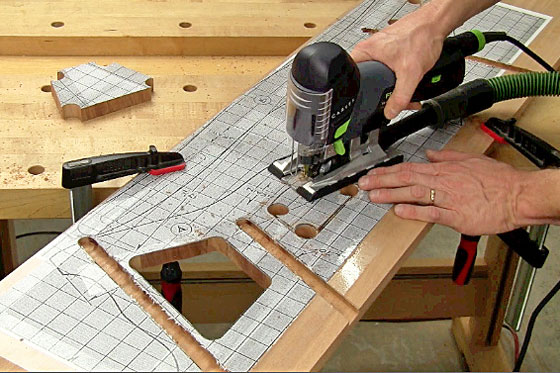
Now go ahead and cut out the upper and lower sides. Use a jigsaw for the curved cuts (see Figure 4). Switch to a circular saw, guided by a straightedge, for making the straight cuts for best results. Or, guide your jigsaw against a straightedge instead.
Smooth all of the saw cuts up to the pattern lines using an oscillating spindle sander or sanding drums in a drill press. For the broad curves, use a large-diameter drum instead of a smaller one to help reduce ripples while you sand the edges.
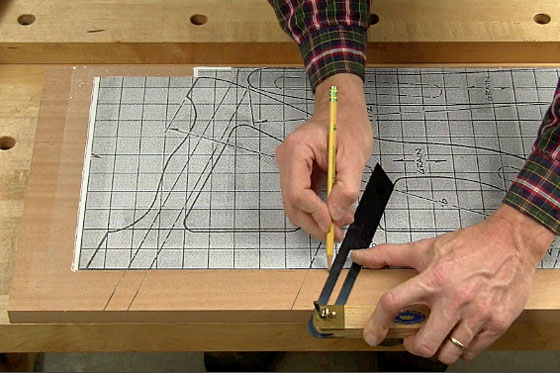
When your first upper and lower side pieces are ready, set them on the second panel and trace their shapes to form the second upper and lower side pieces. While you’re at it, carefully transfer the spline and step dadoes onto the second part’s shapes so you can use them as references for setting up the routing cuts (see Figure 5).
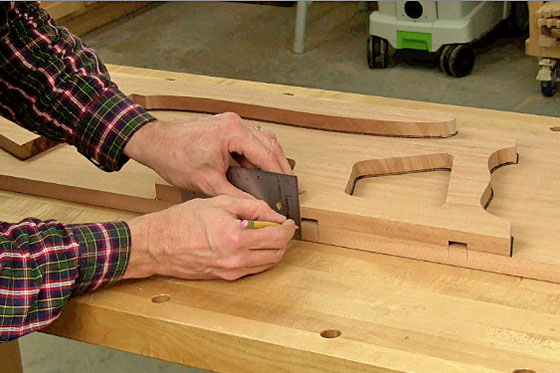
Adjust your T-bevel gauge to the angles of the dadoes on the first workpieces, and transfer these angles to the second set of workpieces. Draw layout lines for the dadoes.
With the dadoes located and marked, now you can cut the second upper and lower side workpieces to rough shape. Then clamp the slotted jig in place to rout the spline and step dadoes. Double-check your accuracy before turning on the router — these dadoes must match their counterparts on the other workpieces.
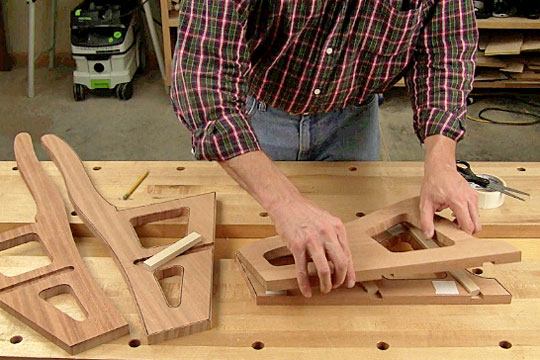
After cutting the dadoes, make a couple of short filler pieces from 1/2-in.-thick scrap to fit the dado slots. This way, you can register each pair of upper and lower side pieces for template-routing the parts to match. Assemble the pieces with the filler strips installed, and use some double-sided tape to hold the pairs of parts together (see Figure 6).
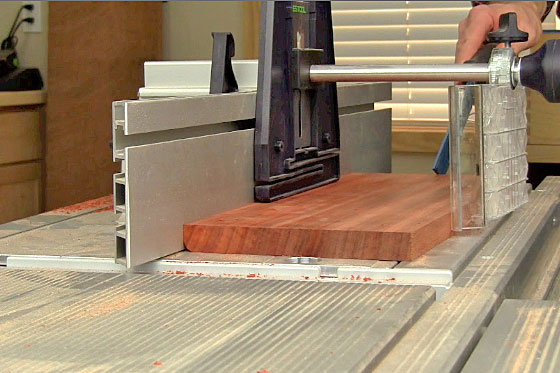
Next, head to your router table and template-rout the upper and lower side pieces to match one another (see Figure 7). Depending on the grain pattern of the wood you are using for this project, you may need to switch from a flush-trim bit with the bearing on top to a pattern bit with the bearing on the bottom, and flip the workpieces over to rout some of the curves. The goal is to avoid routing against the grain pattern, which can lead to tearout. Plan your routing process carefully before you begin.

Separate the upper and lower sides after routing them. Now, cut two 1/4-in.-thick splines for the lower side pieces from matching wood, and glue and clamp them into place. When the glue dries, trim the splines flush with the edges of the lower sides.
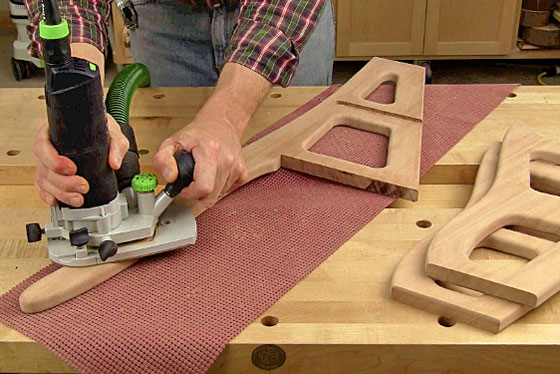
This is a good time to ease the sharp edges of the upper and lower sides with a 1/4-in. roundover bit. Remember to rout clockwise for the inside cutouts and counterclockwise for the outer edges to avoid making climb cuts (see Figure 8).
Set your side pieces aside for a spell, and joint and plane stock for the back, stretcher, four steps and seat. Rip and crosscut these parts to size.
Apply the full-size, gridded patterns for the chair back and stretcher to their workpieces using spray adhesive, and roll the patterns smooth. Then step over to your drill press to drill the ends of the handle cutout on the chair back with a 1-dia. Forstner bit. Hold this workpiece against a clamped fence when drilling these two holes to keep them in perfect alignment. Cut out the waste piece in between to open up the handle shape (see Figure 9). Cut out the back piece and stretcher now as well, and sand their edges smooth.
The back edges of the first and third steps need to be bullnosed in order to fit into the curved ends of the dadoes in the side pieces. This is easy to do with a couple of passes against a 3/8-in.-radius roundover bit in the router table (see Figure 10).
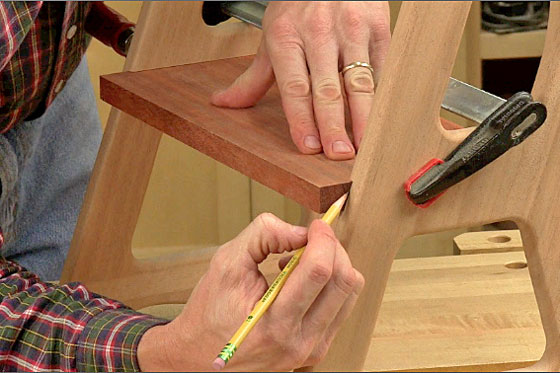
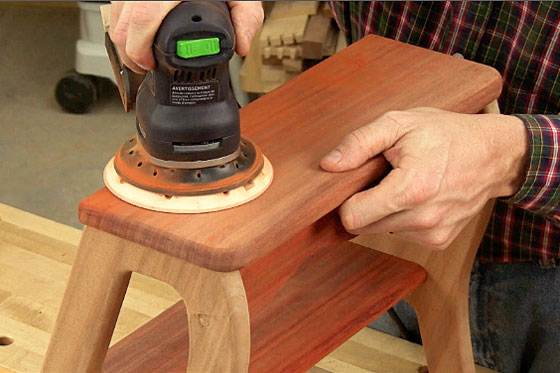
Now, sand the back, stretcher, steps and sides up through the grits to 180. Make sure the curves and transitions are smooth. Then slip the first and third steps into their dadoes, clamp the parts temporarily, and mark any overhang where the steps protrude past the sides (see Figure 11). Tilt your table saw blade to match these angles — it should be about 20 degrees — and trim the steps to final width. While you’re at it, the inside edge of the top step also needs to be cut to this angle.
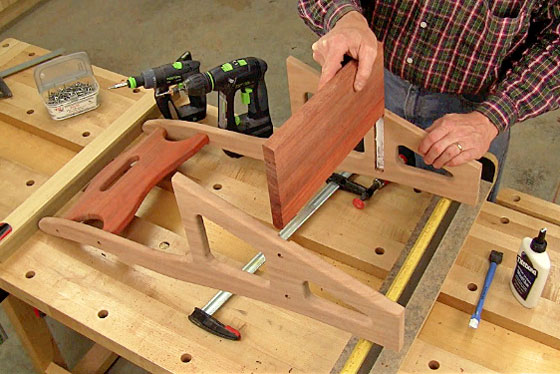
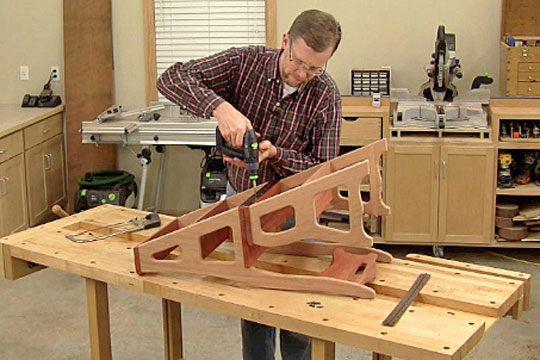
At this point, you can start assembling the project by clamping the back between the upper sides. Position the back piece about 2 inches below the top ends of the upper sides and center it, front to back. Trace around the back’s four points of contact with the sides: these will be your only references for positioning the assembly screws. Then unclamp the parts and drill 1/8-in. pilot holes through the sides at the centers of each of the four traced references. Re-assemble the back and sides, and use the pilot holes as guides for drilling countersunk screw holes through the outside faces of the sides and into the back. Drive a 1-1/2-in. flathead wood screw into each of these holes to attach the back (see Figure 12).
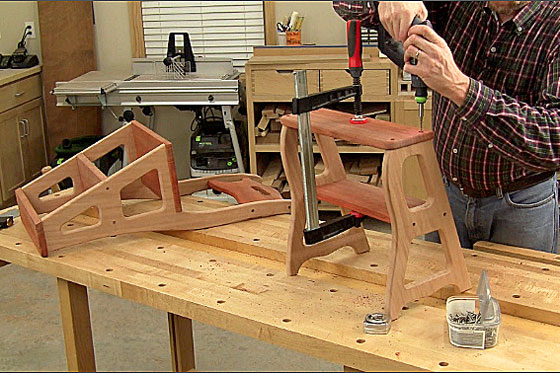
Add the third step next. Spread glue in the dadoes before slipping the step into place and driving screws through the upper sides to secure it (see Figure 13). Then fasten the seat and top step workpieces to the upper sides with more 1-1/2-in. wood screws, driven into countersunk pilot holes, to complete this assembly.
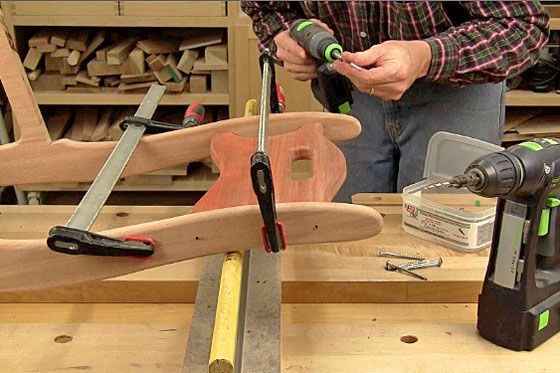
Build the lower framework by bringing the lower sides together with the first step, using glue and countersunk 1-1/2-in. screws to secure the parts. Add the second step, gluing and screwing it down to the top of the lower assembly (see Figure 14). Then fit the stretcher into place between the sides and attach it with more screws.
All of the exposed screw heads need to be hidden under wood plugs, so make those next at the drill press with a plug cutter. Make the wood plugs from a piece of scrap left over from your project wood. For safety, hold the workpiece against a clamped fence to immobilize it when cutting the plugs.
Install the wood plugs with glue, and trim them flush with a flush-cut saw, a chisel or an oscillating tool after the glue dries. Sand the plugs smooth (see Figure 15).
Wrap up this project by joining the upper and lower subassemblies with a 15-in.-long piece of piano hinge. When you cut the hinge to length, make sure the outermost holes are equal distances from the ends of the hinge so it looks balanced. Line up the edges of the hinge leaves flush with the top and bottom faces of the second step and seat, before driving screws into each of the hinge holes (see Figure 16).
Apply your finish of choice to complete this handy, stylish Convertible Step Stool and Chair.


