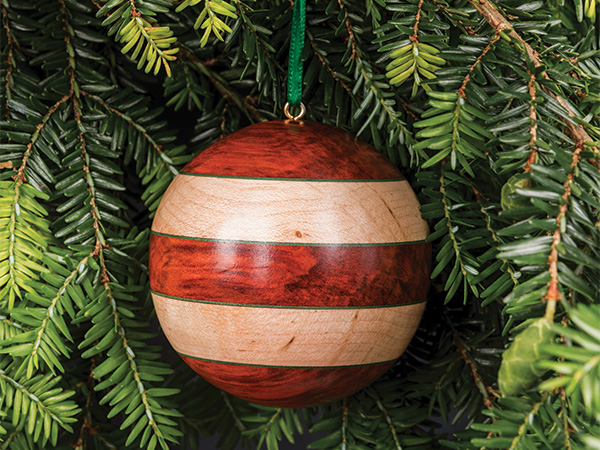
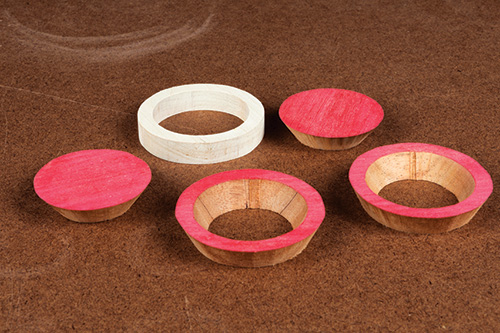
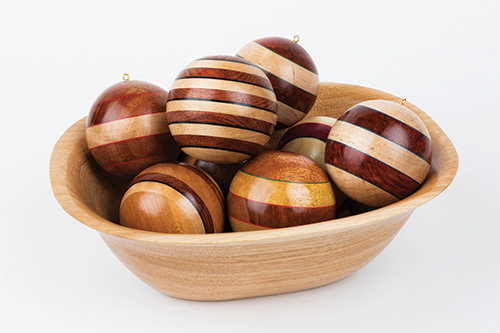
Looking for a unique gift or special decoration this holiday season? Consider using your scroll saw’s versatility to create hollow spheres that are eye-catching, yet easy to make. The options are almost limitless: use standard hardwoods for year-round decorations; add colored exotics or dyed veneer for a holiday theme; or go for maximum impact with unusual laminations and color schemes. Each sphere is made from five pieces of 1/2″-thick wood: a straight center ring, two angled rings and two solid end pieces, all glued together then sanded to shape.
I never thought of using stacked rings to create a sphere until a friend asked for help creating a hollow blank he could turn on his lathe to make a round holiday ornament. As I worked up the specs, I thought it likely that the blank could also be shaped with bowl sanders. My first attempts were rather crude, but once I tweaked the patterns and cutting angles and worked out a sanding strategy, things “took shape” quite easily.
However, I did learn that sanding a small blank into a sphere is different from shaping bowl rings. So even if you’re familiar with bowl-making tools and techniques, do a trial run (or two) with scrap before starting the actual projects.
Choosing the Stock
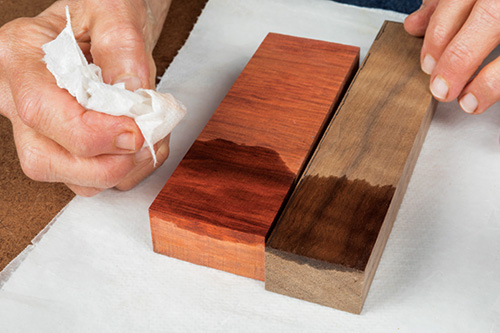
The beauty of the ornament and its ease of sanding are affected by your wood choices. Whether you use standard hardwoods like walnut, cherry and maple, or prefer exotics like purpleheart, redheart, padauk and yellowheart, be sure that adjacent layers contrast attractively. If you’re uncertain how a combination will look when finished, apply mineral spirits for a good approximation. In addition, since dense stock sands more slowly than softer wood, choose pieces that sand similarly, or you’ll end up with ridges instead of smooth curves.
Whether plain or laminated, all stock for this project must be 1/2″ thick for the angled pieces to align correctly. For a single ornament, you’ll need one the same stock. In addition to saving wood, it’s easier to laminate one large piece than many smaller ones.
Jingle Balls
It’s easy to add a festive sound to your holiday spheres.
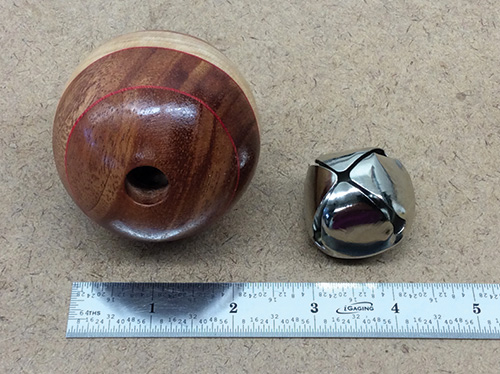
1. Select a jingle bell with a loud, clear sound, sized between 1″ and 1-1/2″ in diameter. It will fit inside the sphere, but won’t fall through the bottom hole. (The author sourced hers from Amazon.com, using the bells found in the ENJOY PET brand 7 Premium Extra Large Loud 1.4″ Doorbells for Puppies Training.)
2. Cut the five pieces as directed in the instructions, but do not remove the pattern from one of the two end pieces. Use a #62 or other small bit to drill a through hole at the center mark shown on the pattern. This transfers the mark to the smaller face. Place the end piece with the smaller face up and secure it to keep it from rotating. Use a 1/2″-dia. brad-point bit to drill a through hole at the center mark.
3. Stack, number and glue the pieces together, but do not attach the drilled end piece. Clamp the four pieces and let the glue dry.
4. Place the jingle bell inside the glued up assembly. Glue on the drilled end piece. Clamp and let dry completely.
5. Shape the sphere as directed, and soften the edges of the 1/2″ hole. Use a shop vacuum to remove sanding dust from the inside of the sphere.
6. Attach a 5 mm screw eye and apply finish as directed.
Design Options
Attractive ornaments can be made from plain stock, but a layer of thin dyed veneer adds visual interest without significantly affecting stock thickness. Veneer is available in many shades, and it retains its color — an important consideration for items intended as keepsakes or family heirlooms. You can laminate one or both faces of the substrate, depending on your design. Two-sided laminations can be used for center or angled rings. One-sided laminations can be used for angled rings and end pieces, but be sure to cut end pieces with the veneered side facing up. If you cut them from the plain face, the veneer will be sanded away during shaping.
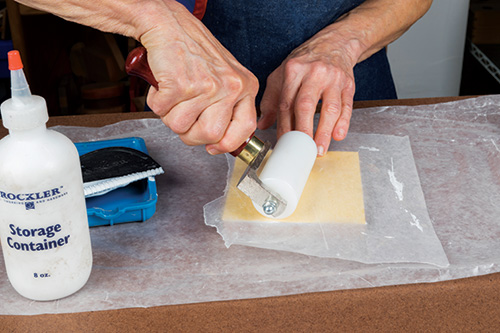
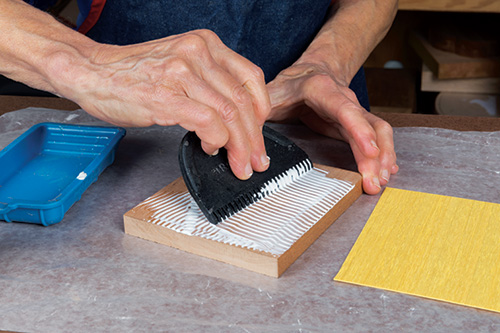
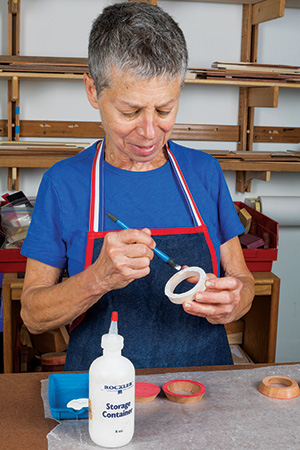
To laminate your stock, apply a generous amount of glue to the substrate, spread it evenly, position the piece(s) of veneer, and use a roller for a good bond. Clamp the lamination and let it dry fully.
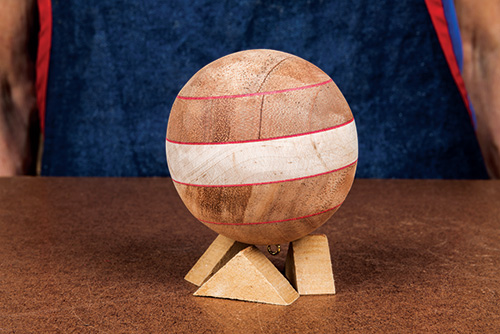
To make a sphere with narrow stripes, create the 1/2″-thick stock from two contrasting pieces of wood, each 1/4″ thick and large enough to fit all five pattern pieces. For additional interest, you can sandwich a piece of thin veneer between the 1/4″ pieces of wood.
Cutting and Gluing the Pieces
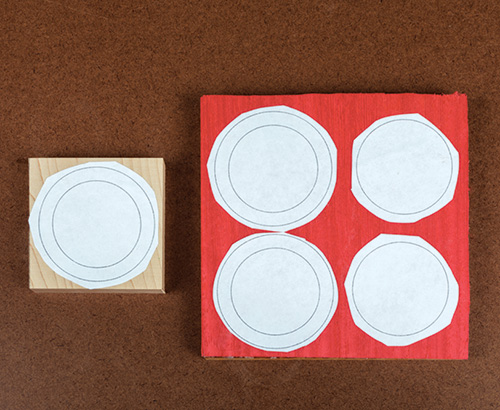
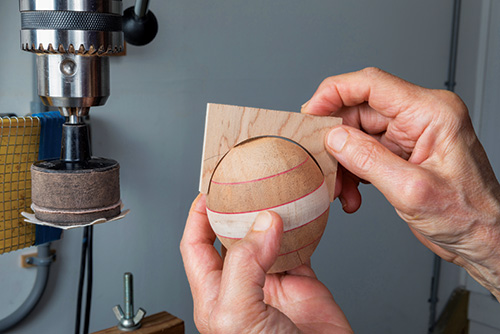
Once your stock is ready, attach the five patterns to the appropriate pieces of wood, using repositionable adhesive. Use an awl to mark the center of each end piece where indicated on the pattern. You’ll use this mark to maintain symmetry as you shape the sphere. If you’d rather not use patterns, draw the rings and circles directly on the stock with a pencil compass, being careful not to change the pattern specs. The narrow-striped ornament needs a special layout for the stripes to be continuous throughout the sphere. Attach patterns for the center ring, an angled ring and an end piece on one face of the laminated blank. Then, invert the blank and attach the remaining two patterns to the opposite face. The pieces are then cut, glued and shaped the same as any other sphere.
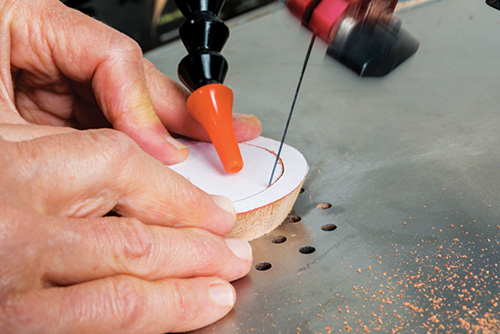

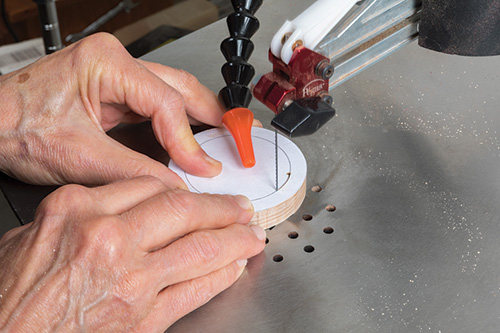
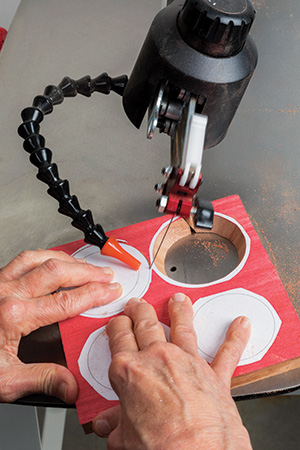
With the saw table perpendicular to the blade, cut the center ring. I do this by cutting in straight to the outer circle, pivoting on the cut line, then cutting around the circle. Entering the wood this way keeps the circle from pivoting as you end the cut. Drill a straight blade entry hole on the inner circle. Insert the blade and cut the inner circle. Next, set the saw to cut the angled rings. If your saw has a tilting arm, tilt it 25° to the right. If your saw has a tilting table, tilt the left side of the table down to 25°.
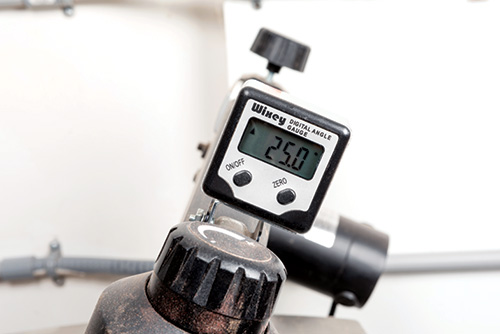
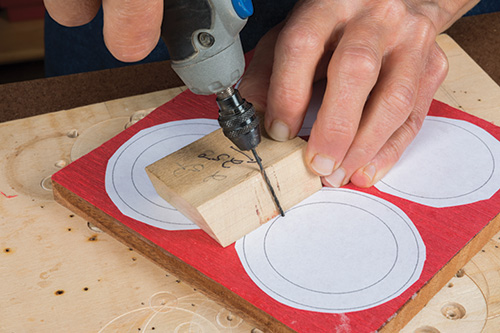
Using a shop-made guide, drill a 25° angle blade entry hole on the inside circle of each angled ring, drilling toward the center of the ring. Cut the outer circle first, cutting in a clockwise direction. Insert the blade through the angled entry hole and cut the inner circle in the same direction. To cut the solid end pieces, tilt the saw arm or table the same way as for the rings, but set it to 35°. Cut around each circle in a clockwise direction.
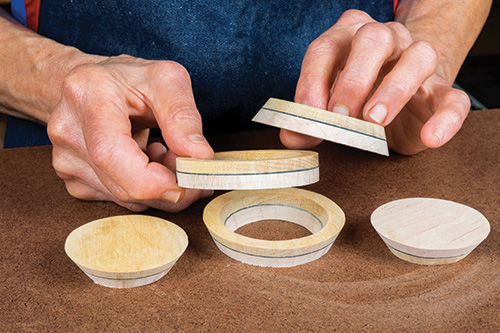
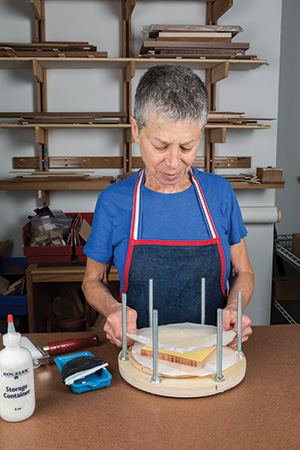
Stack the five pieces, rotating them for the most attractive grain match. Number the pieces consecutively on their fronts to help maintain their orientation during glue-up. Start by gluing the angled rings to the center ring, making sure that the edges of adjacent components line up precisely.
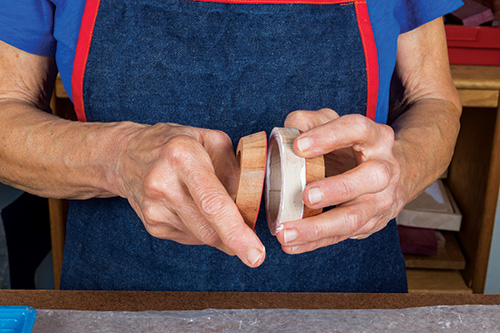
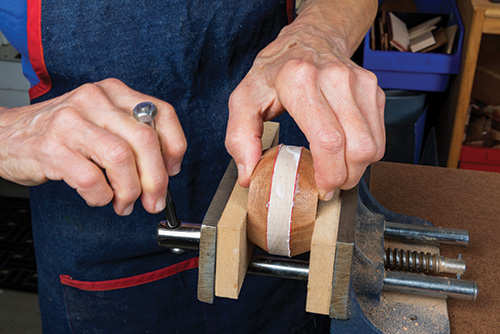
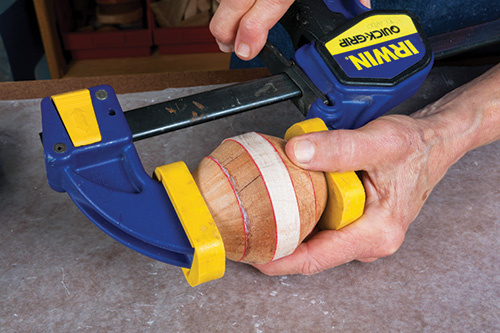
To minimize slippage when clamping pressure is applied, I prefer to use a wood glue with a quick grab, such as Weldbond®, available on Amazon.com. Clamp the assembly briefly in a clamp or vise. Remove it, correct any slippage, then glue on the end pieces. Clamp the assembly and let it dry fully.
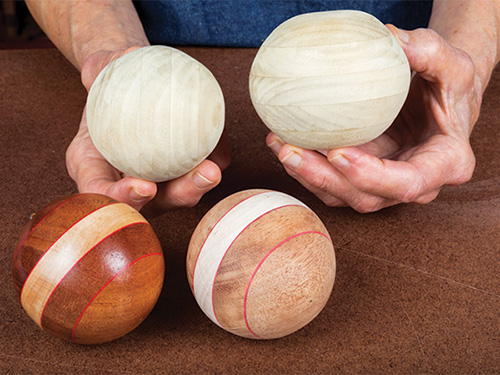
Completing the Sphere
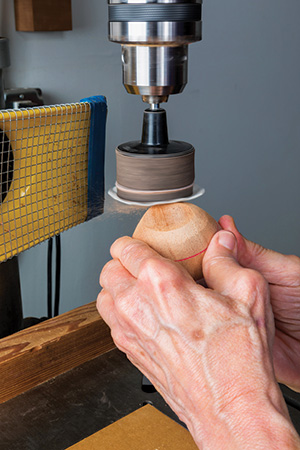
To begin transforming this rough, roundish object into a smooth, symmetrical orb, chuck a standard-density 2″ or 3″ flexible pad sander with 80-grit disc into a drill press. The larger size pad removes wood more quickly, but the smaller one gives better control. With the workpiece held horizontally, start sanding at the center ring, shaping one edge to meet the adjacent ring in a smooth curve. Repeat with the other edge. Continue shaping the sides, working from the center toward the ends, and checking constantly for roundness and symmetry. Do not shape the edges or tops of the end pieces yet. When the sides are shaped, sand progressively through the grits to 150.


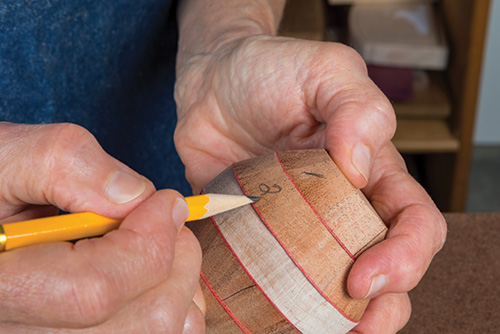
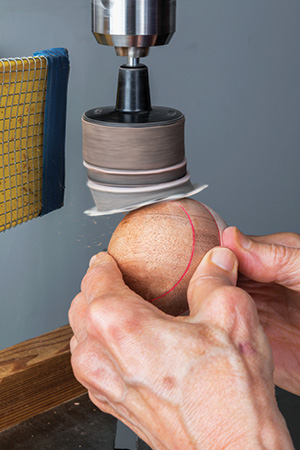
Since shaping the end pieces is guided primarily by eye, you’ll find it helpful to make a semicircular template with a 2-9/16″-diameter cutout to check your progress. Using a 2″ pad and 80-grit disc, position the workpiece at a 45° angle to the pad. Start by sanding down the “shoulders” of the end pieces, then sand gradually towards the awl mark. As the curve starts taking shape, use the template to determine where wood needs to be removed, adjusting the position of the workpiece as needed.
When you’re satisfied with the profile, sand the newly shaped areas to 150-grit, then sand the entire sphere to 240. Attach a soft interface pad to the sander to avoid changing the shape of the sphere, and sand to 320-grit. Finish by hand-sanding with foam-backed sandpaper to remove minor irregularities. Keep in mind that even if the shaping is slightly “off,” as long as the orb is smooth and symmetrical, nobody will know that this was not your original intent.
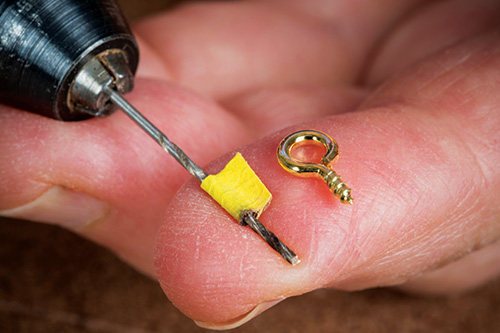
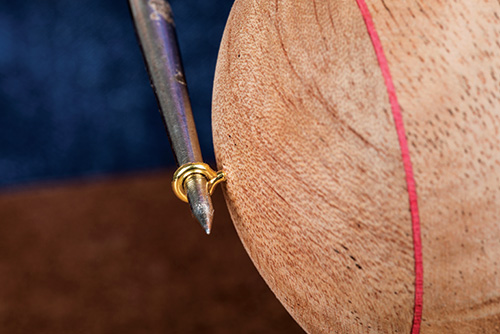
I use 5 mm gold-colored screw eyes for spheres intended for hanging, since the screw eyes are attractive, unobtrusive and sturdy. Because the threaded portion is short and thin, I use a #62 wire size drill bit and rotary tool to drill the hole, and I mark the length of the threaded portion on the bit with tape.

Clamp the sphere firmly to stabilize it. Deepen the existing awl mark to prevent slippage as you start the hole, then drill to the marked depth. Screw the hanger into place, using an awl, if needed, for leverage.
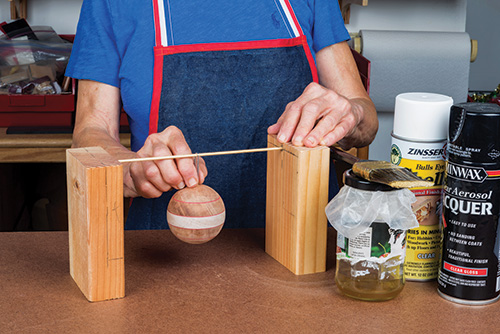
Attach small paper clips to the screw eyes to hang the spheres for finishing, or support them from below. Apply a sealer coat of thinned shellac. When dry, smooth the surface with 320- grit sandpaper or buff with a well-worn 320-grit sanding mop. Apply additional coats of a clear finish of your choice.

Once your family gets a glimpse of these unique, beautiful decorations, be prepared to make lots of colorful sanding dust!


