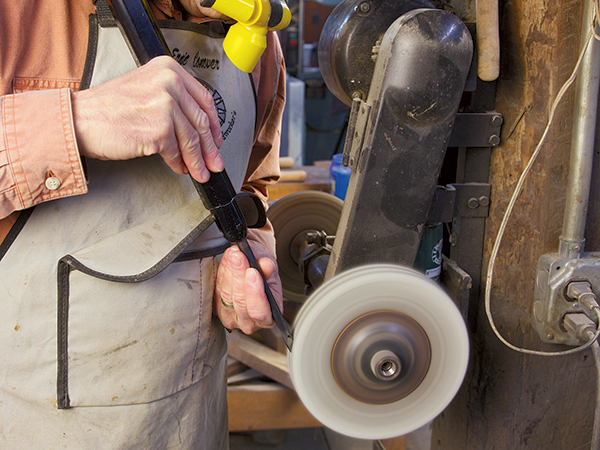
Today we will look at an aftermarket jig which, used in combination with your grinder, helps make grinding much more assured. We’ll finish this two-part series focusing on buffers, which are the quickest way to bring spindle turning tools to a keen edge. Although everyone calls them jigs, grinding aids are actually fixtures, but as this boat has left the dock, I won’t try to row upstream in this article.
Although everyone calls them jigs, grinding aids are actually fixtures. This is because a “jig” guides the cutting tool, using the work as reference, and a “fixture” guides the work, using the cutting tool as reference. Your turning tool is the work, and the fixture guides it using the grinding wheel (the cutting tool) as reference.
One of the most widely used systems of jigs for sharpening turning tools — and frankly the one I prefer — is made by Oneway Manufacturing in Stratford, Ontario, Canada.
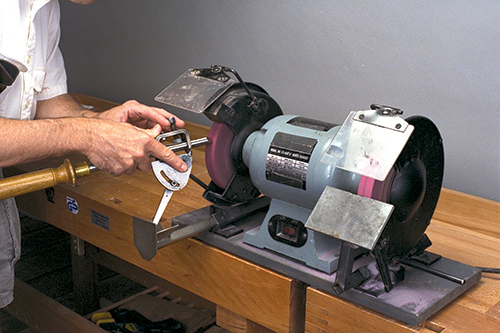
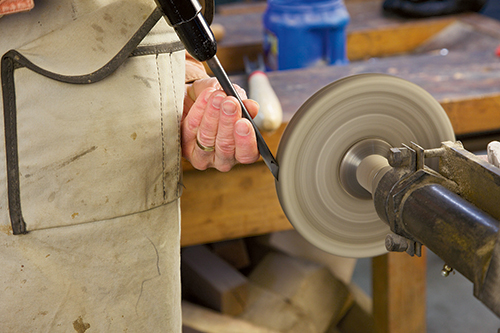
Their basic Wolverine set costs about $88 and consists of two clamping tubes that fit under the wheels of your grinder. Either will accept an arm with a pocket at one end. The kit also includes a quality platform rest. To sharpen gouges you also need their Vari-Grind gooseneck jig that works in combination with the pocket jig and costs an additional $53. So let’s get started with how to use this system. Much of this also applies to similar sharpening systems on the market.
All grinders come with a small platform rest for each wheel that is designed for grinding small HSS (high speed steel) cutters and twist drills in a machine shop. Turners generally replace this rest with one that has a much larger platform that is easily adjustable. You can get aftermarket replacements or even build your own. The platform rest is great for scrapers, spindle roughing out gouges or parting tools.
When in use, scrapers do not cut with a sharp edge presented at an acute angle in the way that the rest of our turning tools do. For that reason, scrapers are ground or burnished to a burred edge. Because the depth of cut is limited to the height of the burr (which is only a few thousandths of an inch high), you only need about a 15° or so grinding angle for your cutting clearance.
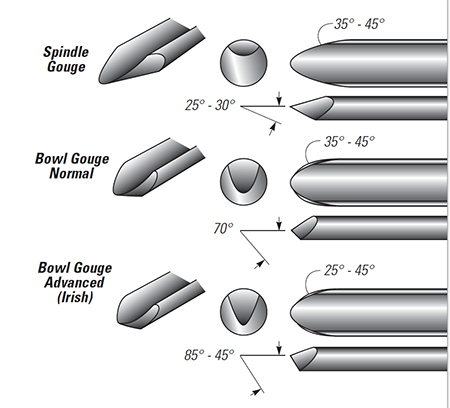
While my suggested grinding angles are fine for spindle gouges regardless of your turning skill, my bowl gouge suggestions are simply good “starting-out” angles for beginning turners. Grinds for bowl gouges tend to get very personal and are also modified for various types of turning. Therefore, great variations from my basic grind are possible as skill grows.
Three Basic Grinds
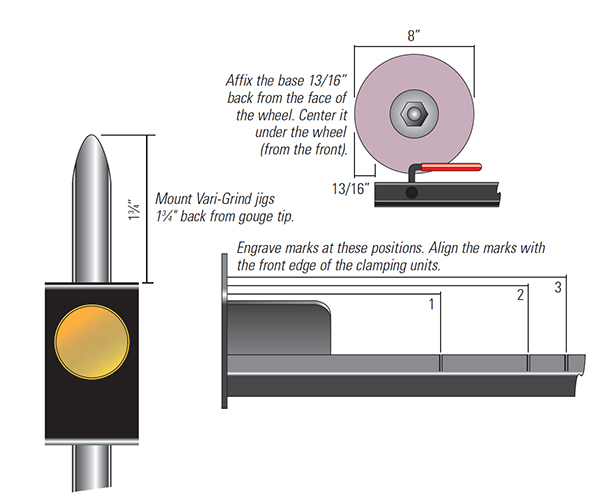
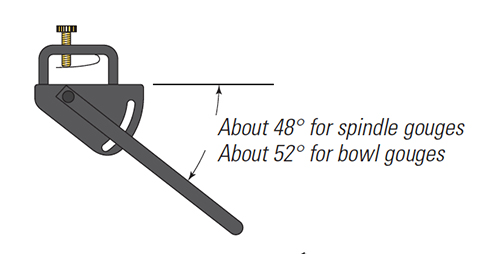
If you’ll look at the illustration below, I’ve provided three locations at which to set the V-arm of the jig. By marking these settings on the V-arm, you’ll get consistent grinding angles that are easily repeated.
| Setting | Measurement | Tool |
| 1 | 4-3/8″ | Spindle gouge |
| 2 | 5-7/8″ | Bowl gouges (advanced grind) |
| 3 | 6-7/8″ | Bowl gouges (normal grind) |
These suggested locations will work for most grinders. However, if you are using alower cost grinder, you may need to add a plywood base under the machine and then make some adjustments.
Also, the settings are for an 8″ grinder, so if you are using a smaller or larger wheeled grinder, you’ll need to adjust for that as well.
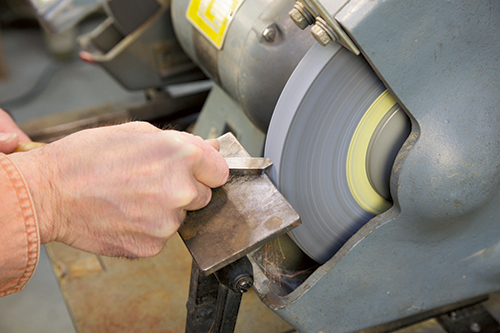
Tools on the Side
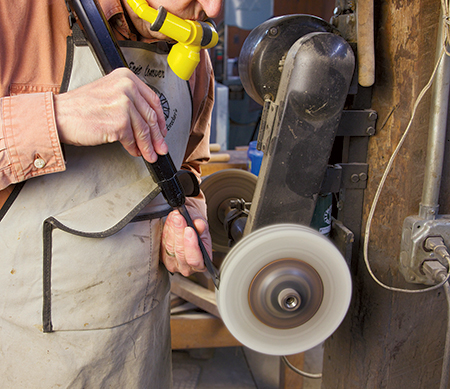
The remaining tools to grind are the skew and its cousins the beading and parting tools. These chisels need flat, rather than concave, grinds. All commercial jigs impart a hollow grind, which will catch in your stock much more readily. The only way I know to obtain a flat grind is on the side of the wheel, a practice that is proscribed by any grinder manufacturers.
With that said, I do not know a machinist that does not grind on the side of the wheel occasionally, and there are twist drill sharpening jigs that are designed to use the side of the wheel. Common sense is what is needed. I won’t grind on the side of a wheel unless it’s at least 1″ thick, and only then with a light touch. Grinding a skew is only needed rarely, usually due to a mishap. Day-to-day sharpening of this tool is on whetstones.
Grind, Don’t Burn
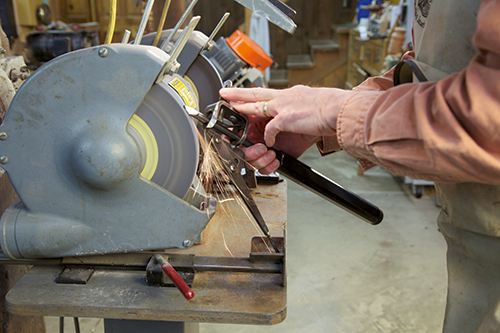
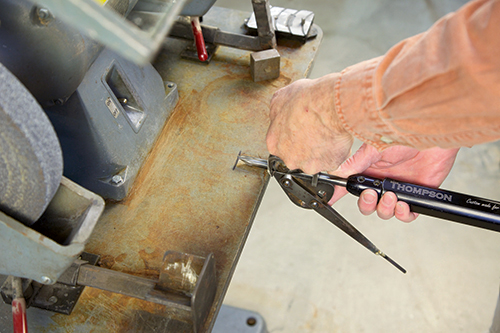
The great advantage of high speed steel (HSS) is that you do not have to worry much at all about overheating tools during grinding. Unfortunately, conventional carbon steel tools cannot be heated over about 350° without drawing the temper. If in doubt if a tool is HSS or carbon steel, it is easy to spark test it. As shown in the photo, the color and characteristics of the spark will tell you which you have.
Buffers
While bowl gouges and scrapers can be used directly from the grinder, spindle tools work much better if honed to a razor edge, the same as bench chisels and plane blades. As I stated earlier, I maintain the edges on my skews — and beading and parting tools — on whetstones. While stones can be used to hone gouges, it is time-consuming and difficult to get all areas of the working edge to keen sharpness. A small dull spot means that a spindle gouge rolls a bead to the left smoothly but goes awry to the right. You blame yourself when it is, in actuality, the tool, because you are pushing harder when you come to the dull spot. I’ve found the quickest and most assured way to come up with superlative edges on spindle and spindle roughing-out gouges is with a buffer.
The buffer is best made yourself from a simple jackshaft unit with 1/2″ arbors that can be purchased from any industrial hardware retailer. It needs to be powered by a 1,700 rpm motor in the 1/4- to 1/2 horsepower range. Pulleys should be sized to give a surface speed at the periphery of the wheels of 3,500 feet per minute. You will need two kinds of 8″ diameter buffing wheels. For the left side, you will need spiral-sewn wheels, which are a hard resilient wheel. For the right side, you will need cushion-sewn wheels, which are much softer and fluffier. Wheels are sold in 1/2″ sections, so you will have to buy two to three sections of each kind of wheel to give yourself a 1″ to 1-1⁄2″ working wheel.
On the left wheel, I apply medium fine (180-grit) Satin Finish Compound, which is about $7 per tube. It is a mixture of a water-based glue and emery compound. Don’t buy a lot as it doesn’t have a good shelf life unless refrigerated. The newly opened tube needs to be kept on a damp pad in a cup or jar. This compound turns our resilient spiral-sewn wheel into the equivalent of a very fine abrasive belt. It is crayoned on, but needs about one to three minutes drying time before work can start. Buffing the bevel and the flute will remove the grinding scratches and all trace of burr.
On the right wheel, I use Chrome Compound (some companies call this Stainless Steel Compound) that comes in a white bar for about $13. This wax-based compound is crayoned onto our cushion-sewn wheel. Work can start immediately bringing our edge to a mirror finish. Compound, the wheels, the jackshaft and the motor can be purchased online at www.mcmaster.com.
A very important safety point is that you always buff off of an edge (not into the edge, as done when grinding). Buffing into the edge will result in the tool being thrown back at you. The trick is to present the bevel or the flute at a tangent to the wheel. The center of contact should be a bit behind the edge so that when the wheel deflects it bleeds to the edge. Have fun and enjoy your sharp tools!


