Having had the privilege of trying almost any lathe or turning accessory marketed in the last 30 years has spoiled me immensely. My recent review of mini lathes was an epiphany in this regard: I realized you did not have to have a big, heavy, expensive lathe and a gaggle of chucks and gadgets to have a very rewarding experience. In fact, there is great satisfaction in getting first-rate results with basic methods. Yes, a food processor is faster, but a sharp knife gets the job done just as well. Therefore, I have decided to turn the clock back a score or two of years and explain how to turn a bowl on any lathe — with nothing more than the faceplate that came with it.
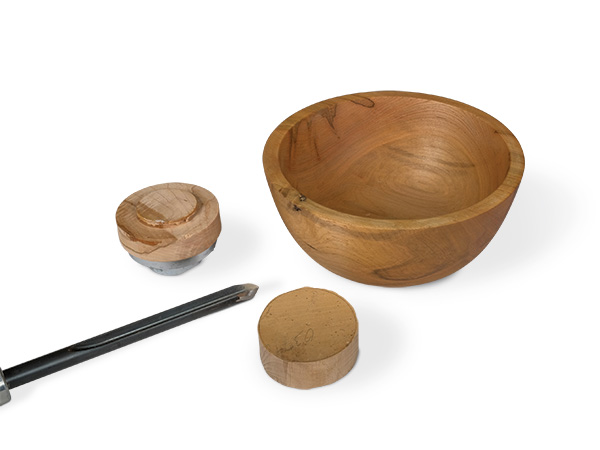
The outside of our bowl will be turned by direct attachment to a faceplate. We will then turn the bowl around and glue the freshly turned foot on a glue block: a 1-1⁄4″-thick disk of durable wood that is of slightly larger diameter than the faceplate. The thickness assumes that 1″ screws are holding the block to the faceplate. The 1-1⁄4″ thickness allows the bowl to be well above the screw tips.
Cyanoacrylate is the best glue for this purpose because it will still bond if the wood is wet and, with the aid of a catalyst spray, dries very quickly. This allows you to turn the bowl from green wood if you wish, but there is nothing wrong with turning a bowl from dry wood if you have a suitable piece. Orienting the base of the bowl to what was the outside of the tree and the mouth to the inside achieves the strongest grain pattern.
Turn the Outside

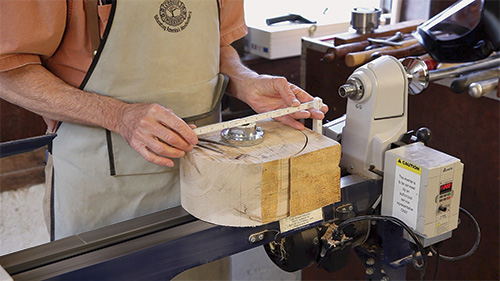
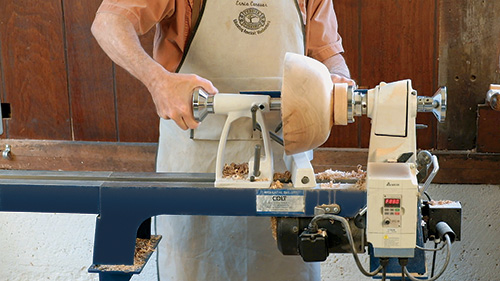
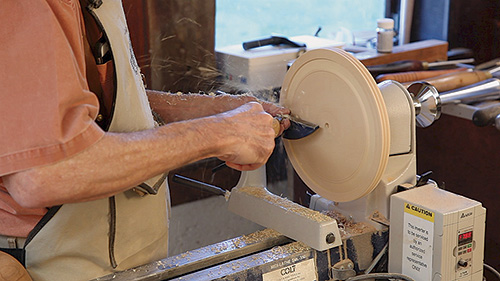
Green wood or dry, you need to bandsaw a round billet that is slightly less in diameter than the swing of your lathe. My Colt Midi Lathe has a 14″ swing, but I sized the blank to a 9″ diameter to show that a nice bowl could be turned with a 10″ mini lathe. You could simply screw the faceplate directly to the side that will be the base of your bowl, but this method presents two problems. The first is that turning the outside of the bowl is awkward, especially for a new turner. Secondly, this doesn’t allow the banjo to be placed under the work, which means you cannot place the tool-rest for proper support of the tool.
A much better plan is to screw the faceplate to the side that will be the mouth of the bowl and turn the outside first. In this case, banjo and tool-rest placement are straightforward. Using the bowl gouge to make the S curve cuts necessary to shape the bowl and foot is intuitive.
Speeds ranging between 250 rpm (if the blank is out of round or not balanced well) to a maximum of 1,200 rpm are appropriate. In fact, going faster than 1,200 rpm is counterproductive for bowl turning. I think that it is also much easier to see the emerging shape of your bowl and create a foot that is small enough to be aesthetically correct when turning in this orientation.
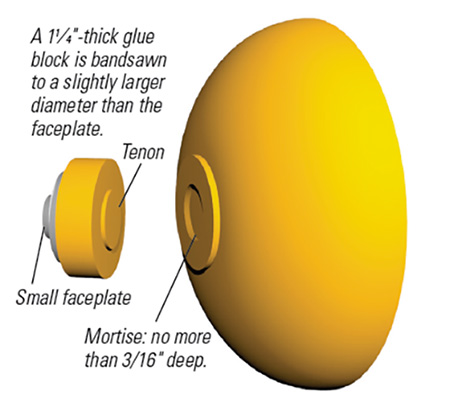
Turning the foot and, in the center of it, a mortise, to receive the glue block are the last steps in turning the outside. This is a good time to sand the outside, starting with 40- to 60-grit sandpaper and working in small jumps up to 180-grit.
Scraping the mortise is a simple but precise operation done with a V-shaped scraper — what I have dubbed a chucking scraper. The details of this operation are outlined in this page’s illustration. The tenon does not have to be a tight fit with the mortise; in fact, 1/32″ of slop is better than a tight fit. You also don’t want the tenon to bottom out in the mortise, or the joint will fail. The strength is from the flat glue areas around the mortise/tenon, both of which have to be dead-flat to create a strong bond.
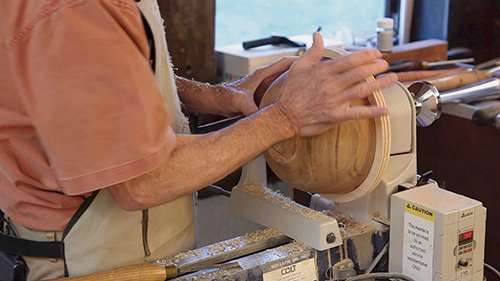
Once satisfied with the fit, apply medium-viscosity cyanoacrylate glue to the area around the tenon on the glue block, spray catalyst on the foot of the bowl, and bring the two together. Now bring up the tailstock and apply pressure with the tailstock quill, turning your lathe into a clamp. Wait 5 to 10 minutes and start turning. You are rewarded with a strong joint and much better centering than you generally achieve with metal four-jaw scroll chucks.
Turn the Inside
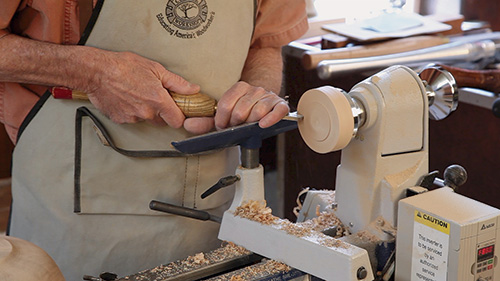
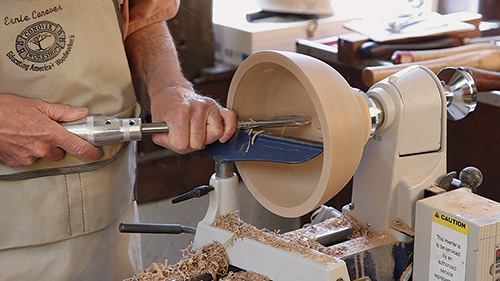
Use a bowl gouge to hollow out your bowl. Starting in the center, use a series of sweeping cuts to bring the interior to the desired shape and a uniform wall thickness. Then sand the interior, again starting with 40- to 60-grit and working to 180-grit. Now is a good time to apply the first coat of finish if you wish. I generally use an oil finish such as Waterlox or Minwax®.
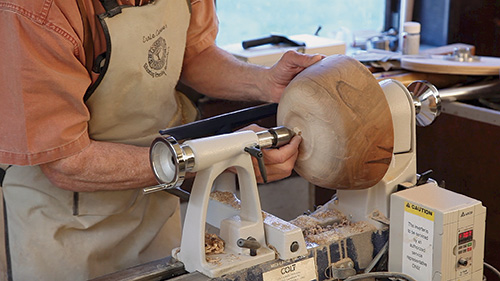
Employ a cutoff (parting) tool to separate your almost-finished bowl from the glue block. Cut the glue block, keeping the right edge of the tool on the glue line. I cut about two-thirds of the foot diameter, stop the lathe, then lightly tap the bowl, and it generally comes right off in my other hand. If not, cut a bit deeper and try again. It is better not to harshly sever the bowl from the glue block with the parting tool: just use it to encourage separation.
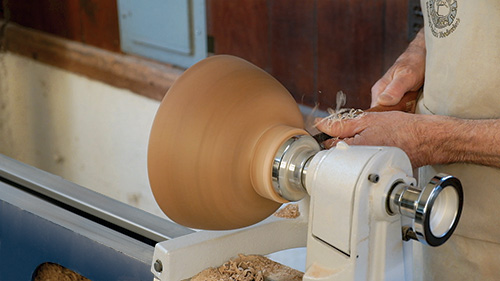
The last task is to reverse chuck the bowl. Yes, we need one more chucking, to remove all traces of the mortise, leaving a refined foot reminiscent of pottery. This can be done two different ways. The first is to mount a 3/4″- to 1″-thick disk of wood that is slightly bigger than the bowl and scrape a tapered groove that the bowl will lock into. Fitting this jam chuck may sound daunting, but it is not that hard to do. Use the chucking scraper to create a channel a bit wider than the wall of your bowl, with the outside wall tapered inward about 3°. It takes patience, but just keep stopping the lathe and testing the fit until you’ve achieved a locking taper.

The second method is to attach a block of wood to the faceplate and turn it to a rounded form. Place a square of cloth inside your bowl, place the bowl and cloth over the block, and pin it there with the tailstock quill and a live center.
Putting a 1/4″ square of wood between the center point and the bowl will keep the center from damaging your bowl. You can now refine the foot and be left with only a small area at the center that is easy to sand out. Apply more coats of finish off of the lathe.
Faceplate Advantages
At last, set the bowl on the kitchen table and let everyone admire it — while you order one or two more faceplates. An extra faceplate or so is very handy to have for this process. Ideally, you would use one for mounting the blank, a second with a glue block for fitting to the foot, and a third with the disk for your jam chuck. Even if you purchase two more faceplates, that’s still far cheaper than buying a four-jaw scroll chuck. If you one day decide to spring for the chuck, you will be able to use it far more effectively because of your glue block experience.
When using glue blocks, you get more secure holding and better centering, and your design controls the chuck — not the other way around. I see many bowls with bases that are too big to be aesthetically pleasing because the jaws set in the chuck dictated that diameter. With faceplate turning, you won’t have that problem.


