This article, “A Different Take on Bottle Stoppers,” by Pete Blair, is from the pages of American Woodturner and is brought to you by the America Association of Woodturners (AAW) in partnership with Woodworker’s Journal.
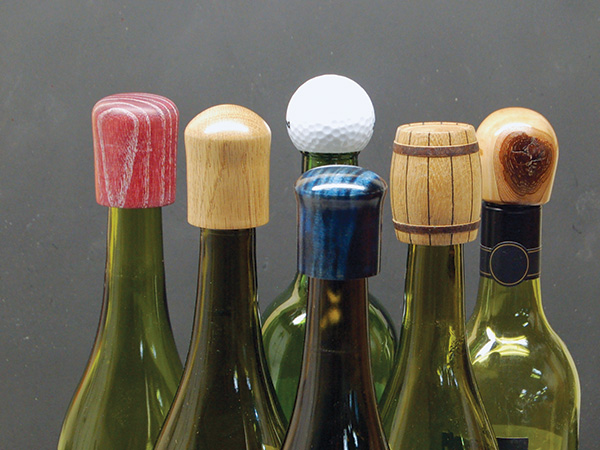
In today’s kitchens, many types of bottles can use a stopper. From olive oil to vinegar, wine bottles are only one possibility. I have made bottle stoppers utilizing everything from high-quality American-made parts to off-shore plastic, “stainless” steel that wasn’t stainless at all, and natural cork. I wanted my stoppers to be relatively inexpensive to make, while still unique. In addition, typical wine bottle stoppers often make bottles so tall, they no longer fit on my refrigerator shelves, so I designed mine to have a low profile.
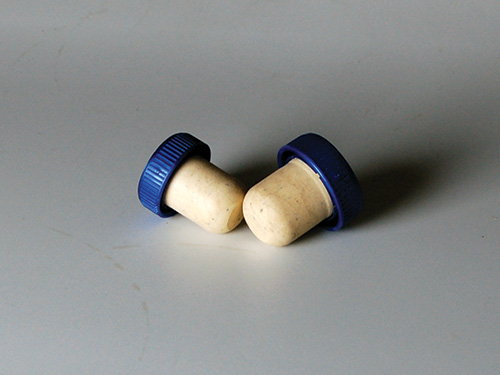
As a frugal woodturner, I looked for a less-expensive way to make the age-old stopper and wondered why natural and synthetic corks were so prevalent. I believe the answer is that they are a throwaway item and can be purchased very reasonably in bulk. A quick online search for T-top corks reveals a variety of sources. Many sizes are available; I bought 100 of the standard wine-bottle size with plastic T-tops. These cost about fifty cents each, with the price dropping as the quantity increases.
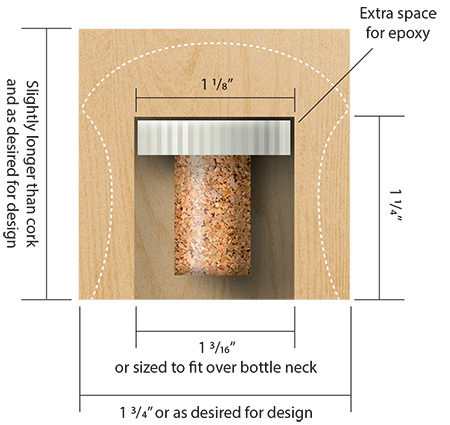
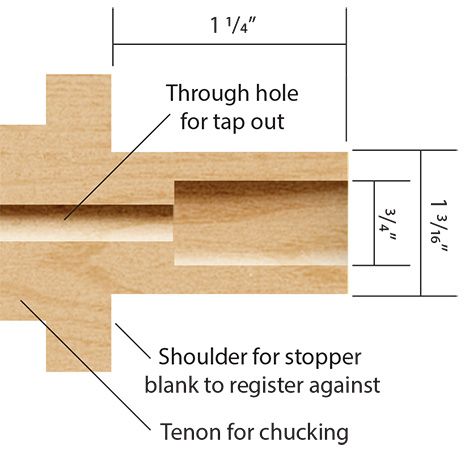
T-top corks can vary in length and diameter of both the cork and the plastic top, so all dimensions shown in Figure 1 are approximate. Adjust your stopper dimensions to the particular units you buy.
Prepare Stopper Blank
Begin by cutting a project blank approximately 2″ (5cm) square, or a little longer than that, depending on what shape you plan to turn. Grain can run lengthwise or across the blank, but remember that endgrain can be trickier to finish. Based on the diameter of your plastic T-top, bore a hole in the blank (mine was 1-3/16″, or 30mm, in diameter). This hole will be used first to mount the blank on a jam chuck, then to accept the T-top in the finished piece.
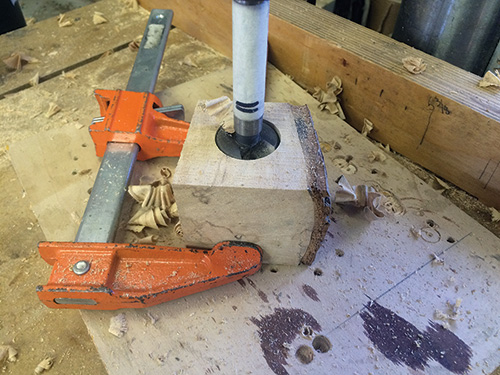
The depth of this hole should be just a little deeper than the length of the T-top and cork to ensure the finished stopper sits evenly on its base, not on the protruding end of the cork, when placed on a flat surface. If the wood is square or easily gripped in a chuck, drill the hole on the lathe. If not, use a drill press, holding odd-shaped pieces with a clamp. After boring the hole, finish-sand the end around the drilled hole, sanding by hand if drilled on a drill press.
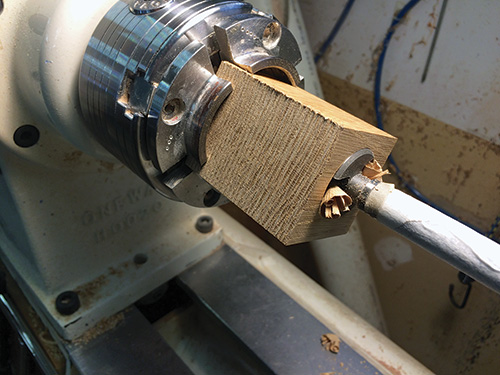
Turn a Jam Chuck
For holding the stopper blank on the lathe, turn a jam chuck, held in your chuck. Turn a spigot sized to fit snugly into the hole you drilled in the blank.
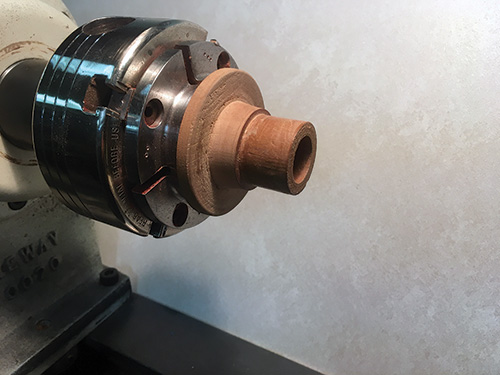
The jam chuck should have a positive tenon and shoulder for the scroll chuck to grip and register against, and a positive shoulder for the stopper blank to register against. You will also bore two concentric holes in it—a 3/4″ (19mm) hole deep enough to hold the cork and a 1/2″ (13mm) hole all the way through, to help if the cork gets stuck.
Shape the Stopper
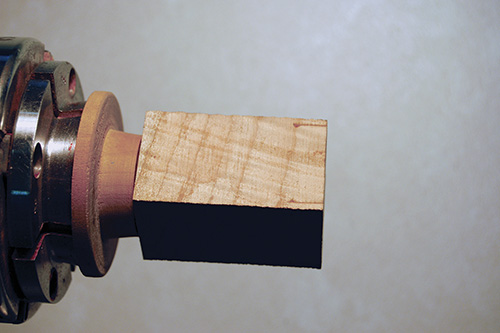
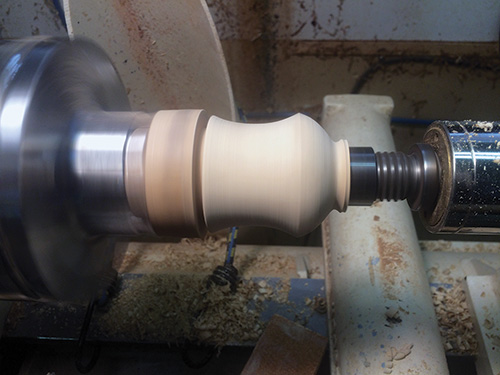
Mount the drilled stopper blank on the jam chuck and bring up the tailstock for support as you shape it. I use a washer or plastic spacer on my live center when I need to use the whole length of the blank and wish to avoid damaging the wood with the live center. But if I have enough wood to waste, I prefer to use the live center as usual.
Wood tends to change shape, and sometimes the fit on the jam chuck is not precise. I have noticed if I drill with the same bit into both endgrain and sidegrain, the fit is usually a little different. If the fit on the jam chuck is a bit loose, simply wrap a little masking tape around the spigot to take up the slack.
Turn the blank to your desired shape, leaving a small amount of material at the tailstock end. I sand to 600 or 800 grit at this point. Masking tape secures the partially finished blank on the jam chuck, allowing me to remove the tailstock and carefully complete the shape with fine, gentle cuts followed by final sanding.
If you want to apply a finish on the lathe, this is the time to do it. I use an oil/urethane blend, but cyanoacrylate (CA) glue works well, too.
Any number of turned shapes and designs can be employed. See Wine Barrel Stopper sidebar for my take on a themed version.
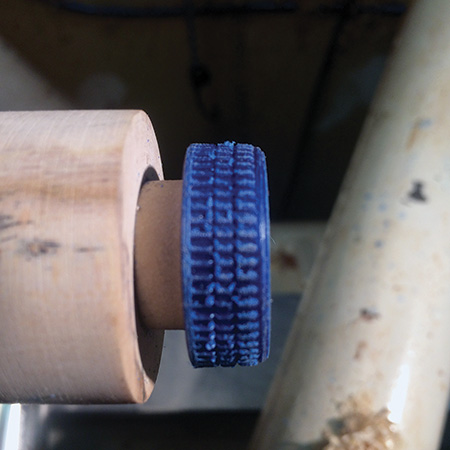
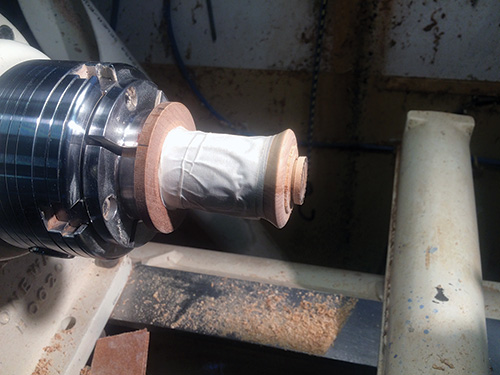
Now the holes in the jam chuck come into play. With the stopper blank removed, press a T-top cork into the larger hole. Spin it on the lathe slowly and rough up the plastic top with an abrasive. I cut a few grooves around the edges, as well. This helps form a better bond when gluing the T-top into the stopper blank. The jam chuck also allows me to later remount the completed stopper to finish or make minor adjustments.
Turn an Insertion Jig
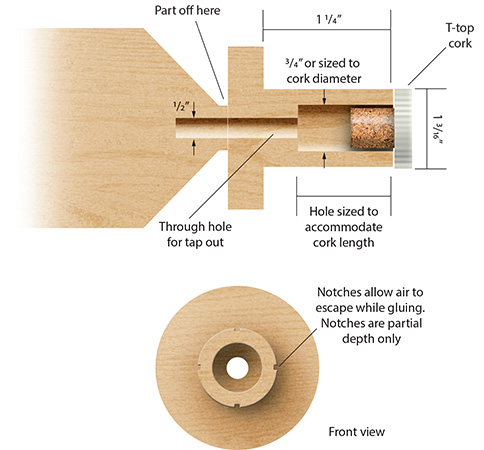
I find it useful to turn a dedicated insertion jig for holding and centering the T-top in the stopper blank during glue-up. To ensure proper alignment, the spigot on this jig must fit smoothly and without force into the hole in the stopper, so turn this diameter carefully. I then cut four shallow slots around the perimeter of the spigot to allow air to escape as the T-top is pressed into the stopper body. These notches are shown on the front view. I use an old hacksaw blade to create these slots, but a chisel would work fine as well.
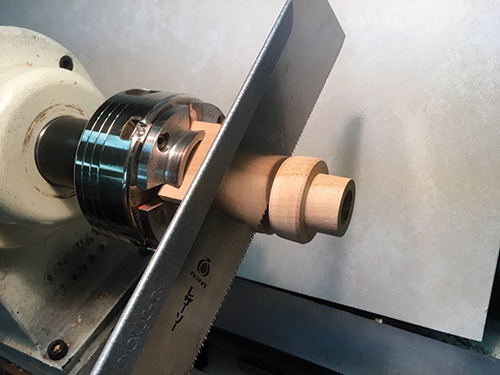
Part the insertion jig from the wasteblock. Use a parting tool until there is a small amount of wood remaining, then finish with a handsaw with the lathe off.
Wine Barrel Stopper
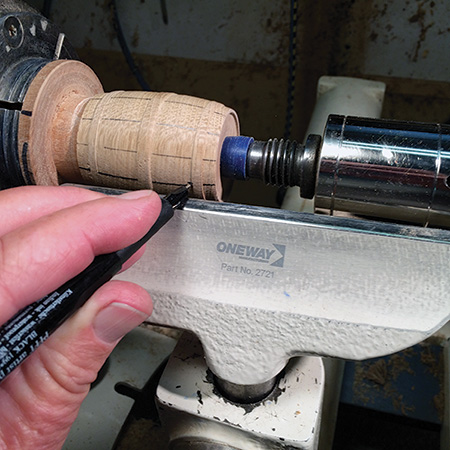
(1) Form a gently curved barrel shape, leaving three raised, wrap-around “bands.” Adjust the toolrest height so its edge is parallel to the central axis, and use the toolrest edge as a guide to mark the staves, first in pencil, then in marker. Use an indexing wheel to space the staves evenly, or determine and measure the spacing manually.

(2) With the tailstock removed and the blank taped securely on the jam chuck, form a recess in the end of the barrel for the “top” detail.
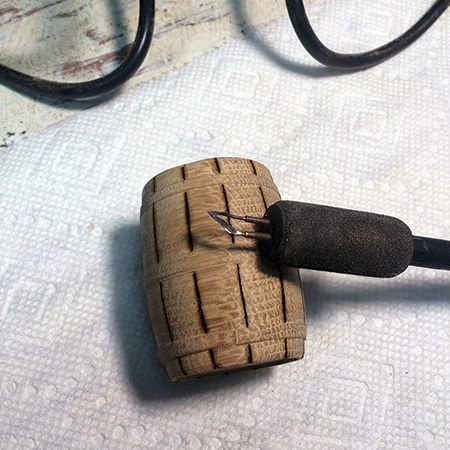
(3) Burn in the lines dividing the staves.
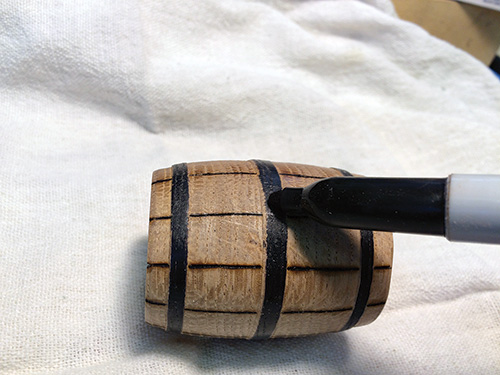
(4) Color the bands with a permanent marker or burner. Then sand and finish. Barrels are typically pretty rustic, so don’t spend a lot of time sanding.
Glue in T-top Cork
Mix up a small amount of epoxy (or use another glue that works on plastic and wood). You need only a little. Carefully use a mixing stick to apply the epoxy to only the bottom of the stopper hole. Try to avoid getting glue on the inside walls of the hole, but a little squeeze-out around the plastic T-top and its grooves is desirable.
I then use the insertion jig to hold the T-top cork, center it in the stopper blank, and ensure it makes secure contact with the glue. Insert the T-top only part way into the insert plug to ensure it will reach all the way to the epoxy at the bottom of the hole.
Then, using the insertion jig as a holder and positioner, push the T-top fully into the stopper. Once the epoxy sets, remove the insert jig from the stopper. Any difficulty in removing it can be resolved using the through-hole and a tap-out bar to nudge it free.
Final Thoughts
These bottle stoppers are durable, functional, and inexpensive to make. They don’t add much height, so bottles can be stored vertically in the refrigerator. The corks have a snug fit, so bottles can be laid on their sides without leaking. Many sizes of T-top corks are available, and best of all, there are endless design opportunities, both in turned shapes and embellishments.
Pete Blair was first introduced to woodturning in high school shop class in the 1960s. Having completed a professional career, he has now returned to the lathe and spends many of his waking hours turning or thinking about what he wants to turn next. Presently, Pete is exploring ways to allow his artistic side to emerge, such as adding detail, color, and texture to his work.


