This article, “A Primer for Drilling on the Lathe,” is from the pages of American Woodturner and is brought to you by the America Association of Woodturners (AAW) in partnership with Woodworker’s Journal.
Drilling on the lathe is a basic operation that is frequently ignored in teaching woodturning. And while much has been written about the use of a bowl gouge or a spindle gouge, little information is available about how to drill efficiently or safely. Each of the drilling techniques I cover has advantages and disadvantages, and the “best” method depends upon the task at hand. Regardless of the drilling method, there are four requirements that all approaches share.
Key Principals
1. Clear the Chips Frequently
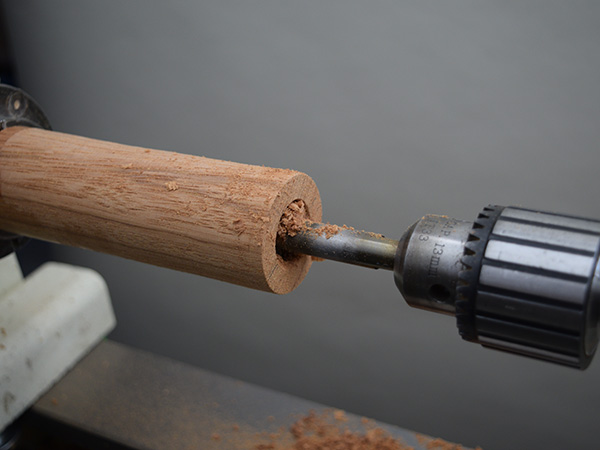
When chips build up behind the drill bit the dam created inside the hole makes it increasingly difficult to retract the bit from the hole. The blockage will cause the drill bit to stay in the blank when the quill is retracted, separating the mating surfaces of the chuck arbor and tailstock quill. Separate the two surfaces, and the drill bit revolves with the wood at the speed of the lathe, rather than being held stationary by the tailstock. At this point, the turner must hit the off button and resist trying to grab the rotating drill chuck. Not a safe experience.
The most important habit to form when drilling on the lathe is to frequently back the bit out to clear the shavings. My rule of thumb is to clear after every four rotations of the handwheel. But I also pay attention to the stream of shavings coming out of the drill hole and adjust my clearing rate as needed. Shavings can become so packed into the bit’s cutting head that they require effort to remove. Use a toothbrush to clear the chips that have adhered to the bit.
2. Maintain the Condition of Morse Tapers
Countering the rotational forces involved in drilling relies on the friction fit between the Morse taper of the chuck arbor and the inside of the tailstock quill. The holding power of the two mating surfaces is astounding, but not without limits. That holding power depends upon the two surfaces being in full contact with each other.

Always be sure your tailstock quill is clean and free of dust and grime that would keep the mating surfaces from making full contact. Inserting a finger in the quill will help you determine if a more serious condition needs to be addressed. If you find that the interior of the quill has been scored or damaged, try a Morse taper reamer—matching the taper size of your quill—to redress the interior walls. This must be done by hand and not under lathe power. Done incorrectly, reaming can damage the quill. Arbors are easy to replace, quills are not. Leon Olson notes that reaming is different from cleaning and care must be taken.
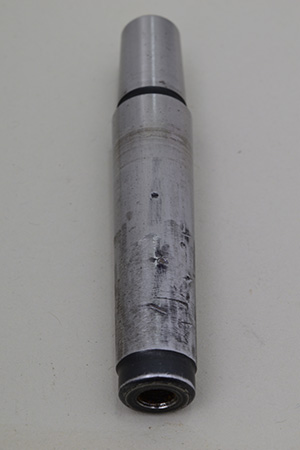
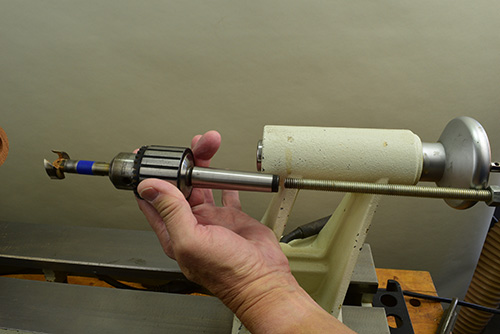
Dings in the arbor are another source of problems. Storing or transporting drill chucks in a way that allows arbors to bump into other hard objects can leave dents and scratches. These dings hold the mating surfaces apart, compromising the holding power.
I found that the arbors had been dinged. I was able to restore one arbor, but after weighing the consequences of a dangerous drilling event, I opted to recycle the most damaged arbor. I have also changed the way I store tools.
A Morse taper arbor can be separated from the head and replaced at about a third of the cost of a new drill chuck. A sharp tap to the arbor through the chuck jaws will cause the arbor to release.
Close examination of my chuck found a stamped “J33,” the size of the end that fits in the chuck head. With that information, I was able to search for a replacement, a Morse taper arbor J33-to-MT2 with 3/8″-16 threads for a drawbar.
3. Use sharp drill bits
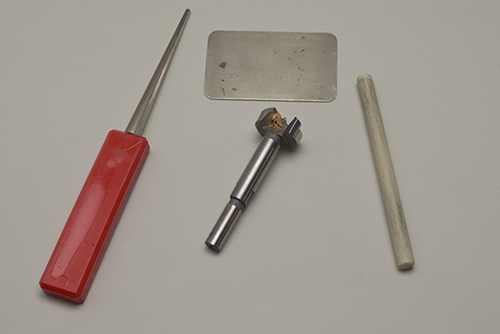
We all understand the importance of sharp lathe tools. Sharp drill bits are no less important and are worth the modest investment in time and a few simple tools to sharpen them. An Internet search will yield a wealth of information and instructions on the topic.
The metal used in drill bits is not necessarily the same quality as the highspeed steel used in today’s turning tools. Drill bits can lose temper from the heat generated in use. This is one reason to bring down the lathe speed when drilling. If you see a color change on the drill bit, the bit has been heated. If the color is dark blue, the temper is probably gone, and when temper has been lost, the steel will not hold a sharp edge.
The usual response to slow drilling — the sign of a dull bit — is to apply more force and turn up the lathe speed. Turning up the lathe speed increases the heat of friction. The correct response is to maintain the appropriate lathe speed for the bit’s diameter and sharpen the bit.
The larger the bit diameter, the slower the lathe speed should be. The bit manufacturer should provide recommended speed guidelines, and look-up tables are readily available online. Proper drilling speeds are slower than one would think. There are also significant differences in speed recommendations for drilling in hardwood versus softwood. I keep a look-up table of recommended drilling speeds posted above my lathe.
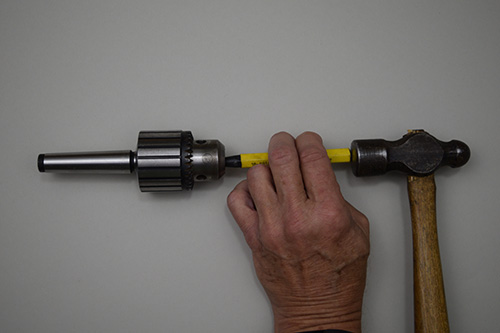
4. Fully seat the arbor
With the lathe off, put the drill chuck arbor into the quill, bring the tailstock up until the bit touches the wood, lock the tailstock, and advance the quill against the wood with the handwheel. Back the bit off the wood slightly and start the lathe. This practice ensures the drill chuck arbor is fully seated and the full holding power of the Morse taper is engaged before you start to drill.
There are a number of other variables that can contribute to the drill chuck rotating in the quill. Differences between the manufacturing processes used to make an arbor or quill, the composition and quality of the steel, country of manufacture, and level of adherence to manufacturing standards can come into play.
Perhaps a dose of common sense should be the first requirement on this list. If your arbor rotates in the quill, something is wrong. If it is not your technique, then it is the tool. Arbors can be repaired to some extent; quills can be cleaned and reamed. But if the tool continues to fail, it should be replaced.
Drilling Methods
The Common Approach
Most of us approach drilling on the lathe with at least the intention of following the requirements outlined above. What seems to be the most commonly used method to drill on the lathe is with a drill chuck mounted in the tailstock. The tailstock is locked in place on the bed ways, and the drill bit is advanced into the spinning wood by turning the tailstock handwheel. Add to the scene one hand placed on the drill chuck in an attempt to keep the arbor in full contact with the quill.
This method has the advantage of having the tailstock locked at all times. This results in an accurately drilled hole throughout the entire depth, as long as the quill is not over-extended. This method is slow, and cranking the handwheel is tedious. Holding the chuck with one hand while retracting the quill is dangerous because your grip may not be strong enough to prevent the arbor and quill from separating, and then you are left holding a spinning chuck and bit! Wearing a glove does not remove that risk.
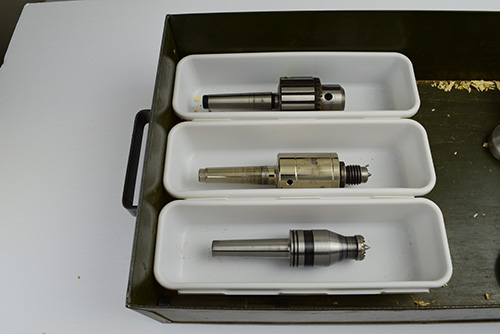
Drawbar
Using a drawbar solves one of the problems associated with the common approach — the chuck and quill separating. Many drill chucks have a threaded hole in the end of the arbor. To take advantage of this feature, pass a threaded rod through the tailstock and thread it into the end of the arbor. A nut tightened against a washer on the handwheel side locks the assembly in place. But before pulling the chuck arbor into the quill, check for grime on the mating surfaces. Tightening the threaded rod can embed grit in the quill.

Drilling with a drawbar ensures the full holding power of the Morse taper. But, because the chuck is locked into the tailstock, the handwheel cannot advance the drill bit into the wood. Instead, the turner unlocks the tailstock and manually advances the bit into the wood by sliding the tailstock along the ways.
Because the tailstock is not secured to the bed ways, this method can allow the bit to wander. Any play in the tailstock can cause the initial entry point of the drill bit to be offcenter, and wood grain variation can encourage the bit to wander farther as it is advanced.
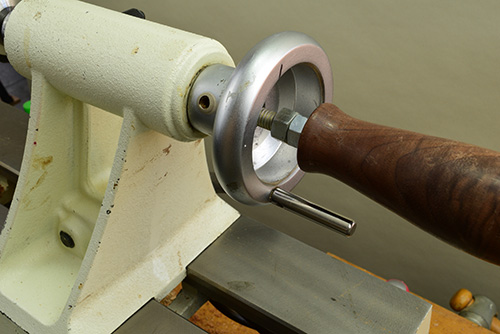
My approach with the drawbar has been to adjust the nut so that the quill can travel about a half-inch. I bring up the tailstock, lock it in place, and advance the drill bit to the wood with the handwheel. This ensures that the drilling begins on center. I then readjust the nut and washer to lock the quill, then unlock the tailstock, clear the chips, and continue drilling by manually advancing the tailstock.
Spring-loaded Drawbar
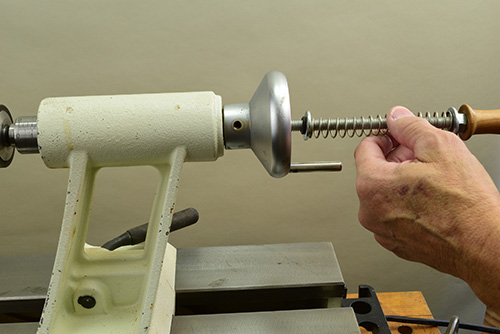
The spring-loaded drawbar is a variation of the drawbar technique. A stiff spring is placed on the drawbar between the back of the quill and the locking nut. The spring tension ensures full contact between the arbor and quill, yet still allows turning the handwheel to advance the bit into the wood. The strength of the spring determines the strength of the mating of the arbor-quill connection. The length of the spring determines the amount of travel. Backing the drill bit out to periodically clear chips is still critical to success.
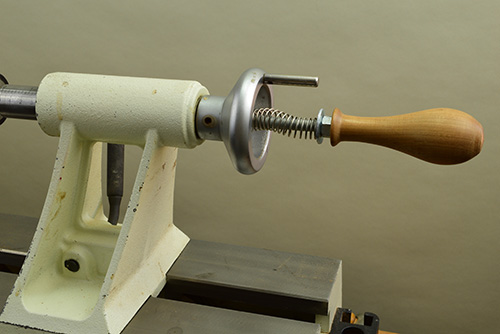
The locked tailstock and leverage of the handwheel contribute to this method’s accuracy and eliminate the need to hold the drill chuck with your left hand while drilling. The disadvantage is the travel length limit imposed by the spring. Exercise caution in selecting the spring; it needs to be sufficiently stiff to hold the tapers together at all times.
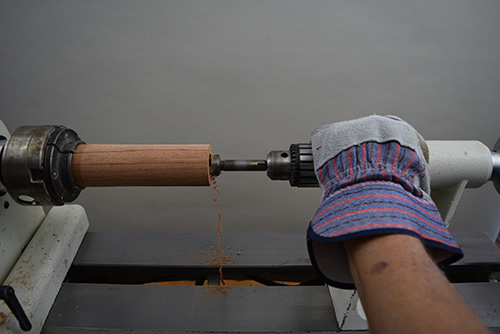
Tailstock-mounted Twist Bit
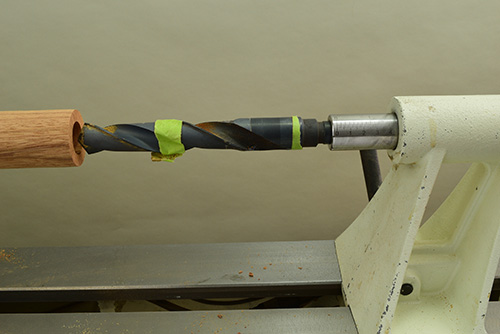
Another system of drilling on the lathe relies on a twist drill bit mounted directly into the tailstock quill. The turner’s left hand helps maintain contact between the mating surfaces while retracting the bit. The tailstock can be locked and the handwheel used to advance the bit, or the tailstock can be unlocked and used to push the drill bit into the wood.
Even though the relatively shorter length of this arrangement reduces play during drilling and produces consistently straight holes, this is my least favorite technique. The left hand’s proximity to the bit’s sharp cutting faces can lead to ugly cuts if the bit were to bind in the hole. A glove on the left hand does not eliminate the risk of injury.
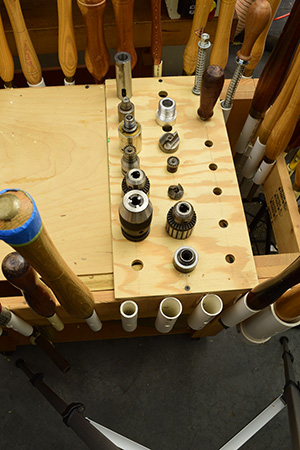
Adapters and Extensions
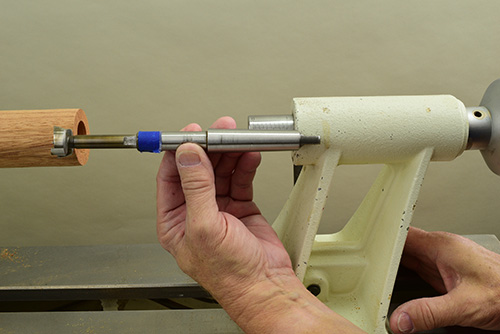
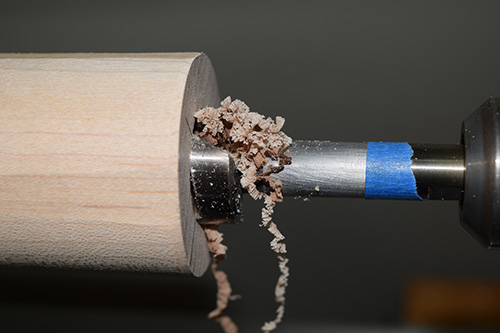
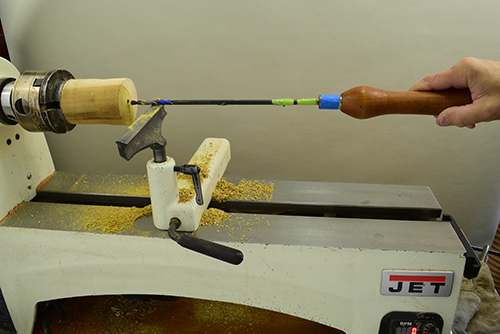
This system uses an arbor that mounts directly into the tailstock and accepts Forstner bits. Extensions can be added to increase drilling depth. The left hand manages arbor contact with the quill, and the cutting edges are comfortably far from the hand. The bit can be advanced with the handwheel or by sliding the tailstock.
This is my preferred method of drilling. I seat the arbor and bit into the tailstock and advance the quill to fully engage the arbor, advance the tailstock until the bit meets the wood, lock the tailstock, and advance the bit into the wood with the handwheel.
Once the hole is established, I will lock the quill, unlock the tailstock and push the bit into the wood to the target depth. As always, I clear the chips frequently.
This technique is accurate, quick, and presents no sharp edges to tear at your hand. There is, of course, a financial cost to acquire the arbor and extensions.
Drilling by Hand
Establishing a hollowing depth for a bowl or hollow form is a common drilling task on the lathe. This can be done with any of the aforementioned techniques, but this task does not require precision and most turners prefer hand drilling’s speed and lack of setup.
The diameter of the bit is important in hand drilling. The rotational forces on the bit increase with its diameter. I have 1/4″ (6mm) and 5⁄16″ (8mm) bits in my kit. The handles for the bits are sized to fit my grip and provide leverage against the force of rotation.
Drilling always generates heat. This is a particularly challenging problem when drilling wet wood with a handheld bit. Heat swells wood fibers, which then bind the bit. Frequently clearing both the chips from the hole and any chips packed into the bit are critical tasks. I tap the drill bit shank on the toolrest to help clear the bit. If necessary, I will use a toothbrush to remove any debris from the bit before continuing.
Begin hand drilling by establishing a center-point with the tip of a skew presented flat on the toolrest, or use the sharp corner of a parting tool. Mark the target depth with a piece of tape on the drill bit. Set the toolrest to align the center of the drill bit and the center of the vessel, with the bit held horizontally. The shaft of the bit should be parallel to the bed ways. Set the lathe to a moderate speed, and push the drill bit into the wood. As always, frequently clear the shavings.
If the bit is pulled off-center, the shaft and handle will begin to travel in a wider circle away from the center of rotation. You can correct this problem by turning away waste until you reach the bottom of the drill hole, then re-establish the centerpoint to resume drilling.
Drilling by hand at slow speed is a reasonably safe practice. But avoid placing your hand or fingers between the bit and the toolrest, and do not attempt to control the bit by gripping the cutting edge of the tool.
Small Diameter Bits
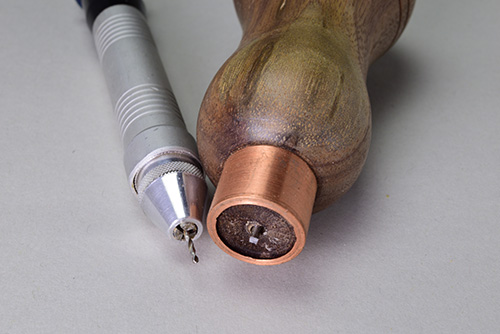
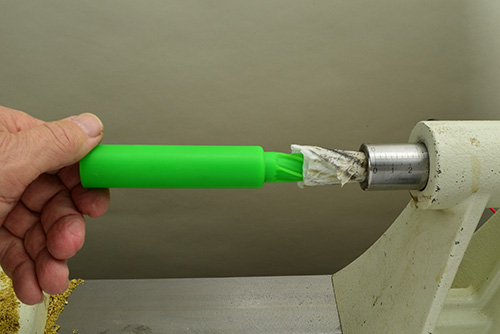
I frequently drill tiny pilot holes for eye screws in Christmas ornaments. I create a center reference with a skew, three-point tool, parting tool, or bedan. The best tool for this task is the one at hand. This reference keeps the drill bit from wandering before the hole can get started. It is a small detail that makes a great difference.
Because of the shallow depth of pilot holes, hand drilling without a chuck or even the toolrest works well. Hold the bit in a shopmade handle, locking vise grips, or the collet of a rotary carver handpiece.
Small diameter bits are easily broken. My preferred method is to use the handpiece from my rotary carver to hold the bits. Small bits seat deeply in the handpiece, exposing a fraction of the overall length and reducing the odds of breaking the bit.
Conclusion
When we master the fundamentals, woodturning is a great joy. Drilling on the lathe is one of those skills that, when mastered, adds to the joy and encourages workshop safety. Without the mastery, drilling can ruin a project in the final steps.
Clean your quill, file your dings, keep your bit sharp, and clear the chips.
Dennis Belcher retired from a 30+ year career in the investment world to his lifelong passion of working with wood. A member of the Wilmington Area Woodturners Association (North Carolina), Dennis demonstrates for clubs and participates in juried art shows. For more, contact Dennis at dennis.m.belcher@gmail.com or visit his website, seabreezewoodworks.com.


