This article, “Add Beauty and Strength with an Inlaid Butterfly Patch,” is from the pages of American Woodturner and is brought to you by the America Association of Woodturners (AAW) in partnership with Woodworker’s Journal.
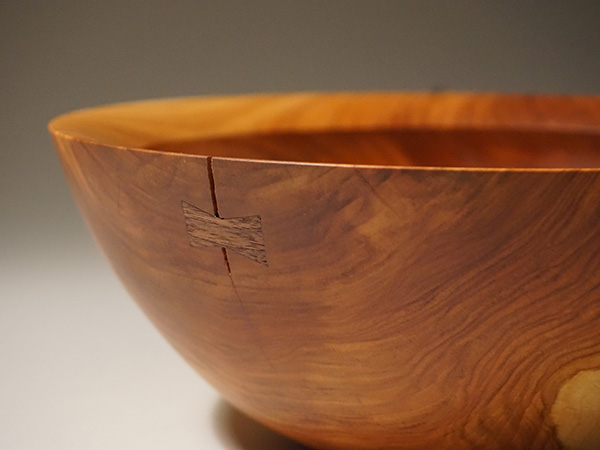
Over the years, I have admired butterfly patches (also known as dovetails, dutchmen, bowties, or pewas) in turned pieces. Aside from becoming a primary visual feature, they add value to the piece by demonstrating the maker’s skill. Additionally, being able to turn a finished bowl with a crack in it extends your usable wood inventory.
Adapting to a Curved Surface
Butterfly inlays are common in flat work. Traditionally, the maker scribes around a hand-cut butterfly, drills or routs out most of the recess, then uses a chisel to work to the line for a perfect fit. But I wondered how to transfer that process to the curved surface of a bowl. I was doubly impressed with turners who had used butterfly inlays in turned work.
The opportunity for me to learn came when I offered to repair a broken bowl for a desperate customer. A bowl (made by another turner) had been dropped and all but broken in half. I researched various methods of repair and landed on the one I knew I could do with the tools I already had.
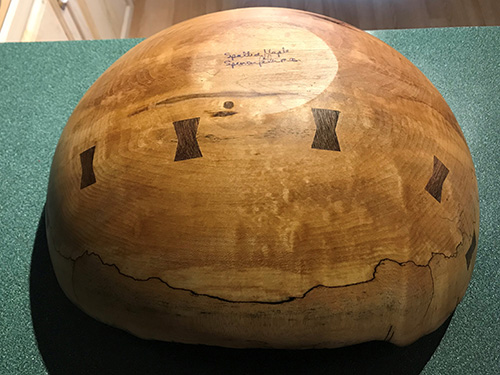
I decided to use butterfly patches using a router with an inlay guide-bushing set and a pattern to make both the recess and the insert. I chose a different bowl to illustrate the process in this article.
Note that the grain of the butterfly inlay must run 90 degrees to the crack to give it full strength. If it runs the same direction, the butterfly itself could eventually break. Usually, I prefer the butterfly to be of a contrasting wood, but that is a matter of preference. Choose wood that is strong but relatively easy to work by hand because you will typically have to do a little tweaking with a chisel or knife. I usually use black walnut for dark patches and birch for light patches.
Router Considerations
I originally used an old Craftsman router with good success, but its motor was often misaligned, and it required a lot of care to advance the bit and keep it in the same relative position. Although the handles were fairly high on the base, I didn’t find it a problem, but when I tried a friend’s small plunge router (trying to solve the misalignment issue) with even higher handles, I found it had a very “top heavy” feel and was hard to maintain fine control.
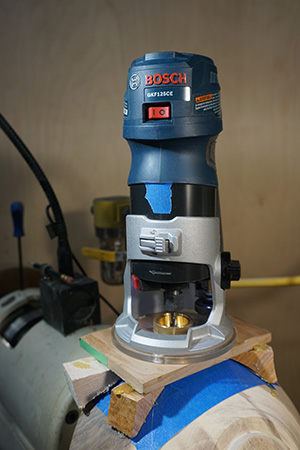
I decided to get a new router, a smaller one for ease of handling, with as much power as my old router, and handles as low as possible. Variable speed and a soft start are also nice features. But most important of all, it had to be able to stay on center when I advanced the bit. While there were several choices on the market, I bought a Bosch Colt.
Inlay Bushings and Router Bits
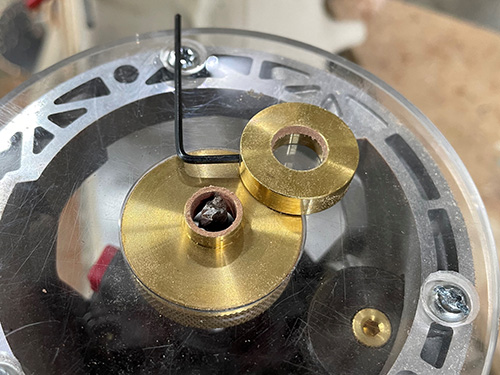
Inlay bushings are made to attach easily to most router bases, with the face flush to the bottom of the base. A centered protrusion around the bit follows a pattern and has a removable collar that allows for negative and positive shapes (recess and insert). Leave the collar in place to create the recess, and remove it to make the insert. Before you purchase an inlay-bushing set, confirm that it will work with your router base. In my case, I used the lathe to turn a custom router base from 1/4″- (6mm) thick acrylic, so it would accept the bushing with a perfect fit.
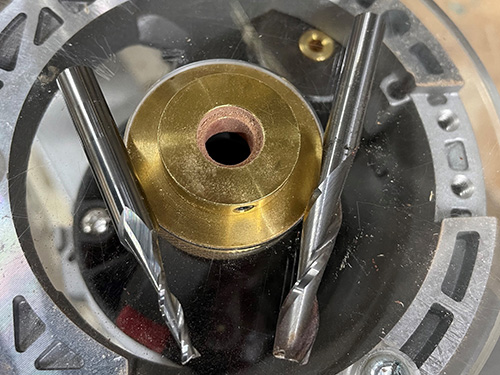
While it would be possible to make the cuts using a bit with straight flutes, spiral cutters make much cleaner cuts. Downward spirals leave a very clean cut at the surface but tend to load the recess with shavings. Upward spirals clear the chips better, but they tend to rip the surface of the wood. So if you find yourself installing a butterfly in a finished bowl, an upward spiral would be a poor choice. My preference is the downward spiral cutter; I simply clear the chips between levels of cut. Router bits are available in 1/8″ (3mm) and 1/4″ diameters, so you must take that into account when choosing a removable collar for an inlay bushing.
Make an Inlay Pattern
As far as I can tell, all commercially available inlay patterns are made from acrylic, so I had a friend with a laser engraver make my first one. I found pretty quickly, however, that I wanted more sizes because the inlays should be in proportion to the turned piece. So that I wouldn’t have to constantly go cap inhand to my friend’s shop, I came up with an easy method of making the router patterns from wood. Choose a hardwood like hard maple, oak, or similar.
A pattern should be large enough for the router to ride on it securely without rocking. About 3″ × 5″ (8cm × 13cm) is good, as it will work for most “bowl-size” butterflies and still provide a stable platform. If you had to make a significantly larger butterfly, consider increasing the outside dimensions to maintain stability. I now make my patterns 3/8″ (10mm) thick, rather than the more common 1/4″, for two reasons. First, I found (sadly, during an IRD) that because the pattern was barely thicker than the inlay bushing, the router teetered on the bushing on a small-diameter bowl, messing up the cut. Second, a thicker pattern allows more room for shavings, which helps to prevent build-up.
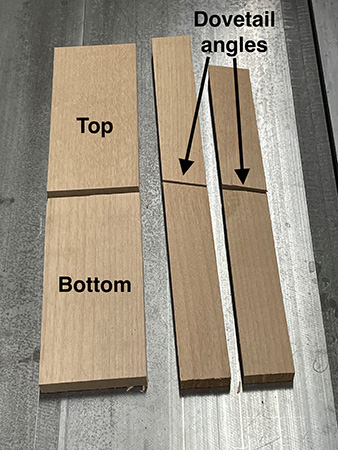
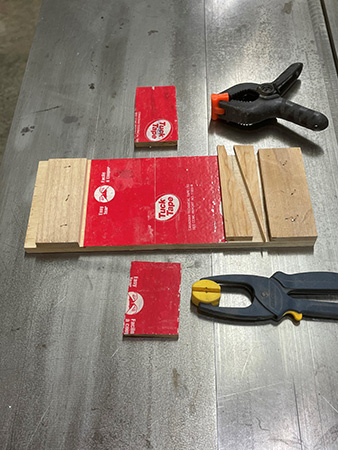
An inlay pattern requires a top, bottom, and four center sections cut to your preferred dovetail angle for the butterfly. After some trial and error, I chose to make my dovetail angles 15 degrees.
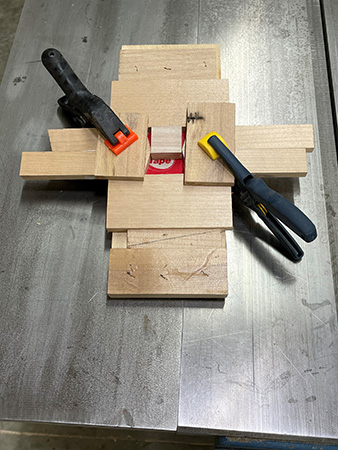
Make a simple clamping device and glue and clamp the components, as shown. This photo shows the completed inlay pattern, trimmed and ready to use.
Rout the Inlays
As described earlier, the router bushing set has a removable collar. Take the collar off, leaving the small-diameter “follower” when cutting inserts. Before adhering the pattern to the wood with hot-melt glue, I put masking tape on both the pattern and the wood being machined. This allows for easy removal of the pattern and the hot-melt glue.
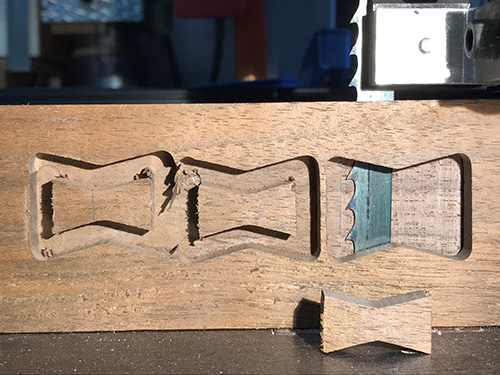
Rout as many inserts as you can get from a piece of waste wood, making them as thick as you want. I make mine at least 1/4″ thick, from wood that is at least 1/2″ to 3/4″ (13mm to 19mm) thick. You’ll have to re-attach the pattern for each insert. When you have as many routed as you want, cut the inserts out at the bandsaw. If you don’t have a bandsaw, this can be done with a handsaw or table saw with a zero-clearance table insert.
Rout the Recess
Butterfly inlays are generally “blind,” meaning they don’t go all the way through the vessel wall. If you have a thin-walled vessel, where the butterfly does go right through, be aware that the small amount of handwork in fine-tuning the recess must be precise. Any cuts that aren’t 90 degrees to the surface of the bowl can show up as a gap on the inside.
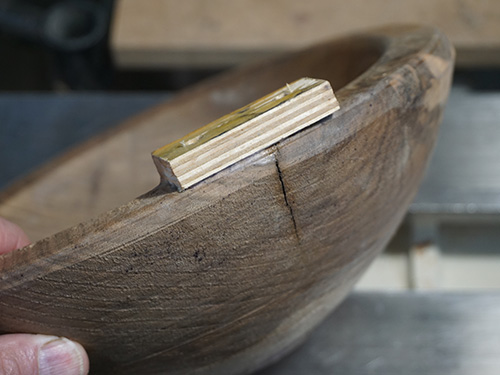
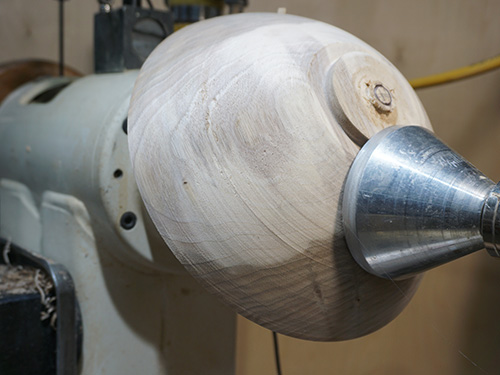
I like to re-mount the bowl on my lathe at an angle, using the face of the chuck and the tailstock to position the work area as horizontal as possible. Determine where you want the butterfly inlay, place the pattern on the crack, trace around the inside of the pattern with a pencil, then check to see if the shape, orientation and proportions are to your liking.
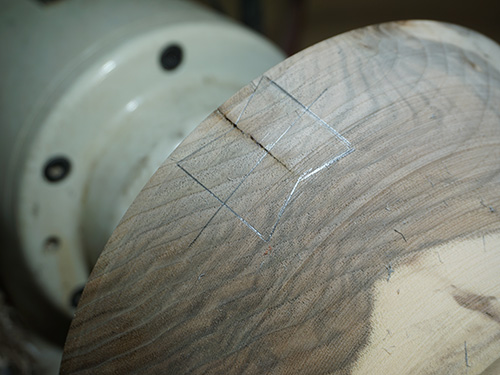
Place masking tape outside those lines in any place you expect to place hot-melt glue (usually the full outside dimension of the pattern). I use blue painter’s tape because it tends to conform to the compound curve of a bowl nicely.
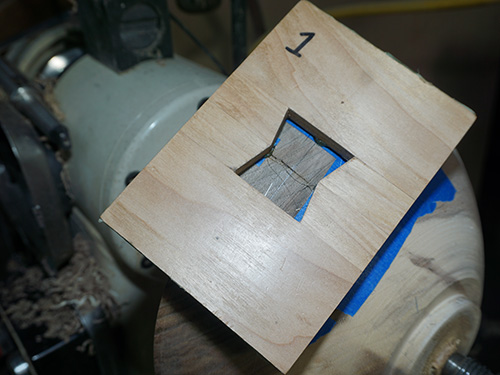
Apply a spot of hot-melt glue at the two points that form the “waist” of the butterfly, and secure the pattern in place. Once it is in place, glue wedges under the four corners, or wherever possible, to provide adequate support while routing.
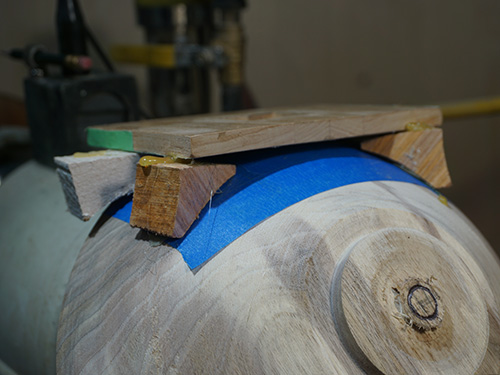
Important: Be careful to maintain the angle of the pattern so that it is tangent to the surface of the bowl. I usually have a selection of wedges at the ready, dry-fit them, then apply a dab of glue on the top and bottom of the wedges before affixing them. Having long wedges keeps your fingers away from the hot hot-melt glue.
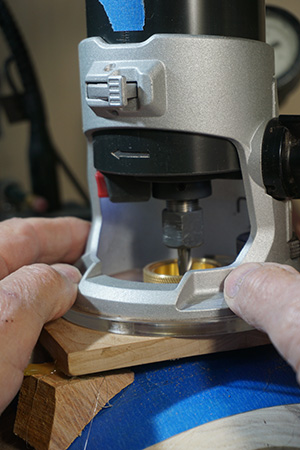
Butterfly inlays just 1/8″ thick will provide adequate strength, so I rout the recess at least that deep, plus an allowance for any finishing cuts on the bowl during turning. After setting the router-bit depth so that it is contacting the surface of the bowl, I put a piece of tape on the router’s depth scale at the full depth to make it easier to see. I like to use one of the corners for the “home” corner, extend the bit while the router is running, then move the router clockwise around the pattern.
Be sure to remove any wood remaining in the center as well. I usually take a 1/8″-deep cut, remove the router to clear the chips, go back to the home position, then lower the bit the rest of the way. If you can’t lower the bit while the router is running (like my old Craftsman), extend the cutter away from the pattern and enter the cut somewhere away from the edge before moving it to your home corner. Always let the bit come to a full stop before removing the router from the pattern.
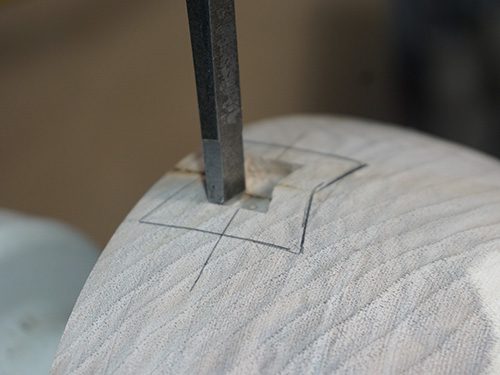
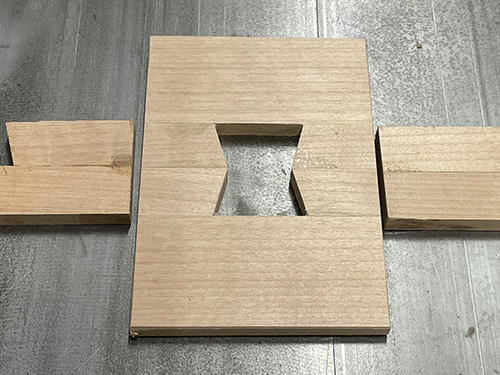
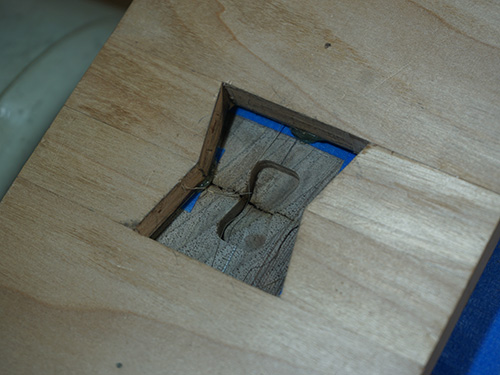
After routing the recess, it will be necessary to cut the dovetail corners to a sharp angle, as the router will leave them rounded. Alternately, you could leave the rounded corners as is, in which case you would have to not only round the corners of the insert to match but also do all the fine-tuning on the insert, not the recess.
Fit and Glue the Inlay
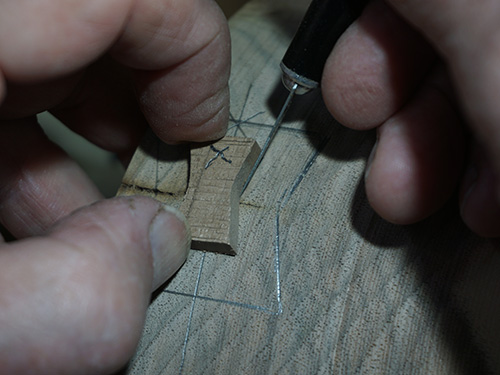
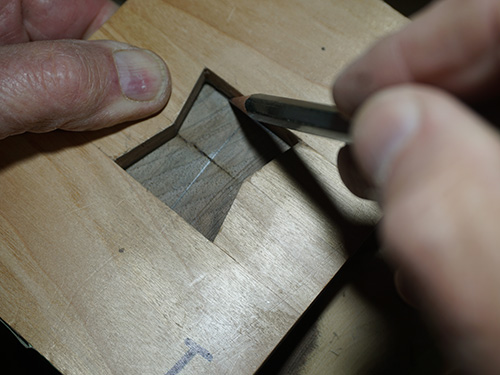
Test the fit of the inlay in the recess to see which way it fits the best, then mark an “X” on one end so you will always test the fit in the same position. The inlay bushing creates a fit that is actually “too” exact, so the fit will have to be relaxed a bit. Place the insert over the recess, hugging one side of the recess with one side of the insert, and scribe around the other side and both ends with a sharp craft knife.
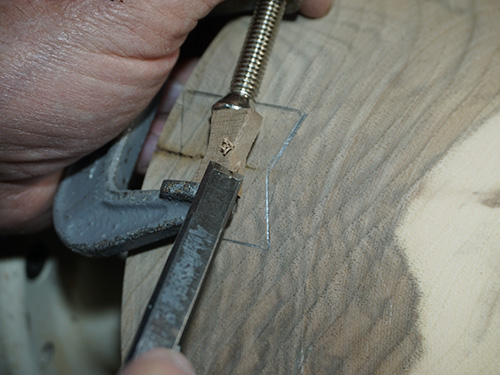
Use that line to locate the chisel to take off fine shavings as required. Alternately, you can work the sides of the butterfly insert to adjust the fit. It is safer and allows greater accuracy to hold the insert with a clamp while making these cuts. You can touch the ends on a belt sander or use your chisel. I’ve taken both approaches and have found that adjusting the recess is easier.

Chamfer the inside edges of the insert to make for an easy entry into the recess. The fit should be a nice push fit or even a tap fit. Don’t put it all the way in until you apply glue, as it probably won’t come back out without damage.
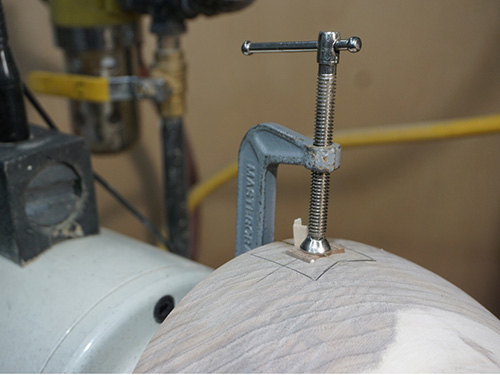
While cyanoacrylate (CA) glue is acceptable, I prefer regular woodworking glue, as I feel it offers a more permanent hold. If possible, drive the inlay home with a clamp, making a glue bond at the bottom of the recess. Depending on the glue brand you use, clamping is usually required for an hour, with full strength in 24 hours. However, there is very little stress on a well-fit butterfly while turning, so it is reasonable to turn in an hour. I have never had an insert move during turning.
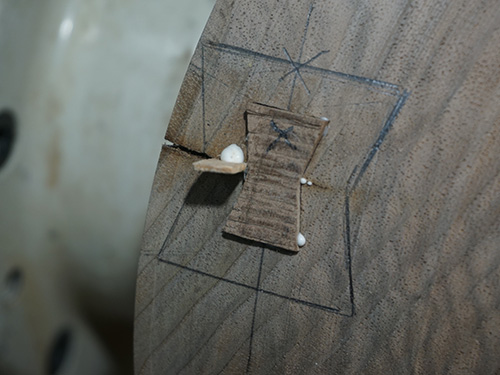
With regular glue, there is usually some squeeze-out into the crack. I try to “dam” the crack with a sliver of wood to prevent that. You could also remove the squeeze-out with a series of pointy blades, slivers of wood, and/or dental picks. With the butterfly inlay glued in place, continue turning the bowl as you normally would.
Closing Thoughts
Generally, cracks that need a repair are obvious, but some aren’t. My feeling is that when the wood’s moisture content has reached equilibrium with the surrounding atmosphere, as with a roughturned bowl that has sufficiently dried, it will not move or crack further. So if a crack is clearly minor, while others on the same bowl have been patched, most people will understand that the bowl will remain stable in its current state.
I am often asked if filling a crack (along with using a butterfly) is a good idea. If you have a salad bowl with a crack low on the walls, filling the crack would maintain the bowl’s functionality. But for more aesthetic pieces, I would leave it unfilled. You may also just simply want to fill it. In either case, I would fill after inserting the butterfly, in case the placement of the butterfly breaks the bond between the filler and the wood.
When I teach new turners, I emphasize the need to honor the wood, to give it their best effort. Using butterflies to salvage a broken piece or to make use of wood with natural imperfections is a way of honoring the wood. The Japanese call the art of repairing broken pottery vessels kintsugi. Cracks are part of the “scenery” and history of a vessel and should be honored, rather than disguised. A butterfly repair on wood is no less attractive than figured grain and becomes part of the story of a wooden vessel.
Ed Pretty has been turning wood for more than sixty years, initially learning traditional spindle techniques from his father. After retiring from a thirty-six-year career as a professional firefighter, Ed now turns full time. Ed offers an interactive remote demo (IRD) on crack repair in turned bowls. Learn more at edswoodturning.com.


