This article, “Build Your Skills and Train Your Eye by Turning a Sphere,” by Kip Christensen, is from the pages of American Woodturner and is brought to you by the America Association of Woodturners (AAW) in partnership with Woodworker’s Journal.
Spheres are fun to turn, provide an interesting way to display a collection of various woods, and make a wonderful pallet for unlimited surface decoration possibilities. After a little practice, they can be turned in about fifteen minutes. There are, however, two more significant reasons why spheres are productive and meaningful projects for turners.
First, making a sphere offers an excellent opportunity to build and hone a variety of basic turning skills. Most of these skills fall into the category of spindle turning, where the grain is parallel to the bed of the lathe. However, the process also calls for rotating the sphere 90 degrees, so the grain is perpendicular to the lathe bed, similar to most faceplate or bowl-turning projects. Further, when making final cuts to refine the shape of the sphere, the wood is often mounted with the grain oriented randomly in relation to the lathe bed. All these changes offer you an opportunity to practice both spindle- and faceplate turning techniques, while making one
simple project.
Second, taking a chunk of wood that is square in cross-section and turning it into a ball requires the turner to practice one of turning’s most common forms—the symmetrical curve. The ability to visualize and cut perfectly symmetrical coves and beads is an important skill for turners to develop.
Mount and Rough-Turn
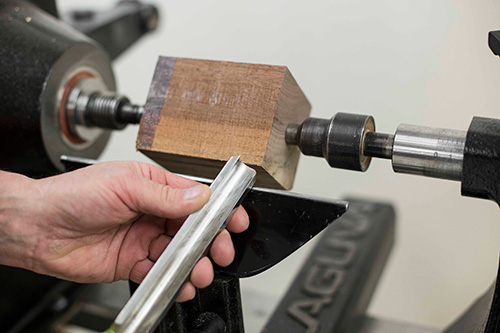
Turned spheres can range greatly in size. Here, I started with a piece of wood approximately 3″ × 3″ × 4-1/2″ (8cm × 8cm × 11cm). The size of the wood is not critical but the blank should be square in cross-section and one to two inches longer than it is square. Mark the centers of each end and secure the wood between a drive center in the headstock and a cupand- point ball-bearing center, or live center, in the tailstock. Adjust the toolrest parallel to the lathe bed, about 1/4″ (6mm) away from the wood, and slightly below center height. Rotate the spindle by hand to make sure the wood will not contact the toolrest when turning.
With the lathe at about 1500 rpm, turn away the square corners and flat surfaces until only a cylinder remains. A spindle-roughing gouge works well for this. With the tool handle low, turn using a peeling angle. Start the first cut about 1/2″ (13mm) in from one end of the cylinder and cut toward that end. Cut deep enough to remove the corners and all or most of the flat surfaces. As you progress along the blank, begin the next cut about 1/2″ away from the beginning of the previous cut.
Continue by making several short nibbling-type cuts as you move from one end of the cylinder to the other. After the square corners are removed, take one or two planing cuts the full length of
the blank to turn away any flat surfaces.
Layout Key Locations
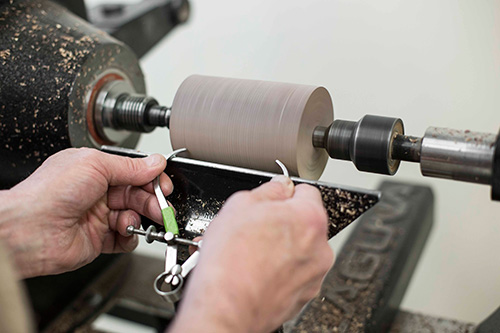
With the lathe off, hold a set of outside calipers across the cylinder and adjust the opening until it is equal to the diameter of the cylinder. Next, turn the lathe on at a slow speed and transfer that distance to the workpiece by resting the calipers on the toolrest and pressing the legs of the calipers lightly against the spinning wood to create burnished layout lines. If needed, darken the layout lines using a pencil.

On the outside edge of the layout lines, make parting cuts down to about 3/4″ (19mm) diameter. Be sure to widen the cut slightly as you go to prevent the tool from binding in the kerf.
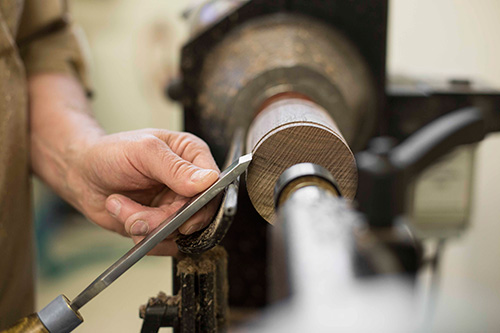
With a sturdy, sharp skew, remove the excess wood at each end of the blank. A peeling angle works best for this cut.
Lay the skew flat on the toolrest with the tool handle low and the cutting edge parallel to the lathe bed. As you advance the tool into the wood, lift the skew handle gradually to produce a ribbon-type shaving.
Use a pencil to mark a centerline between the ends of the blank. This line can be measured with a ruler or carefully eyeballed.
Rough-turn the Sphere
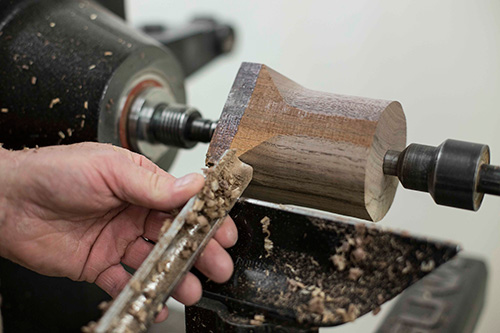
Rounding the cylinder into a sphere can be done with a variety of gouges or with a hefty skew. I like to start with a 3/4″ shallow spindle gouge sharpened with a fingernail grind. This is a shearing cut made with the bevel gliding on the wood behind the cutting edge. Begin by gradually rounding the corners of the cylinder.
Continue making bead cuts until the rough shape of one side of the sphere is turned. Turn one half of the sphere as accurately as you can by eye.
Then repeat this process to turn the shape of the second half of the sphere. As the cuts get closer to the ends of the sphere it is often easier to use a spindle or detail gouge rather than a wider shallow gouge.
Since it is not critical that the sphere be accurately shaped at this point, gauging the shape can be done by eye.
Shopmade Cup Centers
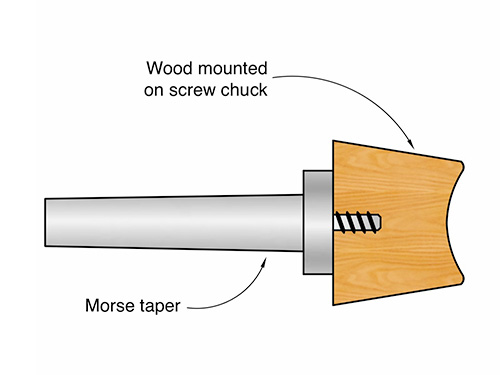
You can buy cup centers made from aluminum or plastic, but I prefer shopmade wood centers. I made mine using an arbor screw chuck for the drive (headstock end) and a revolving center for the tailstock end. These items are commonly available at woodturning supply stores. For the wood parts, I prefer a softer hardwood, such as poplar or soft maple, with the grain running parallel to the lathe bed.
Making the headstock piece, or drive center, is very simple. Start with a block of wood about 2″ (5cm) square and drill a 3/16″- (5mm-) diameter hole about 3/4″ (19mm) deep into one end. Thread the wood onto the screw chuck. Mount the screw chuck (with the wood) in the headstock’s Morse taper, turn away the square corners, and turn a shallow cove that has a smaller radius than the curve of the spheres you plan to make.
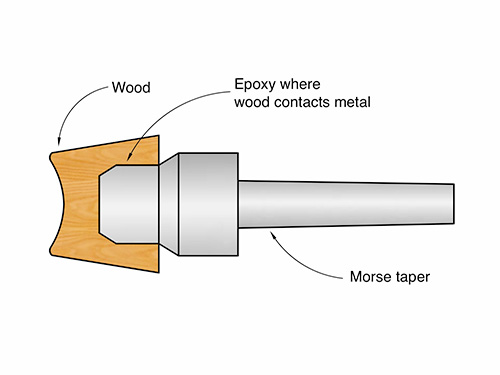
For the tailstock piece, mount another 2″ block of wood on a screw chuck (or in a scroll chuck) and turn a hollow to fit snugly over the front-end portion of the revolving cup center. Use epoxy to glue the wood onto the end of the revolving center. When the epoxy has cured, mount the revolving center with wood in the headstock and tape the ball-bearing section to the Morse taper to temporarily disable its revolving action. Turn away the square corners of the wood, then turn a shallow cove similar to the one you turned for the drive center. Finally, remove the tape and secure the revolving center in the tailstock.
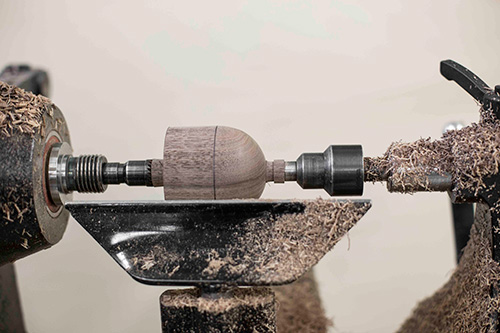
Remount Using Cup Centers
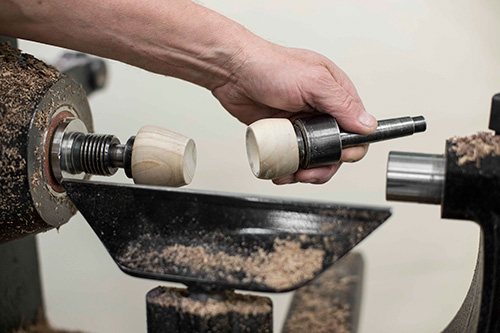
After the sphere has been turned to rough shape, remove it from the lathe. Next, replace the drive center in the headstock with a cup drive center, and replace the tail center with a ball-bearing cup center.
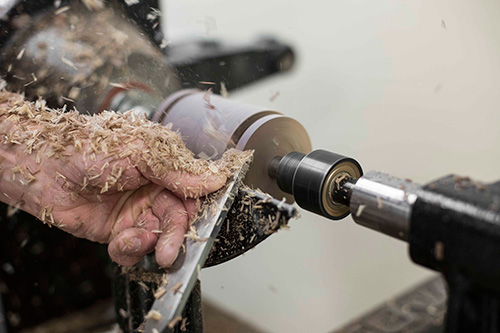
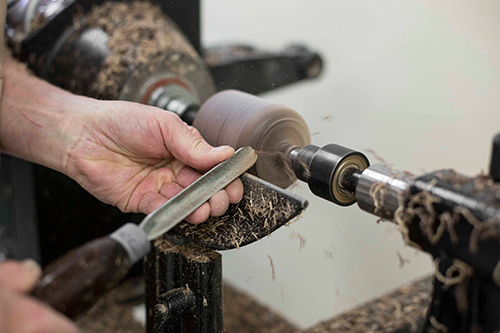
Remount the sphere between the cup centers with the ends of the sphere perpendicular to the lathe bed. Using a spindle, detail, or small bowl gouge, remove the stubs that remain on the ends of the sphere. With the tool handle low, make light cuts from each side toward the center of the stubs.
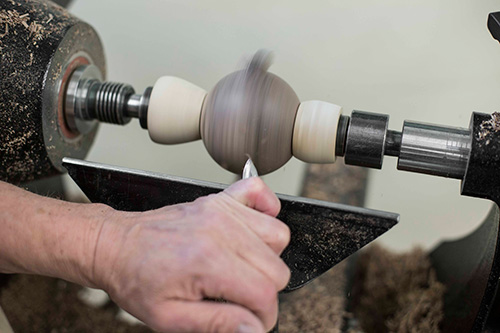
As you cut the remaining stubs away, observe the rough-shaped sphere as it spins between the cup centers. You will probably notice a slight blur resulting from the sphere not yet being perfectly round. Look for the solid sphere shape inside the blurred surface and use it as a visual guide to help you refine the shape of the sphere.
Refine the Sphere Shape
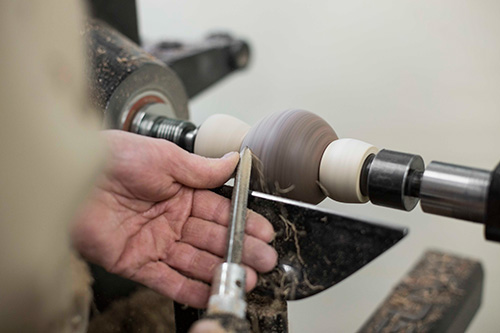
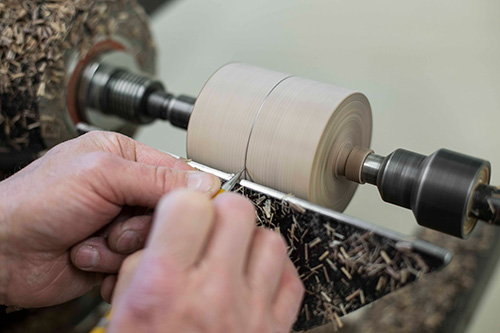
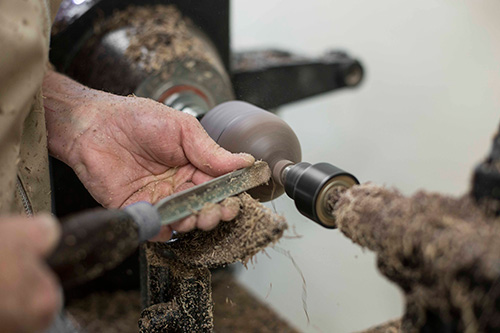
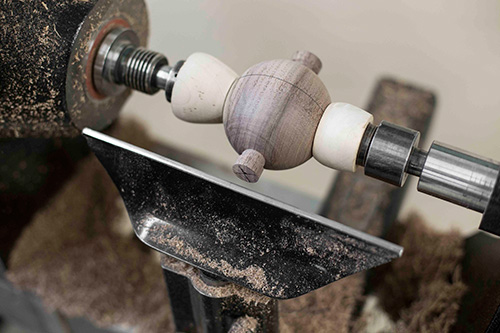
At this stage, the sphere shape can be further refined using a series of shear-scraping cuts. Since the grain direction of the wood is now oriented perpendicular to the lathe bed (rather than parallel as when first mounted between centers), cutting “downhill” from large diameter to small diameter would result in cutting directly into the endgrain for much of the cut. To prevent this, cut into the sidegrain by shear-scraping from small diameter to large—in other words, cut “uphill.” This may seem contrary to spindle turning practice, but at this point, the wood is oriented perpendicular to the lathe axis, as in bowl turning.
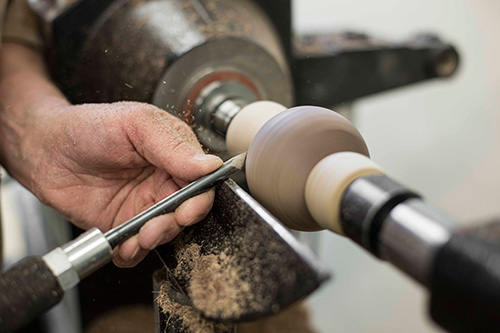
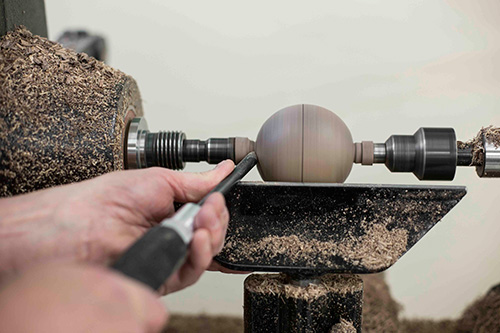
To make this u phill shear-scraping cut, rotate the bevel of the gouge away from and the flute toward the wood and start the cut near the cup centers. Take light cuts, working upward and outward toward the outside diameter near the toolrest. Repeat this process as necessary by rotating the sphere between the cup centers and turning away the high areas.
When the grain is oriented parallel to the lathe bed, make shearing cuts downhill (from large diameter to small) with the bevel gliding on the wood behind the cutting edge. When the grain is oriented askew to the lathe bed (neither exactly perpendicular nor parallel), use a shear-scraping cut, working uphill from near the cup centers outward toward the toolrest.
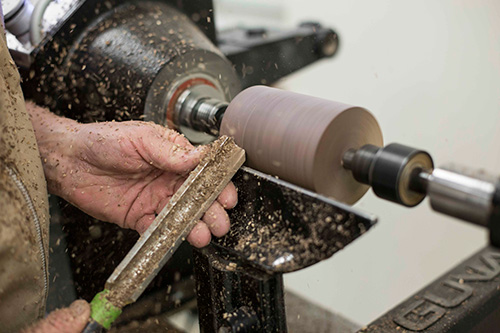
Sand and Finish
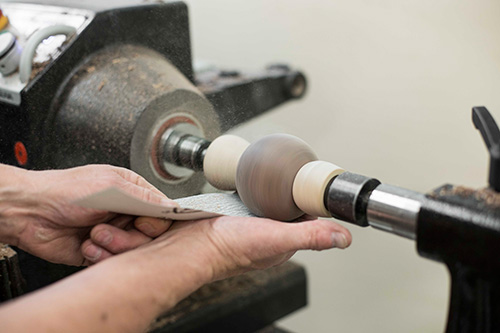
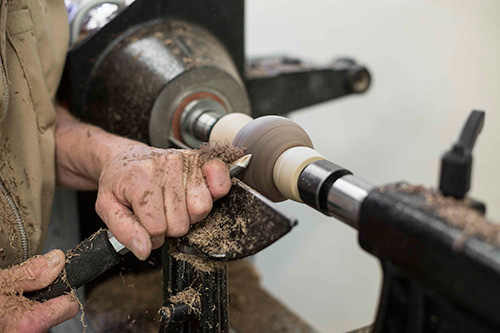
Once the sphere has been cut and is clean and accurate, it can be sanded. Move the toolrest out of the way, reduce the lathe speed if needed, and sand the sphere. Rotate the sphere between the cup centers as needed while you progress from about 150-grit to around 400-grit abrasive.
After the sphere has been fully sanded and is free of any tool marks or sanding lines, remove the sphere from the lathe and apply finish by hand. There are several finishes that work well. I usually use several coats of an oil finish such as Waterlox or Watco Danish Oil.
After turning a few spheres, you will notice your turning techniques improve and possibly have a few ideas for interesting surface decorations or other reasons for adding spheres to your turning repertoire.
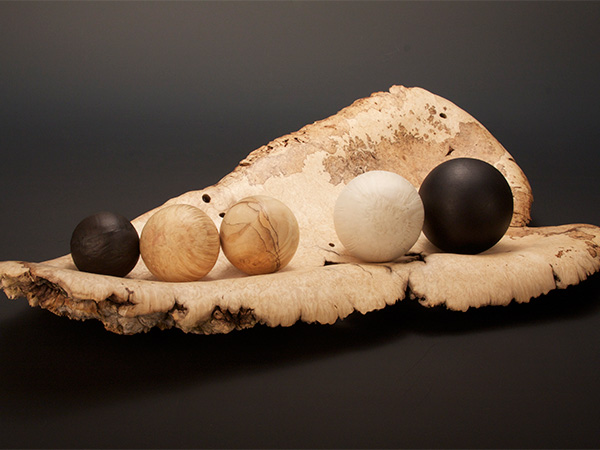
Lead Photo: Preston Christensen, Ebaneet e Slanovaya Kost (Ebony and Ivory), 2009, Box elder burl, 5″ × 21″ × 12″ (13cm × 53cm × 30cm)
All process photos by Stephanie Staples.
Kip Christensen is a professor of technology and engineering education who teaches wood prototyping, furniture design, and manufacturing at Brigham Young University. He has a particular interest in woodturning education and has authored several articles and DVDs on the subject. Kip’s DVD, WoodTurning Projects with Rex and Kip, DVD #4, includes the full process of turning a sphere; visit learningturning.com.


