This article, “Cutting Bowl Blanks from a Tree,” by Dale Larson, is from the pages of American Woodturner and is brought to you by the America Association of Woodturners (AAW) in partnership with Woodworker’s Journal.
There are many ways to cut bowl blanks out of a tree, but the methodical approach that I take efficiently uses the tree and produces stable, aesthetically pleasing bowl blanks. If you have a chainsaw and are willing to put it to work, I will explain how to evaluate a tree to determine where the best bowl blanks lie in wait. On the other hand, if you buy bowl blanks, my approach will improve your skill at evaluating the opportunities within the stock available for purchase. The goal is to predict what your finished bowl will look like before a gouge even touches the surface of the blank.
Timing Is Everything
When I get green wood, it becomes my top priority until I get the subsequent blanks rough-turned. Unprocessed green timber never improves with time. The longer the log sits, the more cracks it will develop, fungus will move in and cause discoloration and loss of luster, and insects will tunnel into the wood. For the log I processed for this article, I cut the blanks on a Thursday and rough-turned them the next day, and this was during a relatively cool and humid part of the year. I use an emulsified wax solution (Sealtite 60) during warm weather to coat the endgrain as soon as I make the cut. I will also spray water on the blanks and cover them with a tarp until I can rough-turn them. In my experience, a cherry bowl blank cut in July will show visible cracks within an hour. If the blank checks, I will have wasted my time in locating the wood and cutting it up.
Chainsaw Safety
While the steps in this article rely on a chainsaw, detailed guidelines for the safe use of this both helpful and dangerous tool are beyond the scope of this article. Several articles related to chainsaw safety have been published including this one by Sandor Nagyszlanczy. The price of using a chainsaw without appropriate precautions can be high, even deadly, either for the saw operator or observers who are too close to the action. When I am using a chainsaw, no one is allowed to be close to me or to hold the piece of wood I am cutting.
Prioritizing the Cuts
I almost always start by cutting up the most valuable—meaning highly figured—part of the tree. If the tree has burls, that is where I focus my initial efforts. I cut the crotch pieces next, followed by the lowest part of the trunk where it transitions to the stump. I then work my way up the trunk, leaving the limbs for last. Limbs are full of stress and typically have both the poorest figure and the poorest turning quality. My theory is that if the chainsaw gives up before I do, the best wood from the tree should already be in the back of the pickup.
Dissecting the Tree
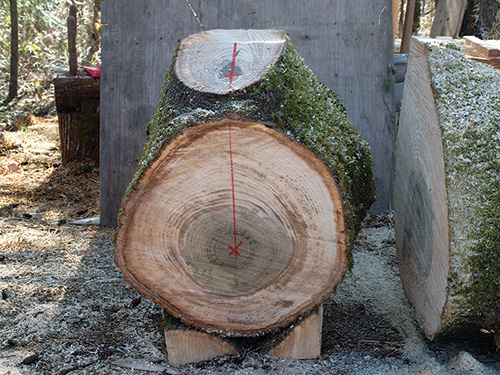
The yellow poplar in the accompanying photos lies in my driveway, and knowing I have ample time to finish the task, I decide to cut the straight-grain blanks first. Measuring the tree’s diameter, I decide to make 14″ (36cm) bowl blanks. I slice a few inches from the butt of the log to remove any checking and to help clarify the grain pattern. I then cut the first round 15″ (38cm) long, which will provide leeway to bandsaw the blank to its final 14″ diameter.
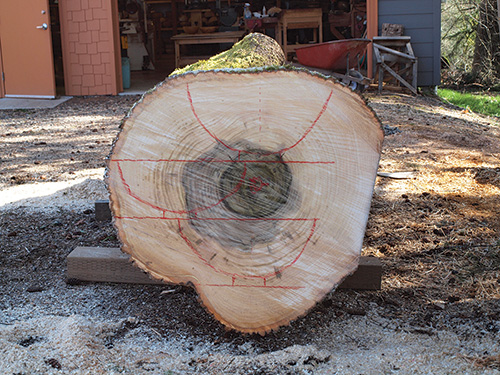
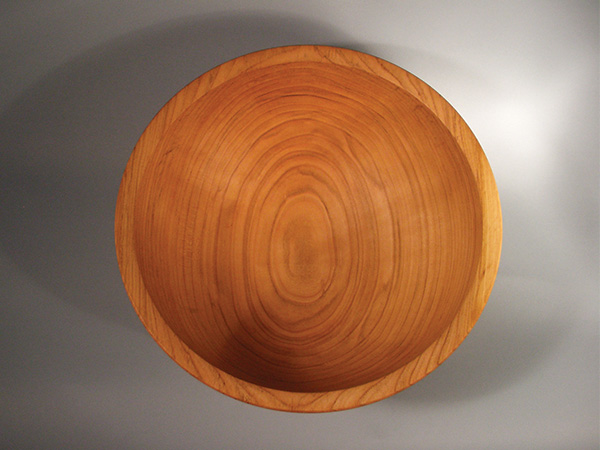
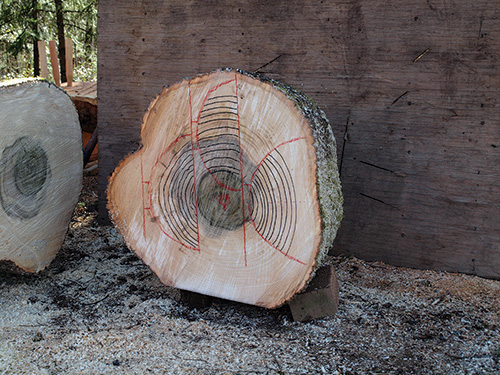
A stable section for a utility vessel requires leaving the pith out of any blank. Checking originates from the pith, so excluding this area eliminates a reliable source of stress in the wood. With that in mind, there are three basic orientations for blanks from straight-grain wood. I have roughly marked the grain lines to illustrate how they are oriented in each blank. The blank on the bottom will yield my favorite grain pattern. It is flat sawn with the center of the bowl aligned with the bottom of the curve of the growth rings. This blank will yield a pleasing, symmetrical grain pattern mirrored in each side of the bowl—a pattern I call butterfly grain.
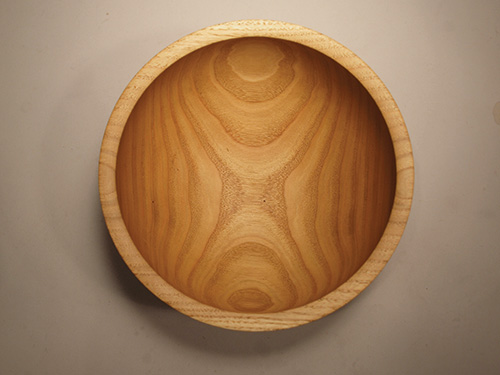
Quarter-sawn blanks lie on both sides of the pith. For the species of timber that I use, I rarely make quartersawn bowls because, to my eye, the resulting grain pattern is not as appealing—the grain lines run straight through the bottom of the bowl and show little or no curl, eyes, or any of the other variants that make wood visually appealing. The exception is when I can acquire a species with strong medullary rays such as our local Oregon white oak (Garry oak). The grain in quarter-sawn oak can far outshine its flat-sawn relatives.
The top blank in the above photo can be used to make a natural-edge vessel, or the outer edge can be removed for a smooth rimmed bowl. The grain orientation running through this blank will produce an approximately round or oval grain pattern in the bottom of the finished bowl. I usually evaluate the blank and consider whether the outer (bark) edge will yield a balanced shape, and if so I will keep the outside intact for a natural-edge bowl. Here I decide against a natural-edge form.
Yet another orientation is possible, an arrangement I call slash-sawn, although the grain orientation approximates rift-sawn dimensioned lumber . The slash-sawn blanks will distort significantly while drying, sometimes to the point of being unworkable, and the finished bowl will simply not be as attractive as the flat-sawn bowl. It is true that more of the log will be lost in taking the one flat sawn blank instead of two slash-sawn blanks. Turner and teacher Lane Philips’ mantra is, “Don’t trade volume for beauty,” and I too encourage taking the best blanks out of the tree, not the most blanks.
I balance the round on wood blocks to prepare it for cutting, ensuring the round is stable and will not roll during the cuts. I orient the cut lines vertically, as cutting straight down is easier and more accurate than attempting an angled cut. Because most of my cuts are with the grain, I use a rip, or skip-tooth, chain on my chainsaws. These chains also work for cross-cutting and are less prone to clogging from the long curls generated by the rip cut. A secondary benefit of a rip chain is that when it is dull, it has half as many teeth to sharpen as a standard chain.
before completing the dissection, working from the outside to the inside cuts.
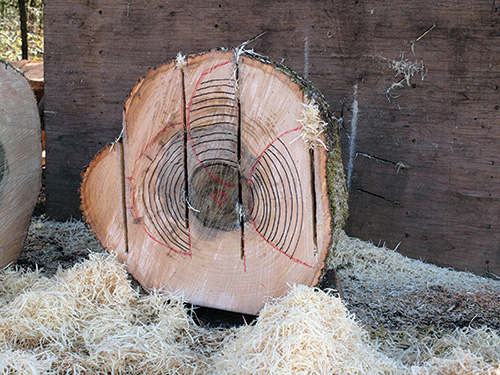
I make all the parallel cuts, stopping each cut short of exiting the log. Before I make the first center cut, I mark the location of the pith on the far end of the round. This guides my cut to keep it running parallel through the block with the pith line. Having the grain oriented straight through the blank is important to the appearance of the finished bowl. The prettiest bowl pattern has the grain parallel to the bottom of the bowl. If I have to choose between making the cut parallel to the pith line and the bark line, I generally cut parallel to the bark line to preserve the desired grain orientation.
The quarter-sawn blank rests on my cutting bench, a 22″- (56cm-) high jig that minimizes my stooping and saves wear-and-tear on my back. I cut outside the checks around the pith; I will get two quarter-sawn blanks out of the slab. I did not cut through the slab because the support blocks underneath the blank are in the wrong location. A through-cut in this situation could pinch my bar.
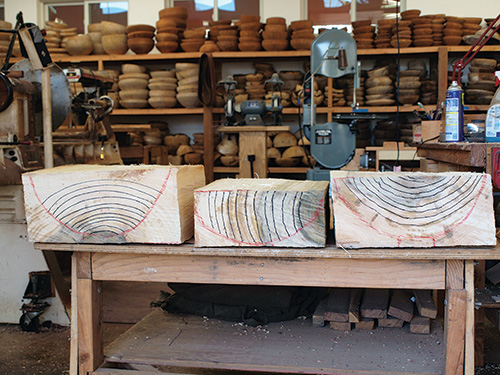
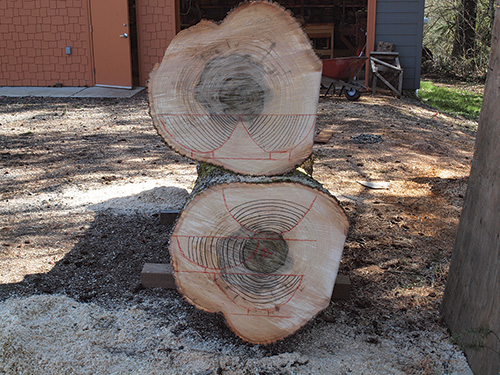
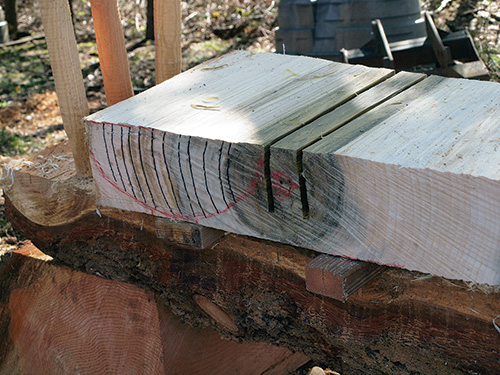
The three basic straight-grain blanks sit on the workbench, bandsaw ready. The flat top and bottom offer two stable surfaces for the bandsaw table. Trying to cut a round or irregular- bottom bowl blank on the bandsaw can lead to an unsupported and dangerous cut.
Cutting the Crotch
I cut a 15″- (38cm-) round from the tree that includes the crotch section. In the area between the two limbs’ pith lines will lie an expanse of interlocked feather grain, or crotch figure, and I have attempted to cross-cut the log below this region.
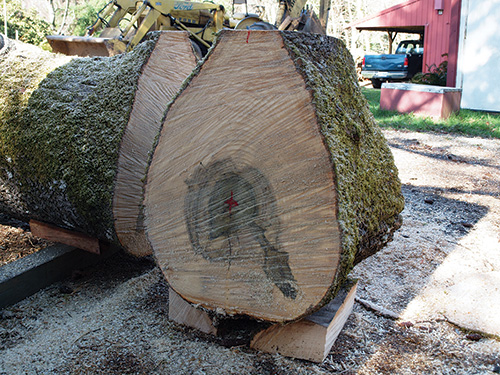
A straight line connects the pith of the limb to the pith of the tree. As with the previous round, I orient this line vertically for cutting. I mark the pith at the end of the round and transfer the mark to the top of the log where I will use the location to guide my cut. I also mark any checking to be avoided around each pith, of which there is little in this log.
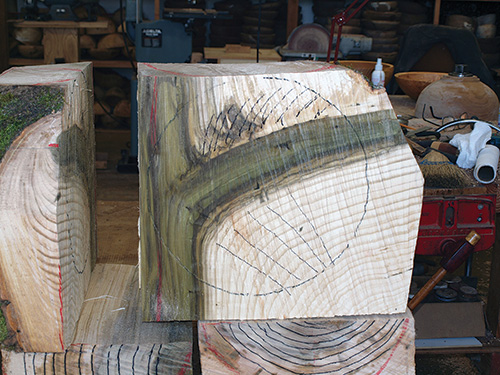
This photo shows the approximate orientation of the three blanks I could extract. If this were expensive or rare wood, I would separate the bottom bowl blank first, but because that blank would be flat-sawn and straight-grain, I decide to forego extracting it.
I make the center cut first, stopping short of cutting completely through the log. Then I slice off each side before returning to finish the center cut. I always saw from the upper end of a crotch section where the most prized feather figure lies. The feather will taper off towards the bottom of the cut, so if my cut wanders a little, there is less likelihood of losing the best figure.
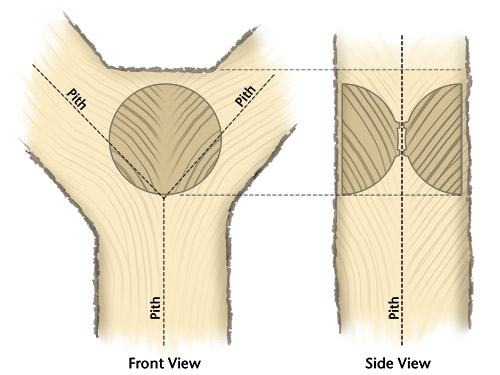
The drawing shows how the feather-figure bowls are oriented in the tree’s crotch. The side view in this illustration shows the location of the pith, which I intend to bisect with my cut. The bowl bottoms are oriented towards the center of the tree, placing the feather pattern in the bottom of the finished bowl.
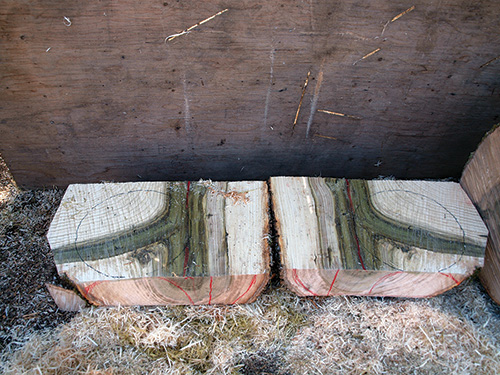
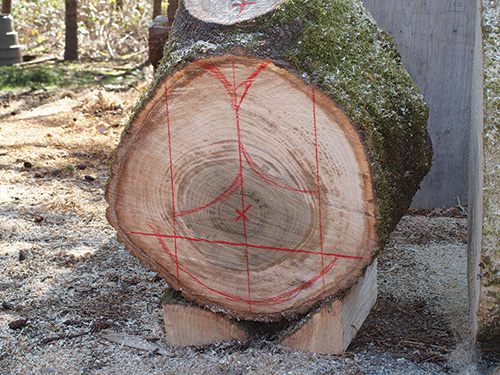
With the crotch section halved, I mark out the best patterns with my calipers and highlight the pith lines with red chalk. Cutting the blanks along the pith lines yields two bowl and two spindle blanks. The feather figure lies above the pith line of the limb and to the right side of the trunk pith line. This crotch did not have a big feather area. Harder to see in the photos is that the weight of the limb has compressed the wood at the junction with the trunk to create fiddleback figure, which I have shaded with a marker.
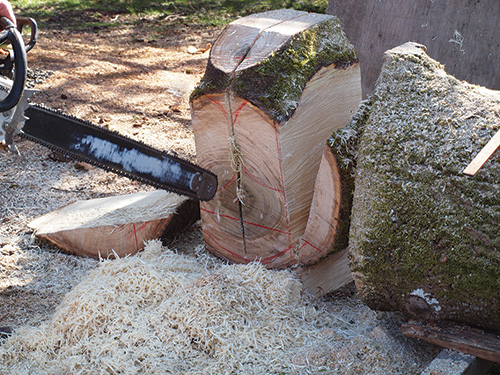
These blanks are now ready to be bandsawed and rough-turned. I will make my final adjustments to the forms for grain alignment as I rough out the blanks between centers, an approach I learned from John Jordan. Turning between centers gives me an opportunity to make final adjustments to the bowl blank and possibly correct mistakes made during chainsawing.
Final Thoughts
There are many advantages to working green wood, including salvaging local timber that may not be commercially available. Cutting one’s own blanks offers the chance to optimize blank size and grain patterns. Turning green wood also generates less dust and requires less physical effort than seasoned wood. Finally, when I rough out green blanks, I get to see colors in the fresh wood that no one else will see. Fresh madrone can be bright red, almost fluorescent, and black walnut can show shades of deep purple and green. Unfortunately, these bright colors fade as the wood dries. With experience processing my own trees, I rarely buy a bowl blank. I find I am no longer willing to give up control of this part of the creative process.
For those who would like to dive deeper into this subject, I recommend two books: Reading the Wood by Michael Elkan and Turning Green Wood by Michael O’Donnell.
Dale Larson has been turning bowls for forty years. He is a founding member and past president of the Cascade Woodturners in Portland, Oregon. Dale served on the AAW Board from 2009 to 2014, as both symposium chair and president.


