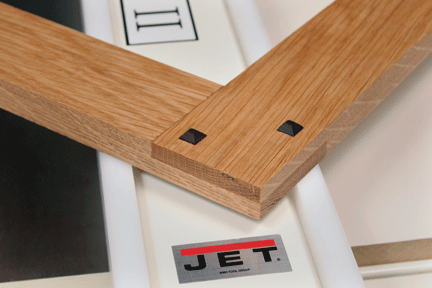
A table saw and dado blade will make quick work of this eye-catching, interlocking corner joint.
Corner lap joints aren’t as strong as mortise-and-tenons or as quick to assemble as pocket screw joints, but their interlocking crossover pattern is quite attractive when a decorative joint is what you want. These simple joints are excellent choices for picture frames, light-duty cabinet doors or face frame construction. It’s a good idea to reinforce the crossgrain glue bond by driving a pair of pegs, dowels or screws through the parts to create a mechanical connection.
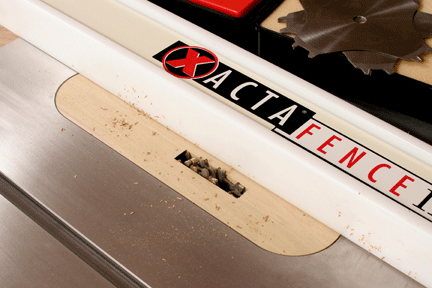
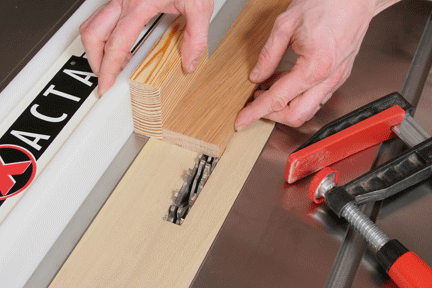
STEP 1: Since most of the geometry of a corner lap joint is exposed, it’s important that your dado cuts are crisp and clean. A good way to minimize tearout is to outfit your table saw with a zero-clearance throatplate made of scrap. Use the saw’s factory throatplate as a template for cutting and shaping the new throatplate blank, and plane it to match the thickness of the original. Then, install a wide dado blade in the saw and clamp the rip fence partially over the new throatplate to hold it securely. Make sure the fence is still clear of the blade. Start the saw and raise the blade slowly up through the new throatplate to create a zero-clearance blade opening (see Photo 1).
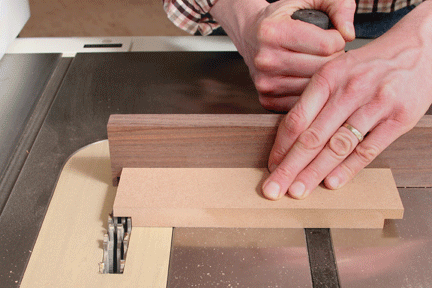
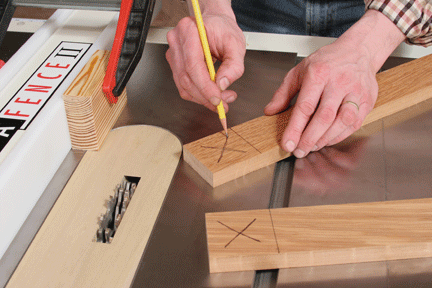
STEP 2: A corner lap joint is really nothing more than a pair of rabbets with elongated tongues that fit together. Usually, the joint parts are the same thickness and size. Once assembled, you’ll want the faces of both parts to meet flush. The trick is milling these rabbets so they mesh together perfectly. To find the correct blade height, cut a rabbet into both ends of a piece of scrap material that’s the same thickness as your joint parts. Set the blade height to about half the thickness of the scrap and make the test cuts, backing them up with a miter gauge outfitted with a sacrificial fence (see Photo 2).
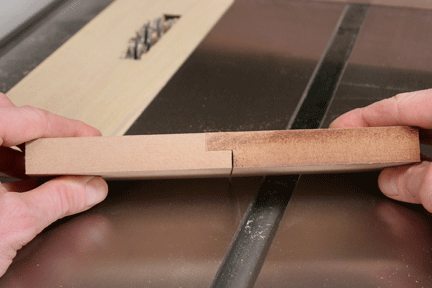
STEP 3: Cut the test scrap in two and fit the rabbets together. If the part faces and tongues meet flush, like the sample shown in photo 3, your blade height is perfect. Raise the blade slightly if there’s an offset between the faces – the tongues are too thick. Lower the blade a tad if there’s a gap in the middle between the parts – the tongues are too thin.
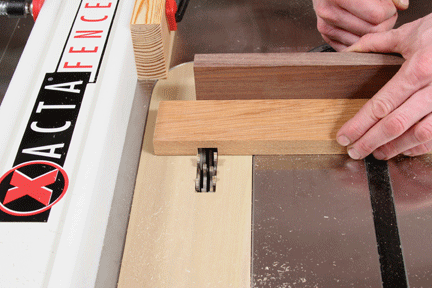
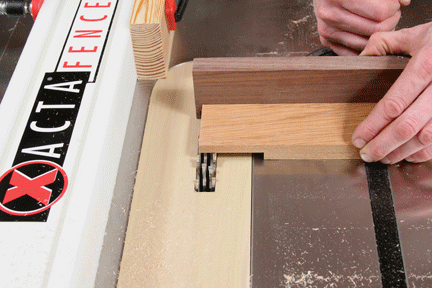
STEP 4: If your joint parts are the same width, you can use the rip fence to establish the length of both tongues easily and without cutting to layout lines. You’ll need to clamp a scrap block to the rip fence to serve as a step-off block during cutting. Here’s how to find the tongue length: set the step-off block against the rip fence, and place the edge of one workpiece against the scrap block. Adjust the rip fence until the outer edge of the workpiece lines up with the outside edge of the dado blade (see Photo 4). Lock the fence.
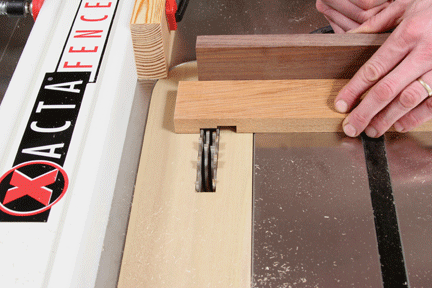
STEP 5: Position the step-off block toward the front of the rip fence, far enough so the workpieces will clear it before making contact with the blade. Clamp the block to the fence. Then, set the joint parts together to determine the relationship of the parts, and mark the inside tongue areas you’ll cut away (see Photo 5).
STEP 6: Cutting the tongues to shape will take several passes, starting with the workpiece pressed against the step-off block. Make this first pass, sliding off the step-off block and holding the workpiece tightly against the miter gauge fence (see Photo 6). For large or long workpieces, it’s a good idea to clamp the workpiece to the miter gauge to keep it from accidentally shifting.
STEP 7: Now, slide the workpiece about one blade width away from the step-off block and make a second pass to hog out more waste (see Photo 7).
STEP 8: Repeat the process until you reach the end of the tongue, then run the full tongue over the blade again to remove any bits of waste that may still remain (see Photo 8). Cut the other workpiece tongue the same way.
STEP 9: Slip the joint parts together and check their fit. If your blade height and rip fence settings were accurate, you’ll have a square, flush and neatly machined lap joint that’s ready for glue up.


