This article, “The Basics of Hand-Chasing Threads in Wood,” is from the pages of American Woodturner and is brought to you by the America Association of Woodturners (AAW) in partnership with Woodworker’s Journal.
Woodturners of today might think of hand-chasing threads as a nearly forgotten art. Before the availability of inexpensive glues, joining wood parts was accomplished mechanically — with hand-cut dovetails, mortise-and-tenon joints, and hand-chased threads. As a design feature, screw threads in wood can elevate your work to a mysterious and intriguing level.
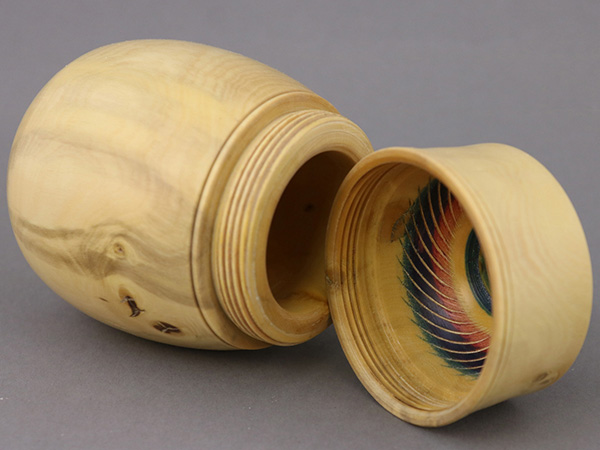
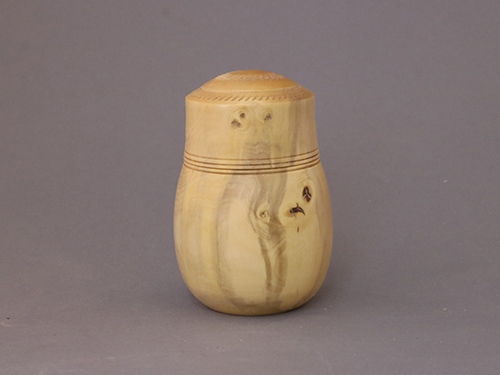
Chasing threads using traditional hand tools at the lathe is a fairly complex topic requiring a clear understanding to achieve success. In this article, I will cover threadchasing tools, wood selection, and the necessary techniques. I’ll demonstrate mating female threads to male threads in a simple turned box (made of boxwood) with special attention on design.
Thread-chasing Tools
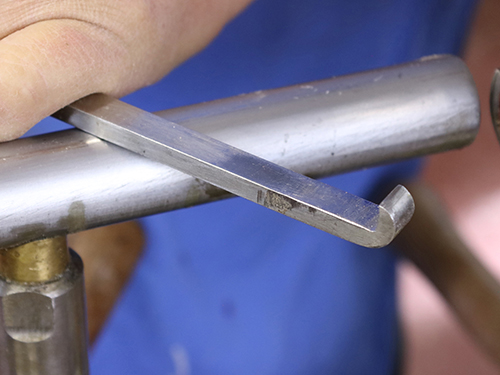
Recess Tool
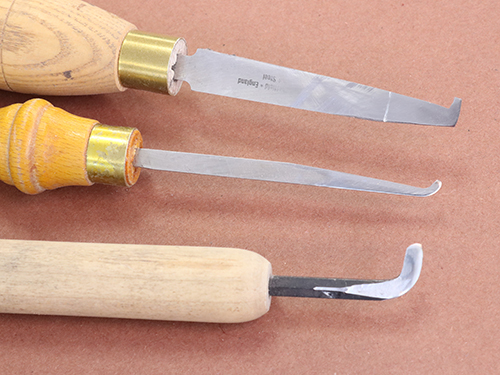
A recess tool is used to form a recess, or stopgap, at the point where the female threads end. The recess is simply a gap that allows the chaser to be removed without accidental contact with the shoulder, which could damage the threads. Shown are three examples of recess tools; the bottom one was ground from a hex wrench.
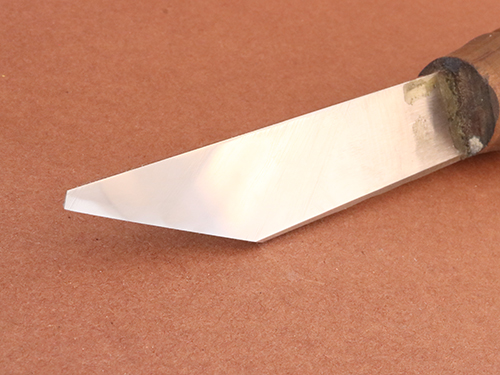
Matching Thread Chasers
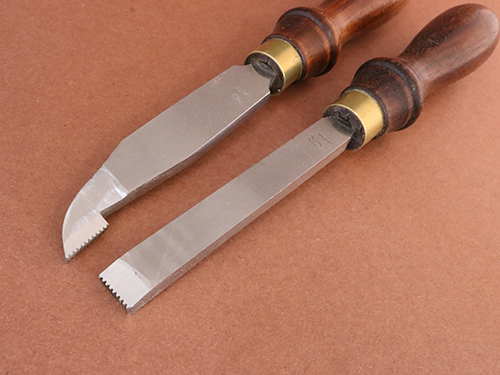
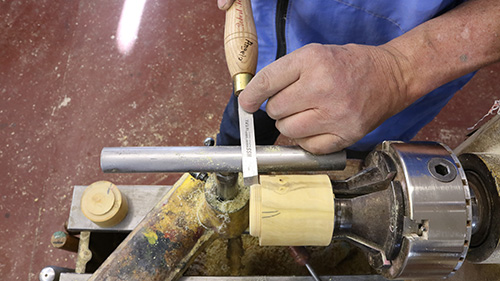
You’ll need a matched set of thread chasers (top: female chaser and bottom: male chaser). Chasers are scraping tools, sharpened on the top surface only. Continued sharpening will develop a hollow-ground, or concave, profile on top. A new chaser begins as a traditional scraper with a flat top and gradually transforms into a negative-rake tool, becoming less “grabby” and easier to use. Threads per inch (tpi) refers to pitch, or the distance between the peaks on the chaser. Pitch is measured by counting the number of peaks in 1″ (25mm). So a 20-tpi chaser has 20 threads in 1″. Knowing the tpi on a chaser will help determine lathe speed and pace of traverse.
Point Tool
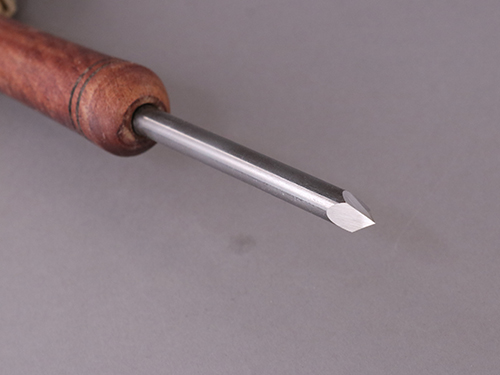
This point tool, made from 5⁄16″ (8mm) round tool steel, is sharpened with three bevels and three cutting edges, forming a point at the end. In thread chasing, this tool is used for creating a chamfer where both the male and female threads begin and a recess where the male thread ends.
Armrest Tool
Lathes did not always have a toolrest that could be adjusted to a position perpendicular to the bed ways. This created a challenge when addressing the endgrain of a spindle project. The armrest tool saves time by making it possible to extend a tool perpendicular to endgrain without having to reposition the toolrest. The first armrest tools were certainly made from wood and no doubt added speed and efficiency in mass-production.
“Inside,” or Square Tool
The “inside,” or square, tool can be very effective when used in conjunction with the armrest tool. Mainly used to hollow endgrain and to create a parallel-sided recess in preparation for chasing internal threads, this tool is an indispensable part of the thread chaser’s kit.
Getting Started
For successful thread chasing in wood, choose a species with close, hard, dense, diffuse-porous grain. Understanding specific gravity helps in selecting wood amenable to taking a proper thread, as, according to The United States Department of Agriculture, specific gravity is the “single best predictor of the mechanical properties of wood.” Woods with a specific gravity of +/- 1 are a choice for thread chasing. I chose boxwood for the project shown in this article, a small box with a threaded lid.
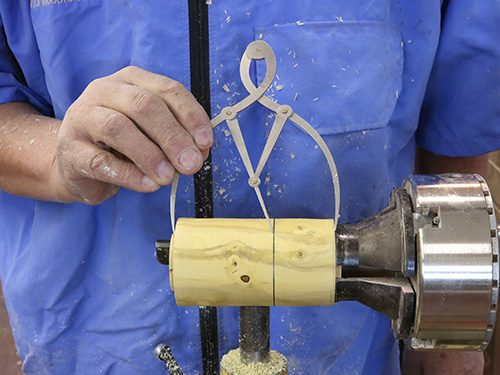
Begin by truing up the blank and creating a cylinder. This provides a good starting point for the next steps and for incorporating design choices later. With the help of a golden mean caliper, divide the blank into what will be the box lid and base. Using a thin parting tool, separate the base from the lid, which remains in the chuck.
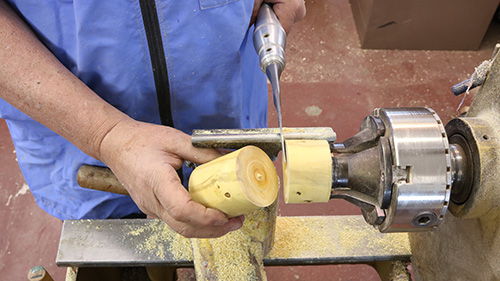
Note that I choose not to shape the box profile during this early turning stage, as chasing the threads and joining the lid to the base initially allows for easier profiling of the project later. It is critically important that the threaded connection be placed precisely, or it will be difficult to complete the shape of the box.

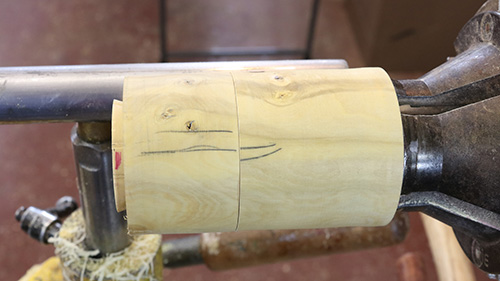
After parting off the base, hold it up to the lid with the grain aligned. Add registration lines that span from base to lid to indicate the desired alignment. This will become important later, when the threaded connection is completed. Although the pencil lines will be turned away, note the lines near the spigot, or tenon, which will remain after the box profile is turned. I add corresponding lines on the top of the lid for future reference. When the grain in a threaded project is prominent and its lines from lid to base are obvious, pencil lines are not needed.
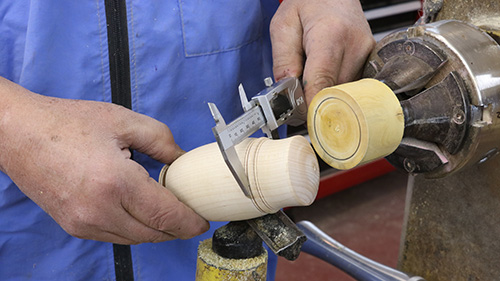
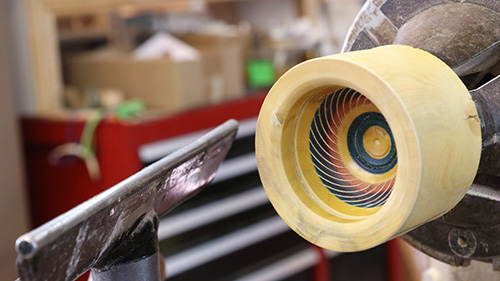
A turned, solid prototype helps to locate the threads in relation to the shape of the completed box. In this case, the threads will be located just below the beaded area on the prototype. I use a Vernier caliper to measure this diameter on the prototype, then decrease the span to allow for wall thickness in the area to be threaded. I then transfer this setting to the underside of the lid. The circular pencil line indicates the outer diameter of the female recess.
The Marriage of Lathe Speed and Traverse
Forming threads in wood using hand tools is, to me, the art of chasing threads. Success comes with practice and experience but also depends on finding the right harmony between lathe speed and traverse (the rate of the tool moving across the wood). Constant lathe speed is controlled by the machine, but traverse is determined by thread tpi in combination with lathe speed.
I find 300 to 350 rpm is the optimal speed range for 16-tpi thread chasers. A lathe speed that is too slow will result in “drunken,” or wavy, threads. When the lathe speed exceeds 400 rpm, thread chasing becomes more difficult, resulting in a double thread. In reality, having a perfect marriage between lathe speed and traverse will help prevent either of these issues.
Consider that at the same lathe speed, the rate of traverse using a 10-tpi chaser must be twice as fast as the rate of traverse using a 20-tpi chaser. Consequently, rate of traverse and tool tpi will also help determine lathe speed: When using a coarser thread chaser (fewer tpi), the lathe speed can actually be slower.
Female (Internal) Thread
I selected a set of 16-tpi chasers for this project. Although it may be easier to develop threads with 20-tpi chasers (recommended by many turners for learning thread chasing), I find it more difficult to mate the female with the male thread. My go-to set of chasers is the 16 tpi, but I do opt for the 20-tpi set when threading acrylics, man-made materials, or dense, close-grained hardwoods.
The female, or internal, thread is typically formed first. Start by drilling or turning a recess to accept the female thread in the underside of the lid. The diameter of this recess has already been marked; its eventual depth will depend on your project. The dimensions for a pillbox cap will differ from the lid in the example project shown here. I rarely “measure” a dimension on anything I turn, but rather gauge and transfer diameters with a caliper. For example, when the female thread is established, I will open the caliper to make contact with the crest of a thread and lock this setting, which is used later to establish the male threads.
I hollow the lid using a box scraper, forming parallel sidewalls. On an endgrain box like this one, you might choose to drill a pilot hole to indicate depth and ease the hollowing. However, I find this technique a benefit only when hollowing deeper, as with the base of this box. With the shallower lid, it is hardly worth the effort. The tools you select for hollowing will depend upon your own inventory of tools and partly on the project you have selected. For some projects, it is easier to develop this recess using a drill bit held in a drill chuck.
Whatever method you choose to hollow the lid, it is important to complete the whole interior before chasing the female threads. Sanding and/or applying a finish after the threads are formed may cause damage to the threads.
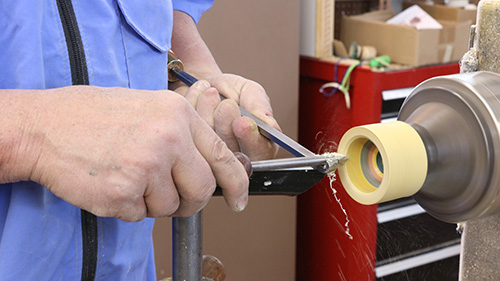
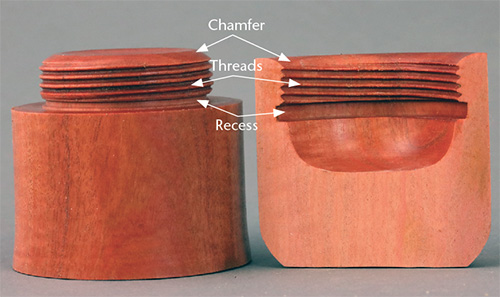
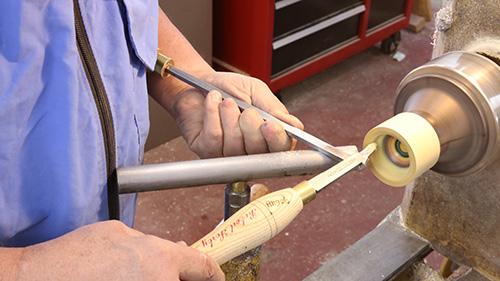
In preparation for chasing the female thread, set the toolrest 45 degrees to the bed ways. Using the armrest tool, I can complete the remaining operations for chasing the internal thread without ever moving the toolrest from this position. With a point tool, establish a chamfer on the leading, inside edge of the recess . This relief area provides a place for the thread chaser to start, and after the project is completed, the chamfer allows the mating surfaces to thread together more easily.
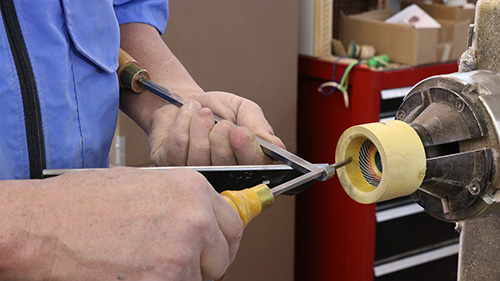
Use a recess tool to form a recess, or stopgap, where the female thread will end. This recess allows the chaser to be removed before it makes contact with either a shoulder at the end of the threads or the bottom inside of the lid. Without this relief, the chaser would hit the shoulder and rip out the thread you have already established. This relief area is necessary in both male and female threads.
Whether chasing the male or female thread, it is important to determine the width of the area upon which the threads will be chased. This is the distance from the chamfer to the recess. The actual width will vary depending on your project but could be as narrow as 3/4″ (6mm). It is helpful to think in terms of layers of threads, or total rotations necessary to screw the lid and base together. Ordinarily, I am satisfied with having two to three complete layers of threads.
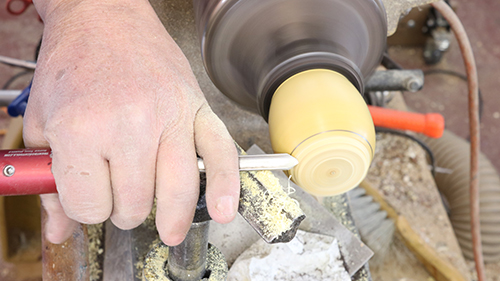
As the female chaser first makes contact with the chamfer, the tool is held 45 degrees to the bed ways. With the thread chaser supported by the armrest tool, start with a gentle right to left motion, moving the chaser ever closer to the chamfer until contact is first made with the second or third tooth on the chaser. It is very important that two teeth of the chaser make contact at the same time. When using very coarse chasers, like those with 10 or 12 tpi, the chamfer must be large enough to accommodate their wider pitch. Form the thread initially on the chamfer, then proceed by swinging the tool handle away from you with each pass.
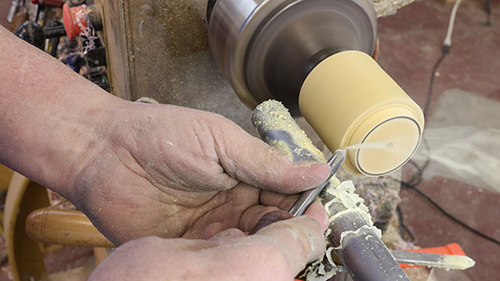
After a groove has been established, the chaser is drawn farther into the recess. Note that the female chaser is not pushed into the recess by the right hand: The speed of traverse is determined by the chaser being “pulled” by the armrest tool into the threads you have already created. In fact, it is common practice to lubricate the threads as you progress. I find a very loose mixture of beeswax and mineral oil works well to reduce friction.
The thread chaser tool will gradually be moved to a position parallel with the bed ways. At this point, the chaser is cutting with the lead tooth. As you continue making passes, skip over the first or second threads. The female thread chaser should be held level or parallel with the bed ways and the top cutting surface of the tool positioned slightly above center height.
A key point about tool presentation: The female thread is formed by pulling the tool into the developing threads with the aid of the armrest tool, while the male thread is formed by pushing the chaser into the threads using your right hand. In both cases, the pressure applied to the tool in the grooves already formed will dictate the rate of traverse.
Male (External) Thread
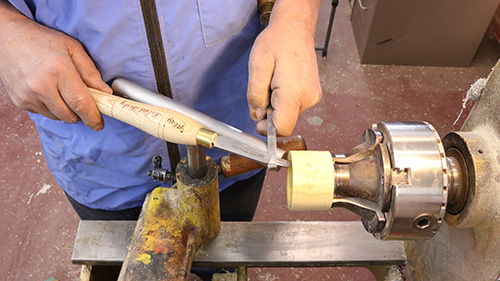
With the box base secured in the chuck jaws, form a tenon where the male threads will be located. It is a matter of preference whether to hollow the box before or after the male threads are chased. Use a Vernier caliper inside the lid to gauge the diameter of the completed female threads (positioning the caliper at the thread crest). Then transfer this span with a pencil to the bottom of the male tenon.
I use a point tool to further prepare the tenon for chasing the external thread. Begin by making the tenon sides parallel to each other. The diameter of the tenon should be equal to the anticipated crest of the male threads plus 2mm to allow for wood wasted during the chasing operation. In simpler terms, the depth of the male and female threads should overlap.
As for the length of the tenon, note that the shorter the span of male threads, the better the grain alignment. The length of the female threaded area will have no effect on grain alignment, but the length of the male threads, if wider than necessary, can result in grain that does not match up well when the lid is on tight.
Form a recess adjacent to the shoulder at the base of the tenon. Then form a chamfer at the end of the tenon, where the thread chaser will first make contact.

I physically “size” the connection by gently pressing the lid onto the spinning base of the project. A rub mark will appear on the tenon, which indicates the diameter of the crest of the male thread. I find this process more accurate than relying on measuring and marking, but if you are not comfortable holding the lid to the spinning base, you can slow or stop the lathe and simply turn the work by hand to create a rub mark.
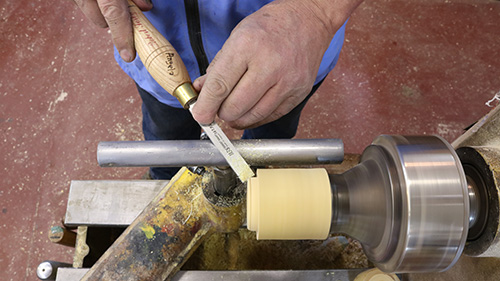
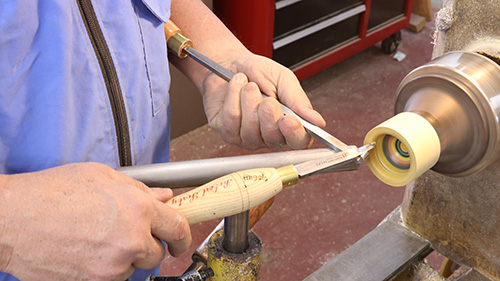
Ensure that the sides of the tenon are as parallel as possible and reestablish the chamfer if necessary. As similarities exist for chasing both female and male threads, I will cover only the cursory elements of the male thread chasing process. Begin chasing the male thread with the handle of the tool pushed away from you and contacting the chamfer at 45 degrees.
Continue with a right to left motion until the second or third tooth of the chaser gently contacts the wood. As described earlier, the rate of traverse is determined by lathe speed and the pitch of the chaser. The thread chaser will begin to form a groove on the chamfer.
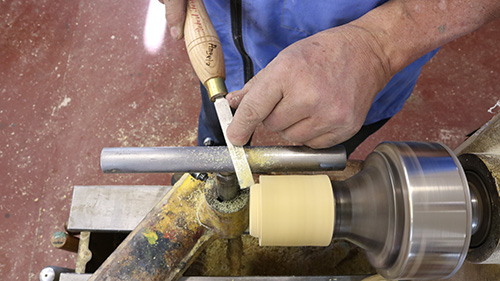
Continue to form a deeper thread while swinging the handle of the chaser toward you. Moving the thread chaser perpendicular to the bed ways, continue until the thread is fully developed.
Join Female to Male Threads
Test-fit the connection once the male thread has been formed. It is rare that the male and female threads will fit together perfectly at this point. If they don’t thread together, determine the cause and apply one or more of the following solutions, continuing to test-fit and repeat any of these steps as necessary:
1. Check for and remove any obvious taper on the male thread: continue chasing the threads.
2. Slightly reduce the diameter of the male thread. Resist the temptation of reducing this diameter by continued chasing, as this can result in the peaks of the thread crumbling. Remove the crest of the threaded area and then continue chasing.
3. Check that the recess or stopgap remains at the base of the tenon. The recess is often removed during thread chasing. Re-establish the recess if necessary.
4. Remove a very small amount of wood from the crest of the male thread. Doing so may allow for a smoother connection and prevent the peaks of the thread from crumbling as the parts are threaded together.
Grain Alignment
The final step in the thread-chasing process is to align the grain that runs from the base of the box to the lid. This is accomplished by removing very slight amounts of wood from the shoulder of the male threaded area. Continue removing wood and testing until the original pencil lines begin to match up when the lid and base are threaded together.
The photos show that the pencil marks are not yet lining up perfectly. As turning continues on the outside of the box, the lid and base will screw farther together. Allowing for a slight mismatch will also accommodate any finetuning of the connection later.
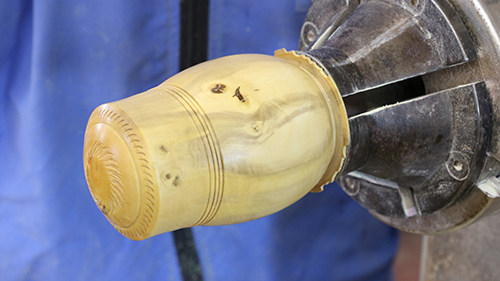
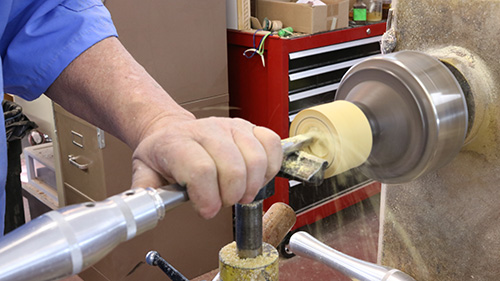
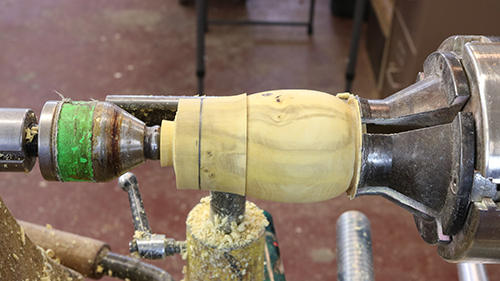
I typically shape and complete the design of the box while the lid is held by the threads. It is good practice to use tailstock support while turning the outside of the box. As you arrive at the final shape of the project, the connection usually tightens up a bit and the grain will line up.
Reverse-mount the base and finish turning its bottom. I do this by turning a “threaded chuck” in scrap wood and screwing the base onto it.
Final Thoughts
Chasing threads in wood using hand tools will not appeal to everyone. “What is the point?” you might ask. Learning to chase threads is by no means an end in itself. Joining the lid and base of a box with threads will elevate your work to a level attained by only a small percentage of woodturners. This specialized skill will add a new dimension to your projects and open up possibilities not available with a simple slip-fit connection. But regardless of whether you take on the steep learning curve of thread chasing or simply read about it and pass on the knowledge, we are preserving an important part of woodturning history.
All photos by Cheryle Angelo.
Sam Angelo spent forty years in public education, teaching, coaching, and working as a school counselor, eventually retiring in 2011. He began woodturning in 1988 using a borrowed lathe. Sam has been chasing threads by hand for ten years and enjoys incorporating threads in puzzles, boxes, and hollow forms. His work can be seen at wyomingwoodturner.com. Sam has also produced in excess of 500 videos on all aspects of woodturning, including thread chasing. Visit his YouTube channel.


