
This article, “How to Turn a Simple Tray,” by Richard Raffan, is from the pages of American Woodturner and is brought to you by the America Association of Woodturners (AAW) in partnership with Woodworker’s Journal.
As utilitarian items, trays in a house are like mallets in a workshop: often useful, so always worth having a variety close by. Trays are generally used for corralling and/or transporting a clutch of objects—a few mugs of coffee too hot to hold or difficult to carry at one time, sushi, bread, keys, or drinks to share among friends. As a supporter of liquid-containing vessels, a tray needs to be flat, with a well-defined rim to the functional space. You need a rim you can get your fingers under and grasp, so you can lift the tray. And a tray needs to be light in weight and just thick enough to support any weight it is likely to carry. The rim needs to be at least 1/4″ (6mm) thick so it won’t break when dropped, which is inevitable if you think in terms of decades rather than years.
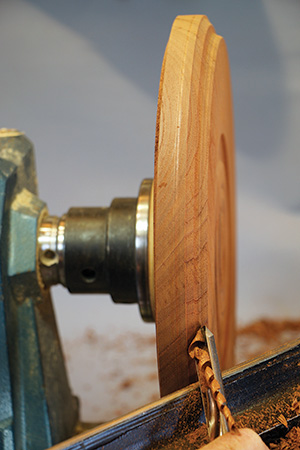
The example shown in this article is similar to several small trays I have in daily use. This is a facework project with the grain running across the face of the blank and at 90 degrees to the lathe axis. You need a blank at least 1″ (25mm) thick. Here, I’ve used an Australian red cedar offcut from a furniture maker’s scrap bin. It is 11-3/4″ (30cm) in diameter and as large as I can fit on my only lathe, now that I’ve downsized to a smaller model.
As with a bowl, I turn the outside profile and base first, then remount the half-turned tray for hollowing. First, the blank goes on a screw chuck so I can do the outside. Then dovetail jaws expand within a shallow recess in the base as the tray is completed. This latter method precludes the need to remount the tray to remove a tenon or finish the base after hollowing.
A tray is an appropriate turning project for any skill level. The main challenge is to turn a flat surface inside the tray and then keep it flat while sanding. This project is completed entirely on the lathe, though of course it can be embellished after turning. If you’re wondering about production and costing, allow about forty-five minutes.
Chucking Options
The quickest and easiest way to mount any facework blank with a flat face is on a screw chuck. For most facework, I use the dedicated Vicmarc 3-in-1 Screw Chuck, shown attached to the lathe, usually with spacers to reduce the length of the screw. You rarely need more than 1/2″ (13mm) of the screw penetrating the wood, and on small blanks 1/4″ (6mm) can be sufficient. In preparation for mounting, drill a hole just deep enough to accommodate the screw. Screw the blank onto the chuck on the lathe, and ensure the blank is wound tight against the chuck face or jaws.
For blanks larger than 18″ (46cm) diameter, I occasionally use a screw accessory with step jaws for greater blank-to-chuck contact. If you have only a screw accessory mounted in standard 2″ (50mm) or smaller jaws, it pays to turn a ring that fits over the jaws to contact the chuck body, thereby increasing the surface area against the blank. The wider the backing surface, the shorter the screw you can use safely; also, the blank will be less apt to pivot on a wider backing surface than if it were mounted only against the smaller-diameter jaws. With a blank screwed tight against the chuck, you won’t need to use the tailcenter to keep the blank steady. That’s important because usually you need unrestricted access right across the base. Also, many wood lathe tailstocks are not spot-on the lathe axis — which is a problem when supporting wood mounted in a chuck.
For many years before the advent of modern woodturning chucks, I made my own 7″- (18cm-) diameter screw chucks. They were among my first turning projects. A #14 wood screw penetrated the blanks slightly less than 1/2″. On this, I turned hundreds of plates, trays, and platters up to 18″ diameter from boards 1½” (38mm) thick. If the blank spun on the screw, courtesy of a catch or cutting too forcefully, it was remounted on another screw chuck with a slightly fatter screw. If the blank spun again, it was held on a standard faceplate with screws.
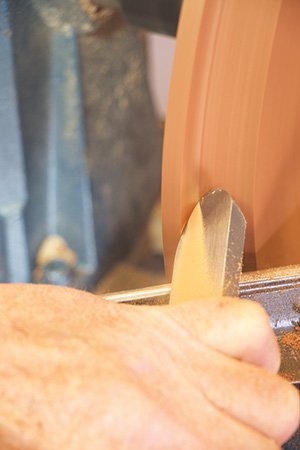
True the Blank
First, true the blank, removing any splits or defects you don’t want in the final piece. When turning any thin blank or planed board, begin with the side, using either a spindle or bowl gouge to shear cut in from both faces with the bevel against the wood.
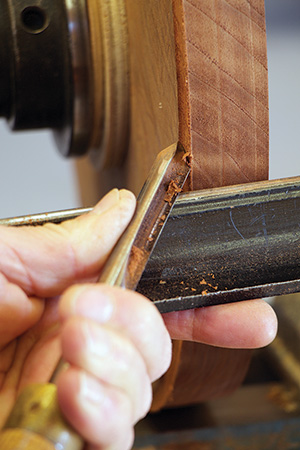
This avoids splitting the endgrain on each edge. Then remove as little wood as possible to true the outer edges of each face, easing the tool’s edge into the cut with your thumb.
Make sure the gouge is rolled on its side: if you have the flute up, a heavy catch is guaranteed.
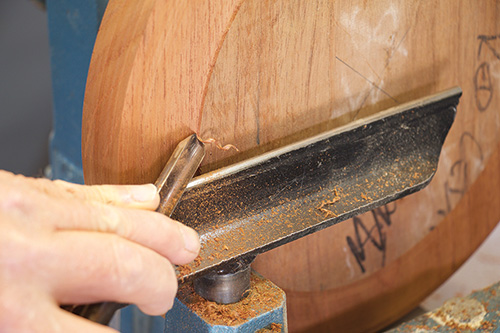
To true the bottom surface, roll the gouge over to bring the bevel onto the wood and make a shear cut to the center. To ensure the tray sits flat, the base needs to be very slightly concave: the barest hint of light beneath a straightedge is sufficient.
Typically, I use a skewed scraper for a more controlled cut across the base, gently stroking the surface to remove only fluff or very small, curly shavings.
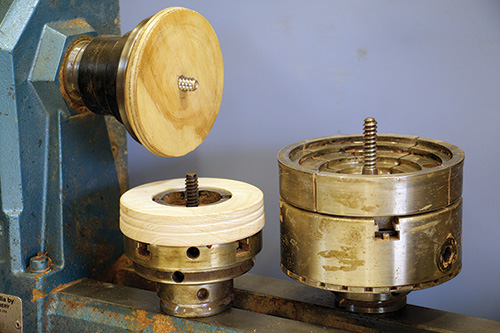
Turn a Recess for Expanding Jaws
Into the barely concave bottom surface I cut a 1/8″ (3mm) dovetailed rebate shaped to match the jaws on my chuck. The larger the diameter of the jaws, the better the support for the job when hollowing the inside, so for this tray, I used 5-1/2″- (14cm-) diameter step jaws in a 6″- (15cm-) diameter recess. A 1/8″-deep groove might seem too shallow, but crisp dovetail jaws grip very effectively, and the wood is unlikely to split when there is plenty of wood surrounding the rebate.
Chuck jaws with serrations or ridges damage the wood and need much deeper rebates, so they are not well suited to this situation. Apart from that, since they require a deeper rebate, serrated jaws severely restrict your design options—particularly the depth to which you can hollow the tray.
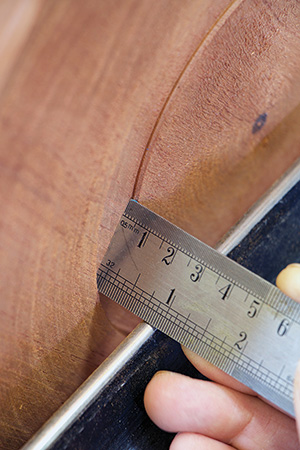
It pays to make the bottom of the rebate flat, so the ends of the chuck jaws sit flush against the bottom. If they don’t, you will encounter one of two problems: either the jaws won’t be able to fit into the corner of the rebate (in which case you could have turned a rebate half the depth) or if there is space between the jaws and the bottom of the rebate, the depth to which you can hollow the tray is reduced and this in turn makes the tray thicker than necessary. Consequently, confirm that the bottom of the recess is flat using a small straightedge.
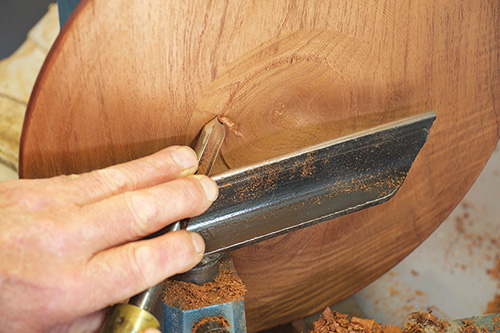
Detailing the Base
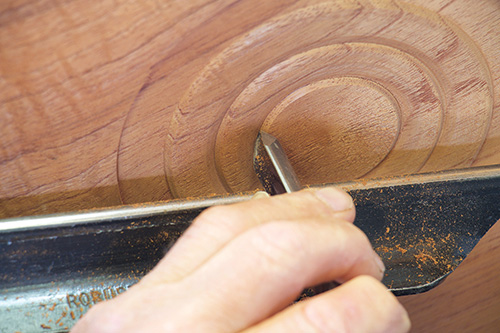
For decoration, I usually cut some wide beads within the area defined by the chucking recess. I do this using a 3/8″ (10mm) spindle gouge with a fingernail grind and 35-degree bevel, first pivoting the nose of the tool in from the left, then the right. You can also use the corners of a square-end scraper for such detail, but a shear cut is cleaner, requiring minimal sanding. Take care not to go deeper than the rebate for the chuck jaws, as that would compromise the depth to which you can hollow the inside and weaken the base, which can lead to vibration during hollowing.
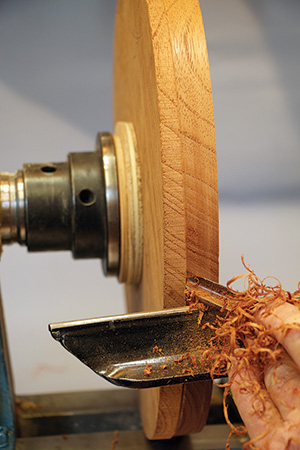
Turn the Rim Profile
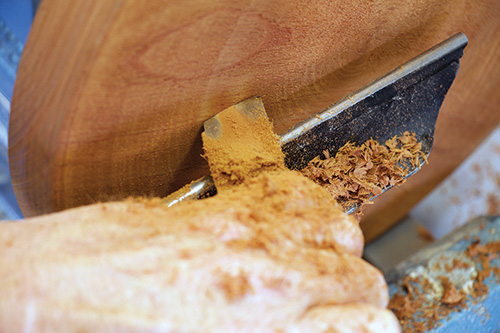
After you have detailed the base, form a cove about 1″ wide under the outermost rim. This will enable you to grasp and lift the tray with ease. I hog out the bulk of the waste using the left wing of a spindle gouge, then use the same edge to shear-scrape the surface, easing the edge back and forth over just a small area at one time to remove only powder. Even more effective is to shearscrape with a 1″ asymmetric, roundnose scraper tilted on edge. Keep the nose of the tool clear of the wood to avoid catches.
While the workpiece is still mounted on the screw chuck, sand and polish the profile. I sand to 400 grit abrasive and apply my usual finish of boiled linseed oil and beeswax.
Remount and Hollow
Remove the tray from the screw chuck and remount it for hollowing. The hole that was used for screw chucking can be drilled deeper and used to indicate hollowing depth.
For accuracy, rather than drill a depth hole by hand, go to a drill press where you can set the depth precisely to leave a fraction over 1/2″ thickness in the base—about 3/8″ over the bottom of the chuck rebate. A couple of depth holes drilled away from the center will help you gauge a flat surface.
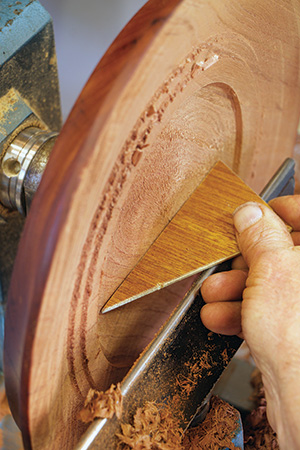
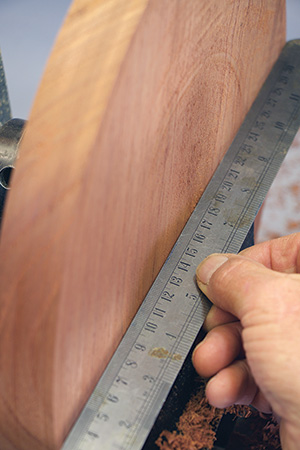
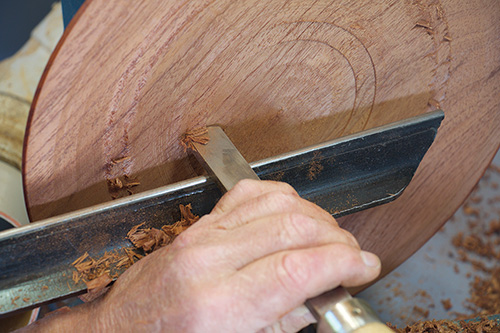
Turn the working area of the tray flat. You can remove the bulk of the waste using a gouge to shear-cut into the center, or use a square-end scraper working from the center outward. Check for flatness as you go. I find scraping faster and more accurate.
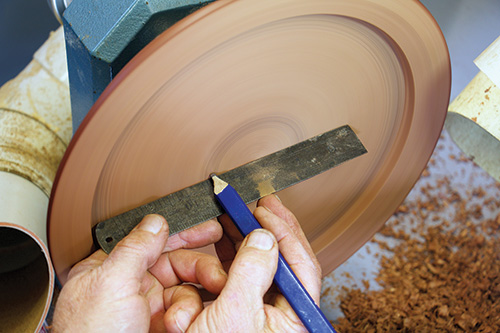
For small diameters, I have a triangular, shopmade, plywood straightedge, but better is a steel rule that doesn’t wear when burnishing the high spots, here highlighted with pencil. For accuracy when removing the high spots, I favor my skewed scraper over a gouge. However, when the grain is severely torn, as is inevitable with some blanks, I’ll take a very light cut across the flat surface using a 3/8″ bowl gouge with a steep bevel on the nose.
Shape the Rim
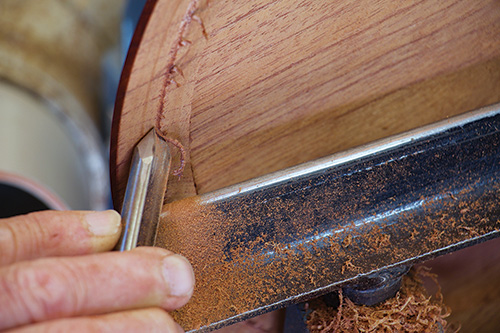
Form the topside of the rim using a spindle gouge with a fingernail grind to reduce the risk of a catch at the end of the cut. The gouge should finish on its side, with the flute facing toward the center of the tray.
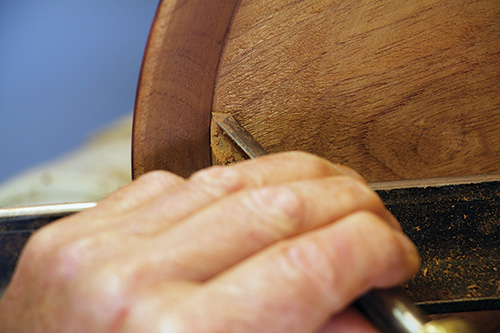
Then pivot the nose of the gouge in from the other direction to cut a small groove at the bottom of the rim. This defines the flat working area of the tray and makes sanding the flat area easier.
Sand and Finish
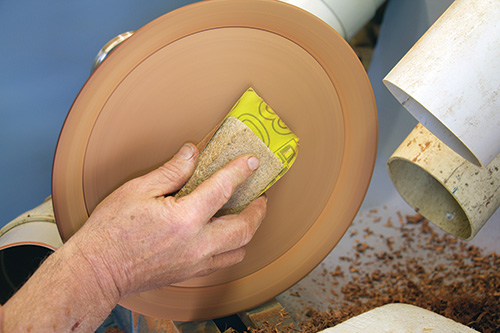
Use a sanding block to remove any small ridges, while maintaining a flat surface. Check for flatness often using a straightedge because sanding is less aggressive near the center, where a bump tends to develop. To remove this bump, turn the lathe off and push the sanding block across the center, rotating the blank a few degrees with each push. When you’ve worked through the grits and the surface is still flat, you’re ready to apply a finish and call the project completed.
Richard Raffan is a semi-retired professional turner living in Canberra, Australia. He is well known as an author of classic woodturning books and videos. For more, visit richardraffan.com.


