While these sleek, versatile and user-friendly cabinet hinges are often called “European” style, they’re almost standard issue these days in mass-produced kitchen or bath cabinetry here in North America. There’s good reason for it: Euro hinges come in a wide variety of options to suit both face frame and frameless cabinets. They can accommodate door swing ranges from 95 up to 120 degrees or more, as well as complex door clearance requirements for inside-corner cabinetry. The hinges also offer easy adjustability once installed — turning a couple of screws moves the door incrementally up and down, left and right or in and out to improve its fit, reveal and operation. Some Euro hinges also offer snap- or soft-close features that make additional door catches unnecessary.
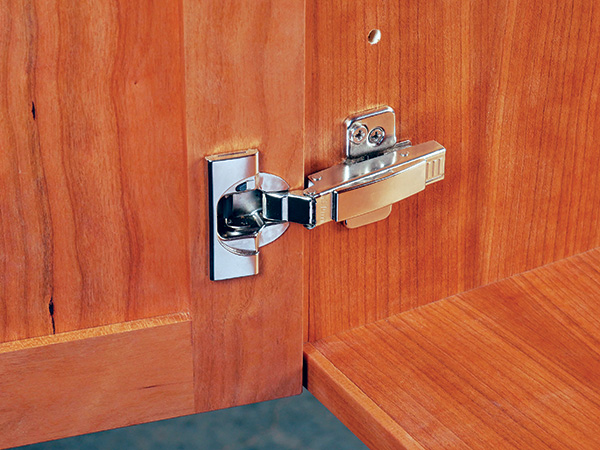
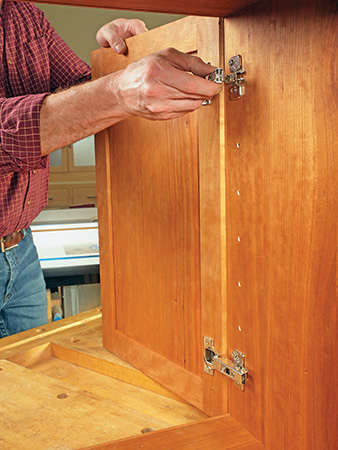
There are two basic types of Euro hinges: concealed or long-arm. Both have a cup on one end of the hinge that fits into a round mortise on the inside back of the cabinet door; creating this mortise involves simply drilling a stopped hole. On the other end of the hinge, a mounting plate fastens either to a face frame stile or the inside wall of the cabinet carcass with screws. No mortise is required.
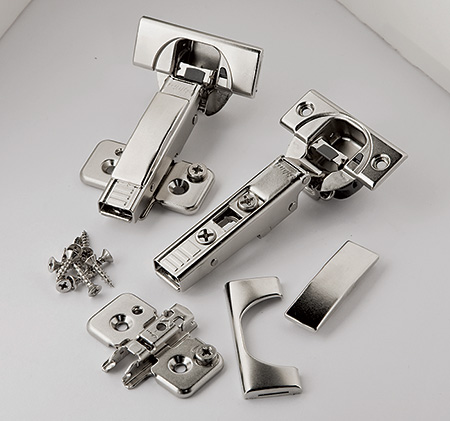
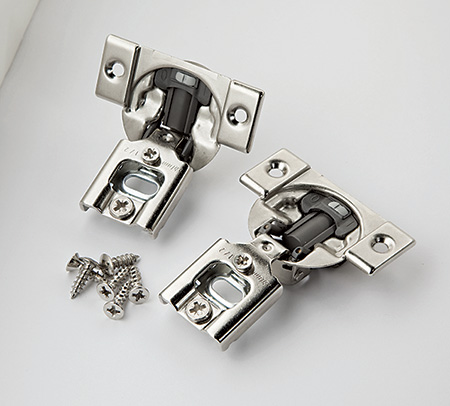
Compact styles are one-piece hinges, while long-arm styles have two main components that snap together at the mounting plate. Longarm hinges are particularly handy, because they make doors easy to remove.
Door Details
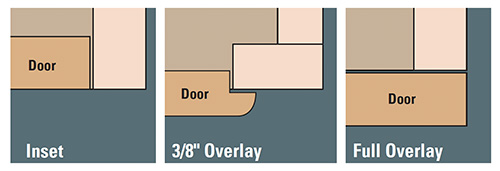
The manner in which a door interfaces with the cabinet’s carcass will impact which Euro hinge options are available for your project. Inset doors (left illustration) fit completely inside and flush with the cabinet opening. They’re common on both frameless and face frame cabinet styles. Some doors, particularly on older cabinets, have a 3/8″ x 3/8″ rabbet around their back face, enabling them to recess partially into the face frame opening (center illustration). Other door styles overlay the front edges of the cabinet carcass or a face frame by the full thickness of the door (right illustration). Euro hinges are made to accommodate these full-overlay doors with varying amounts of overlap around the opening; this may range from 3/8″ up to 1-1⁄4″. Hinge descriptions in catalogs or online will specify inset or overlay style, face frame or frameless cabinet type and maximum swing range, among other important product details.
Installation Process
All the conveniences of these production-quality hinges can also be part of your shop-built cabinet projects, and they’re super easy to install! If you can drill holes, you can mount these hinges successfully on the first try.
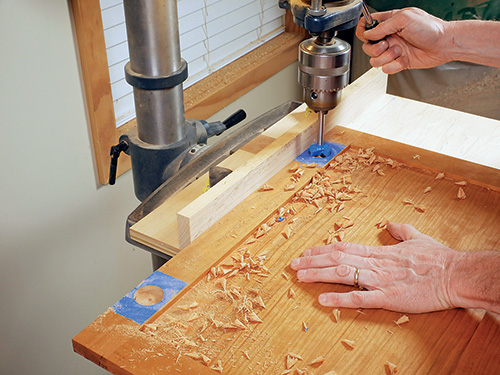
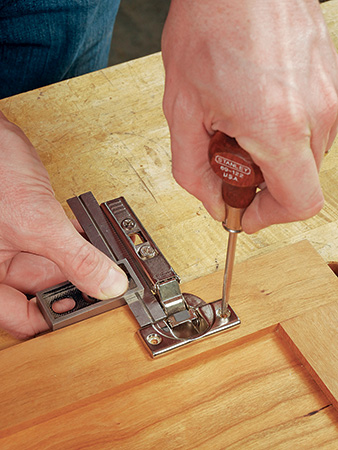
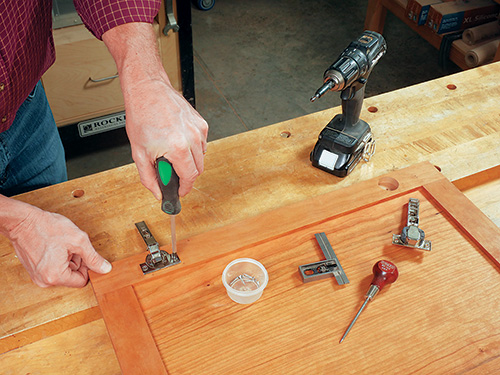
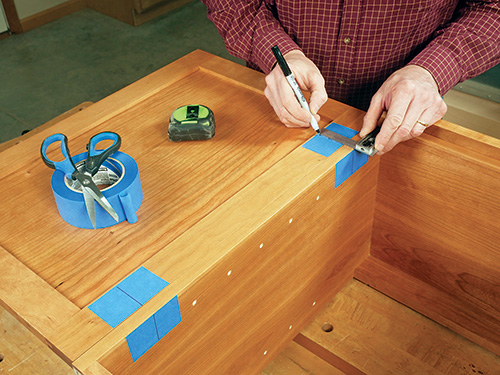
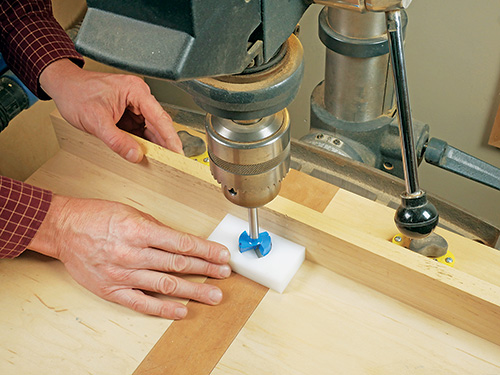
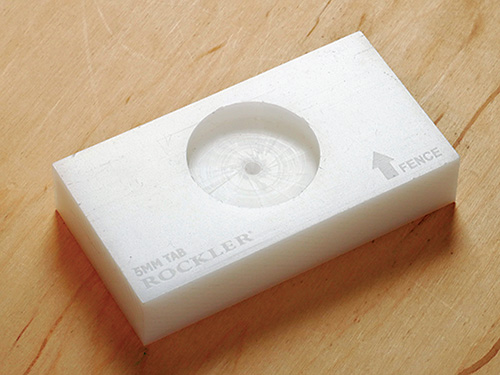
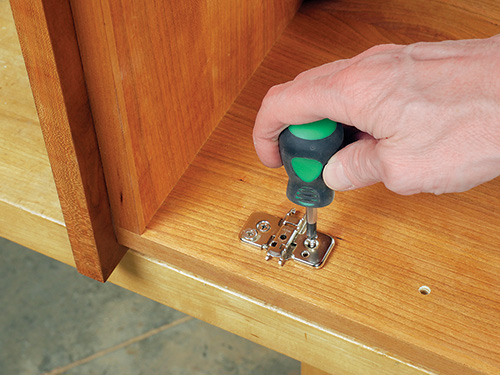
The photo series explains the process for mounting typical long-arm hinges on a frameless cabinet with a frame-and-panel door. Most Euro hinges require that the cup mortise be drilled with a 35 mm Forstner bit. Using a drill press for this step is best, but a handheld drill will also work, provided you drill carefully and not too deep. A JIG IT Deluxe Concealed Hinge Drilling System from Rockler simplifies the task.
Jigs Make It Easy!

Rockler offers several more inexpensive jigs which will make the installation process even easier. A JIG IT Hinge Cup Jig enables you to set the Forstner bit the exact distance away from a drill press fence to locate the hinge cup mortises accurately on the cabinet door. Then, several options of JIG IT Mounting Plate Templates can help locate the hinge mounting plate screws on the cabinet or face frame without measuring.

For an informative overview to help you choose the right Euro-style hinges, visit here.


