Last week Rob invited you to share your favorite workshop jigs for a chance to win a prize. Many of you have followed suit, with jigs ranging from simple to complex. Thanks for sharing them! – Editor
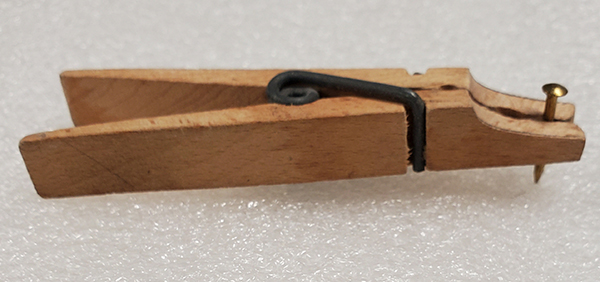
I cut a corner off a clothespin to hold small nails while pounding them in. – Bruce Mielke
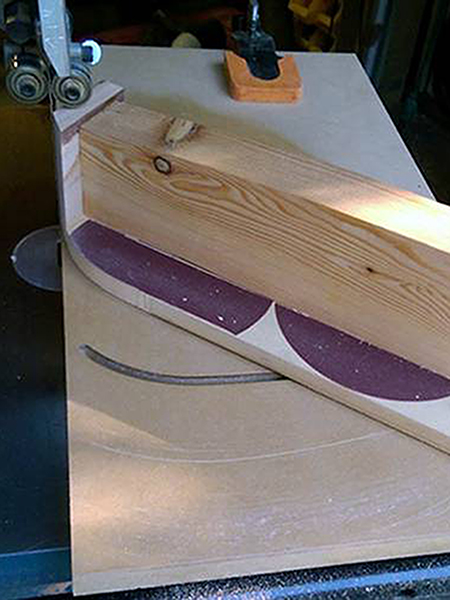
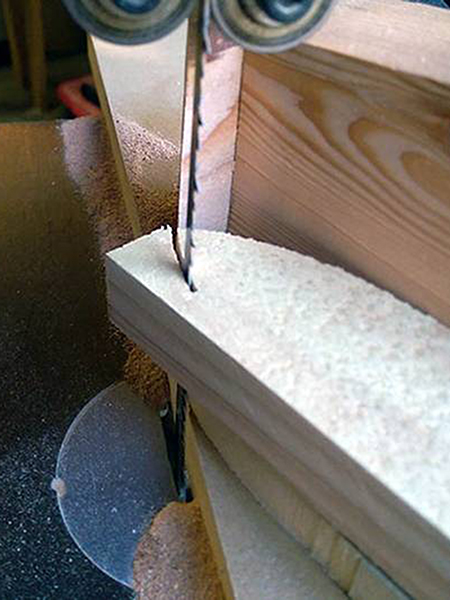
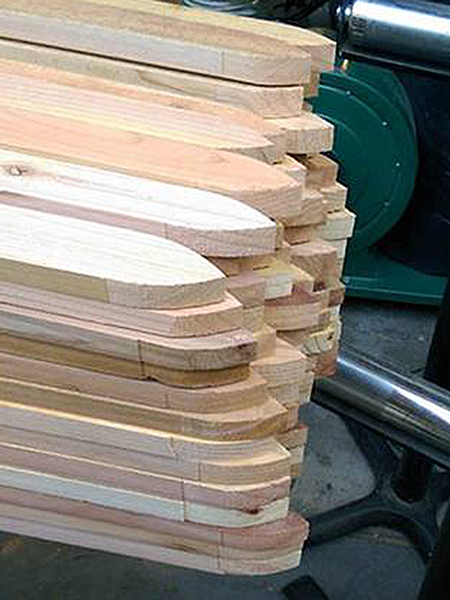
This past June, I needed to make over 200 fence pickets with a modified Gothic arched top. Cutting each picket by hand pretty much guaranteed that few arches would match. So I needed to design a jig that could give me consistency and allow me to cut multiples at once to speed up the process. The first jig design I came up with used an articulated arm attached to a table saw sled. While it was functional, it didn’t give me the results I was looking for, and some might say it was a bit cringe-worthy with so much exposed saw blade! My second design used a little math to calculate the “Golden Rule” arch dimensions and a French curve to pattern the raceways. The base of the jig is clamped to the bandsaw table and requires only moving the dual fulcrum slider past the blade. This solution was far safer and very consistent. The tall upright enabled me to stack and cut three pickets at a time, making the entire job quick and even enjoyable! When the cutting was finished, I could lay out 30 to 40 pickets side by side and final-sand the arches to match. – Ed McDermott
Here’s a picture of a jig I made and use to trim solid-wood edging flush to plywood panels. A video of how it’s made and used is on my YouTube Channel “Early Riser Workshop” – Earl Griffis
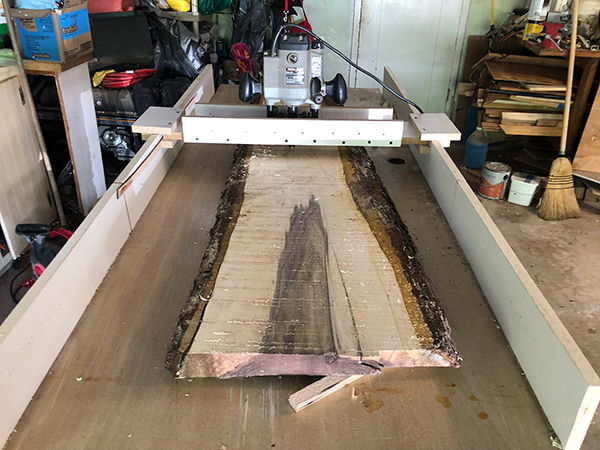
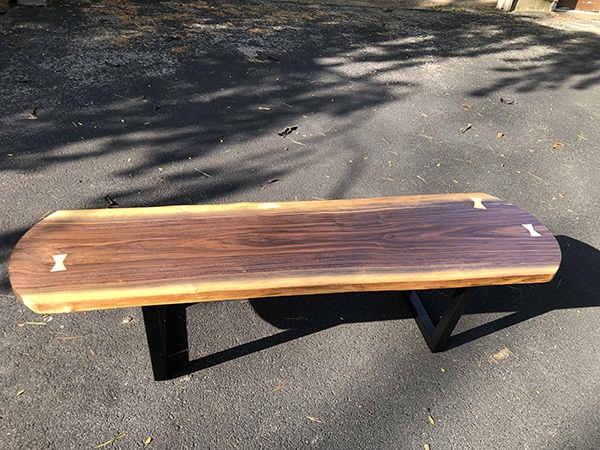
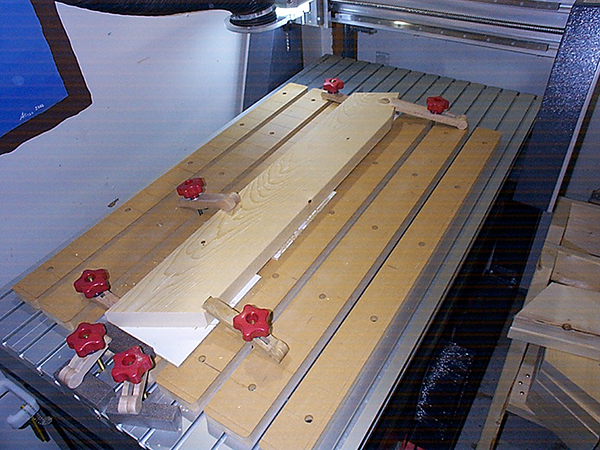
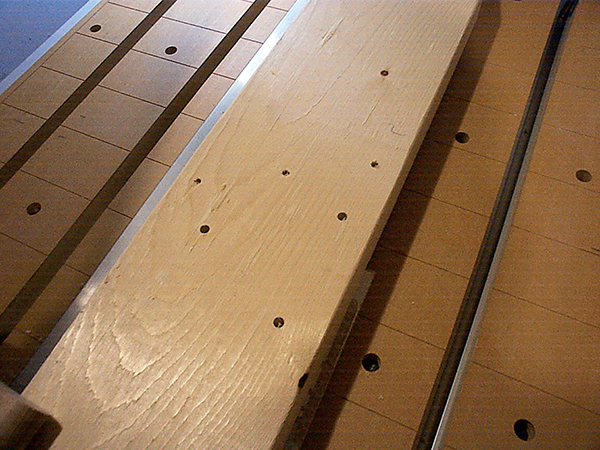
My slab surfacing jig is a little different from many others, since it is made out of a door and some melamine shelving. It works, as is evidenced by the live-edge coffee table project I’m including here. There are many more projects coming. – Barney Heller
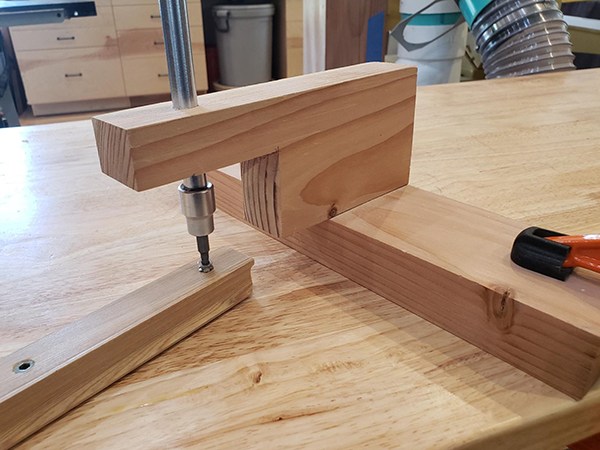
From some cypress in my lumber pile, I made a batch of door pulls for the shop cabinets I built. Rather than to use wood screws to attach them from the inside of the doors, I used screw inserts and standard 8-32 screws to reduce the likelihood of tearout. The attached photos show the 15-minute jig I built to ensure that I installed the screw inserts straight and true. For the top piece, I used the drill press to bore a through hole that just cleared the shaft of my 3/8″-drive socket extension. Then I sawed the cutout and attached it with screws to the base piece. To use the jig, I just clamp the base to a benchtop, insert the socket extension from the top, snap on the hex bit and ratchet, and get busy installing the inserts in pre-drilled, appropriately-sized holes in the backs of the door pulls. I had all the inserts installed in a dozen pulls in minutes. What I had thought would be a one-time jig worked so well that I kept it and have used it several times since. – Greg Sheppard
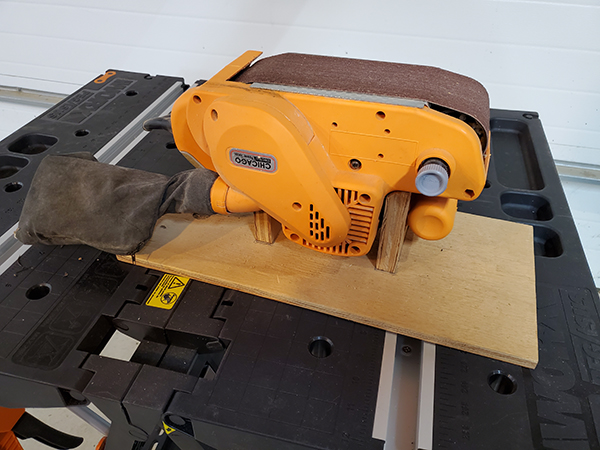
I don’t have a big shop, so I like to turn my handheld power tools into bench tools. This one made of plywood allows me to invert my belt sander so I can hold workpieces with two hands while sanding them. – Gary Lech
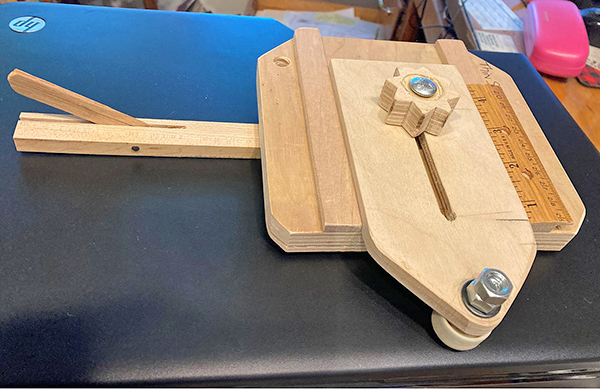
Here’s my adjustable thin-strip ripping jig with a bar that locks the jig in my saw’s miter slot. – Leslie Elliottsmith
I had two favorite jigs: one for cutting the sides of our six-sided mugs on the table saw and the second for leveling out the bottom edge of the mugs before a bottom was glued on, using a router table. Sadly, I have neither of them anymore so if I were to do it again, I’d have to start over. Aw shucks! – RileyG
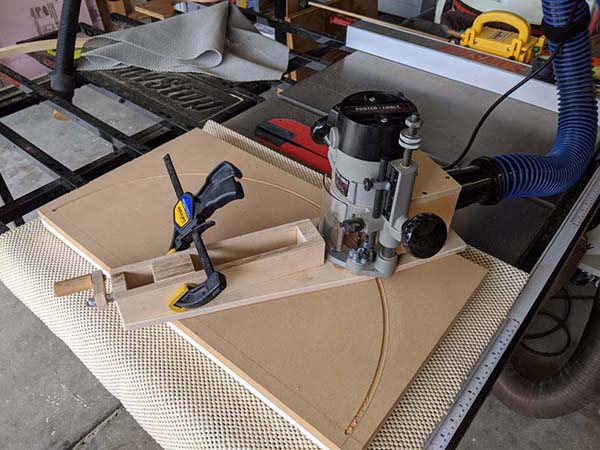

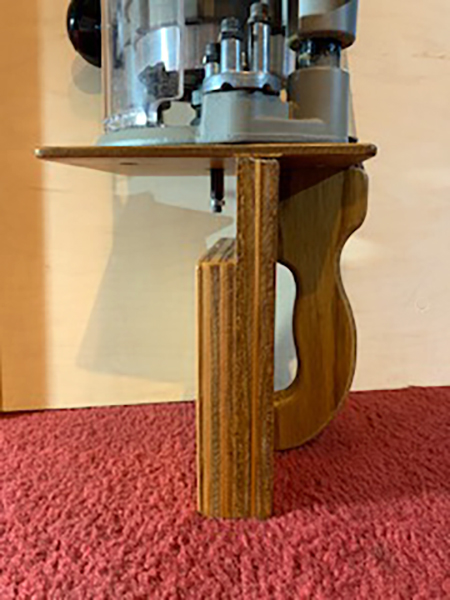
I sometimes go overboard designing and building jigs. Here is one of my latest (top photo, above). I wanted a radiusing jig for my router that was infinitely adjustable because I was going to exactly match an existing arc for the project that I was working on. Hence the rationale for a screw-adjustable pivot point. The picture of the Magswitch and dust hose (bottom photo, above) was my solution to getting my dust hose out of the way while routing my arcs. I love my Magswitch featherboard. I just wish they weren’t so expensive, otherwise I’d have more of them. – Dave Zempel
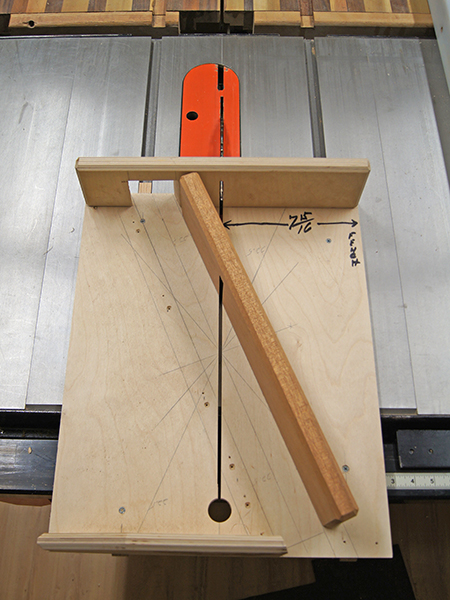
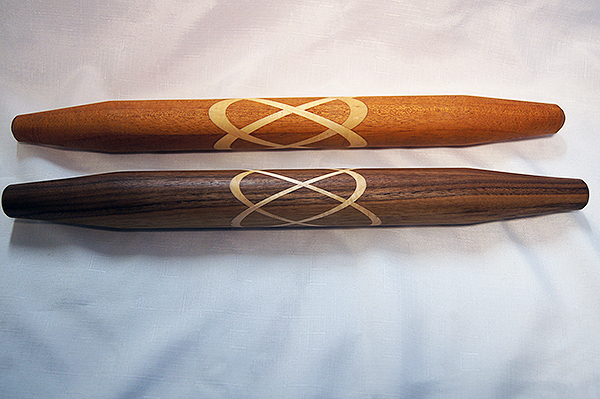
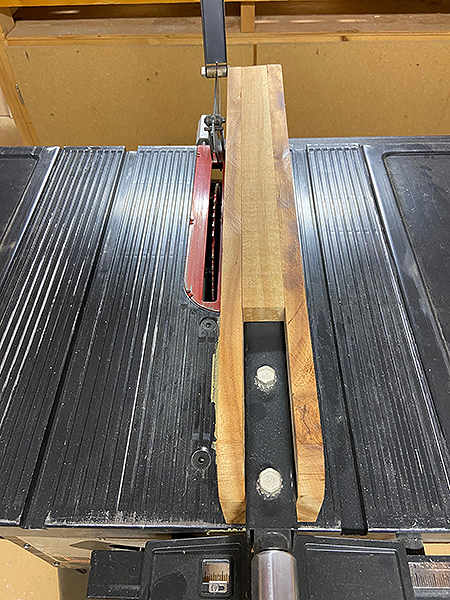
Here’s a jig I made to help me cut 2-1/4″ glued up square stock for a turning blank to turn French rolling pins with a Celtic cross in the center of them. I was uncomfortable holding the stock while cutting the 22-1/2-degree angles, so I made this jig. It also allows me to put a clamp on each end of the diagonal upright fence to hold the stock while the saw blade goes through the stock so I don’t have to hold it. There are some slight improvements I would make if I built this jig again, but it works for me well enough as is. – James Wypijewski
A number of years ago I needed to cut some very thin pieces of wood (1/8″ thick) to make dividers for my dresser to separate my socks. To make sure that I was able to cut the wood without possibly damaging the rip fence, I made this jig that fits over my saw’s rip fence and protects it on both sides. I have used it many times over the years to cut other thin pieces of wood. It’s nothing fancy but very useful anyway. – Rich Zuccaro
On many occasions I need to glue some boards together to make shelves or small table tops. This jig allows me to easily place the boards on top of each other with the biscuits (if necessary) in place, apply the glue and then clamp the boards together, all while still in the jig. I clean the jig after each use to get the excess glue off before the next use. – Ken Lauterstein
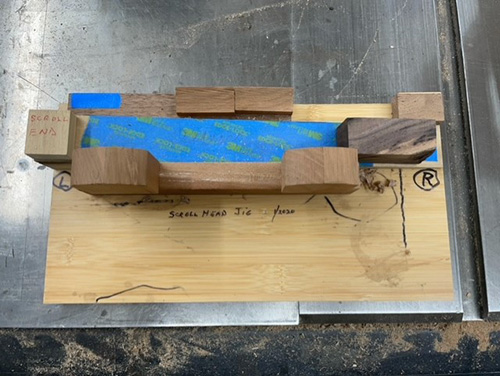
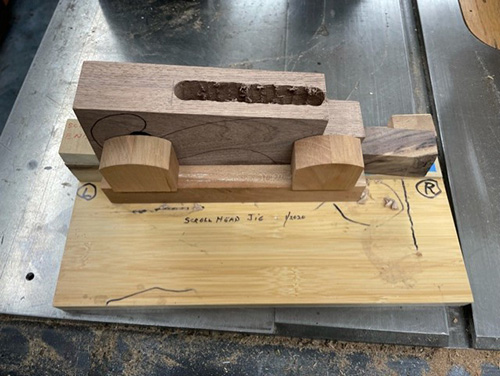
I recently started making mountain dulcimers. To help cut the stepped mortise for the toners and strings I created this jig. With this jig I don’t have to reposition the Forstner bit to drill an evenly slopes slot that can be finished with a sharp chisel. – Thomas Moss
Over 33 years as a teacher, I’ve learned to keep fixtures as uncomplicated as possible. Here is an example I used to drill accurate holes in preparation for the assembly of Leopold chairs with a group of children. I used this setup on my CNC machine, but it also works well on a drill press. It consists of a fence and a stop. (I have also used a simplified version using two nails as a fence and a single nail as a stop.) The same setup was used for the front leg, back leg and backrest. By having all holes drilled accurately, it eliminates the need for fixtures during assembly. – Bob


