This article, “Forgiving Shopmade Collet Chuck,” by Carl Ford, is from the pages of American Woodturner and is brought to you by the America Association of Woodturners (AAW) in partnership with Woodworker’s Journal.
Recently, I needed some extra collet chucks to turn bottle stoppers at a Nutmeg Woodturners’ Learn-and-Turn meeting. I own only two of the commercially available collet chucks and quickly decided that purchasing more was out of the question due to cost. Plus, I don’t like turning something like a bottle stopper right up tight against the metal collets in a commercial collet chuck; visions of my turning tool running into that metal collet are not pleasant. I decided to make my own custom collet chucks out of ultra high molecular weight (UHMW) polyethylene plastic.
Considerations
A collet chuck needs to be solid enough to grip whatever small project you are turning. It also needs to flex a little without breaking when you tighten the four-jaw chuck down on it. I chose UHMW plastic because it turns easily with regular woodturning tools, flexes nicely, and yet is really tough. It comes in different shapes and sizes; I bought 2-1/2″ (6cm) diameter rod from McMaster-Carr (mcmaster.com, item #8701K53).
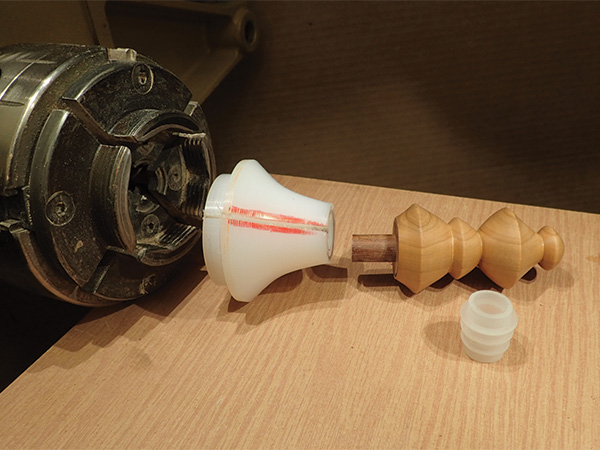
Custom hole sizes are no problem with these shop-made collets. I can finally make a collet with a 5-16″ (8mm) hole, which is not typically included in the commercially available collet sets. Plus, you can shape the collet any way you like. I made mine with a long nose that positions anything mounted in the collet a good distance from the metal jaws of my four-jaw chuck. In the end, I decided I like my UHMW custom collets better than the commercially available ones.
I made collets that would fit in the #2 jaws of my Oneway Stronghold chuck. Consider the size you’ll need for your chuck. The UHMW collet chuck will have a tenon that you’ll mount in your four-jaw chuck. A single gap cut in the collet allows the plastic to grip down on a workpiece when you tighten the four-jaw chuck.
Make a Collet
Step 1: Form Tenon
Mount a 2″ (5cm) length of 2-1/2″-diameter UHMW plastic rod in a four-jaw chuck. True up the end and side of the blank. Then cut a tenon to fit in your four-jaw chuck. I find that an 88-degree spearpoint tool works well, but you can use whatever tool you like for forming a tenon.
Step 2: Drill
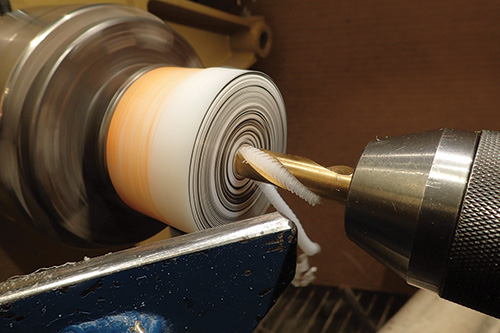
Remove the blank from the chuck and remount it using the tenon you just made. True up the end of the blank. Then drill the center hole for the collet all the way through the blank. Here, I am making a collet that will accept a 1/2″- (13mm-) diameter dowel. Thus, I used a 1/2″-diameter drill bit. When you drill UHMW, the drill tends to flex the plastic out a little. So after you remove the drill, the hole is actually a little smaller than the size hole you drilled. This is exactly what we want for the center hole in a collet.
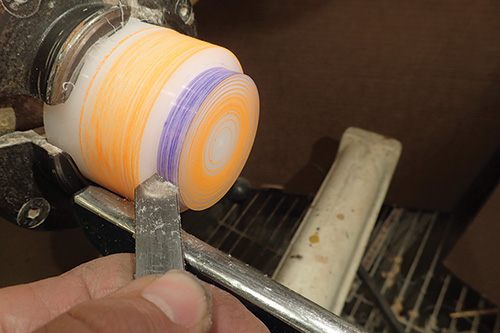
Step 3: Shape Collet
I used a bowl gouge to shape the collet, but you can use any tool you like. A spindle gouge would also work well for shaping.
Step 4: Cut Gap
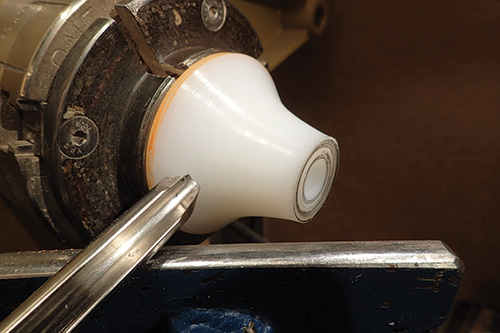
Very carefully, use a bandsaw to cut a gap, or kerf, in the new collet. Cut a gap on only one side, roughly 1/8″ (3mm) wide. This gap allows the collet to close down and grip whatever is mounted in it when the four-jaw chuck holding the collet is tightened.

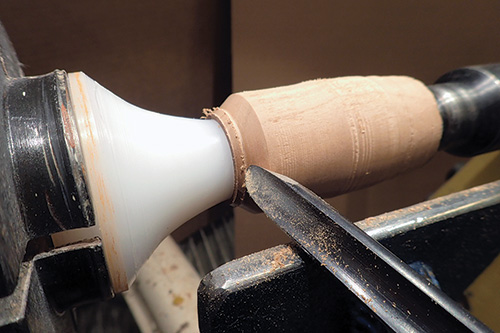
This image shows a 1/2″ dowel mounted in the new 1/2″ collet. In order for the collet to tighten properly, the gap (highlighted in red for illustration purposes) must be aligned with one of the gaps in the four-jaw chuck.
Bottle Stopper Example
Here is an example of how I used my new custom collet to turn a bottle stopper.
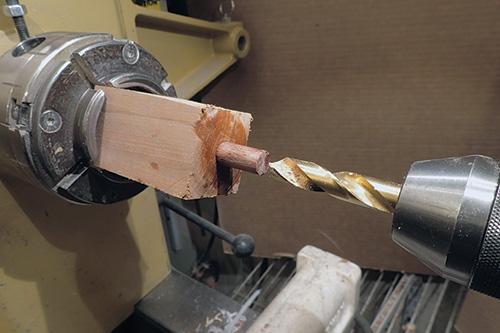
1. Mount a bottle stopper blank in the four-jaw chuck. True up the end and drill a hole for a 1/2″ dowel. Glue a length of 1/2″-diameter dowel into the hole.
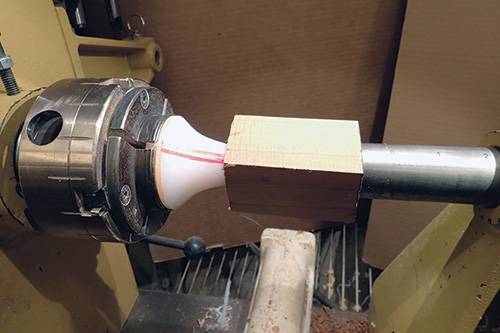
2. After the glue has dried, mount the dowel/blank into your new collet chuck. Be sure the bottle stopper blank is driven all the way in and seated evenly on the collet chuck.
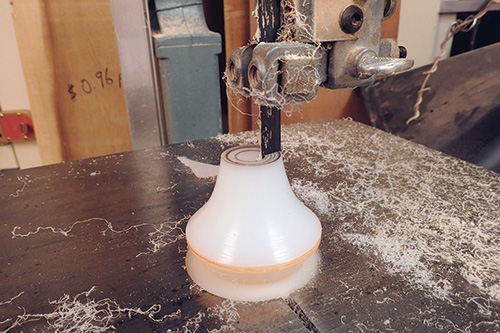
3. Turn the bottle stopper. This photo shows that turning the bottom of a bottle stopper is easy because the metal jaws of a commercially available collet chuck are not in the way. If you cut into the UHMW collet, it is very forgiving and no big deal. Continue shaping the bottle stopper, removing the tailstock only to finish turning and sanding the very end.

4. Complete the stopper by attaching a cork or other bottle insert onto the dowel (pictured in the lead image).
Carl Ford is an accomplished woodturner, a member of the Nutmeg Woodturners League (Connecticut), and loves teaching people how to turn. His website is carlford.us.


