Rout sturdy door joinery and glass retainers in one operation.
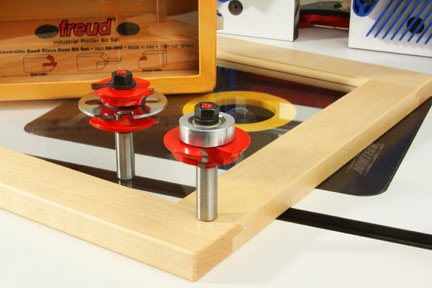
Most production-made cabinet doors are assembled with cope-and-stick joinery. You can make the same joinery in your shop with a router table and a matched set of router bits. A sticking bit forms a decorative profile around the inside edges of the frame, and a coping bit creates a mirror-image profile on the ends of the rails, plus a stub tenon to lock the rails and stiles together. Learning how to use these bits will speed up your door-making projects and expand the decorative possibilities of your cabinetry. Most cope-and-stick bit styles cut a groove to house a raised or flat panel inside the door frame, but Freud’s unique Recoverable Bead Door bits are designed for making glass-panel doors. The bits also create special retainer strips to hold the glass in place. Learn the basics of cope-and-stick joinery while you see how these unique bits work.
Step 1: In order for your cabinet doors to sit flat on the cabinet, be sure to surface your stock to remove any twisting, cupping or other lumber distortion. Plane the wood to precisely the same thickness so the rails (horizontal members) and the stiles (vertical members) will meet flush at the corners of the door frames.
Step 2: Consider what style of hinge you plan to use on your cabinet as well as whether the doors will overlay the edges of a face frame or set completely inside the door openings. Choose your hinges, and measure the door openings on your cabinet carefully.
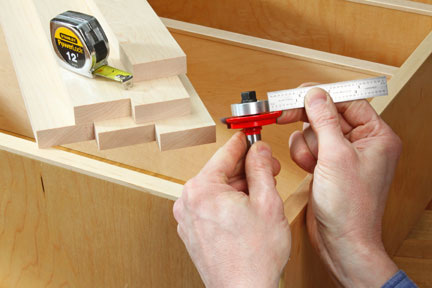
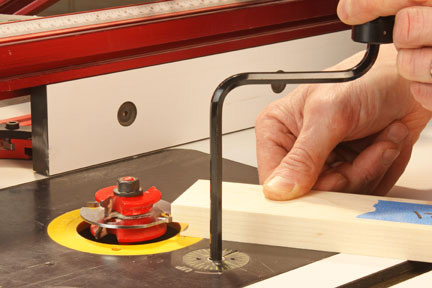
Step 3: Determine how wide you want to make your rails and stiles. Typically, frame parts range from about 1-3/4 to 2-1/2 in. wide. The doors shown here will have 2-in. rails and stiles, but the router bits require an extra 1/8-in. of width to allow for milling the integral glass bead. Cut the stiles to length; they should extend the full length of the doors. The rails will fit between the stiles. To figure out the rail length, double the width of two stiles, subtract this measurement from the overall cabinet door opening and add in the length of two stub tenons. The coping bit will cut these stub tenons, so measure from the bit’s pilot bearing out to the end of the cutter to find the tenon length (see Photo 1).
Step 4: Set the rails and stiles together to decide which faces will be in front on the final frames, and mark the parts to keep their orientation clear. Routing the door joinery will happen with the “show” faces down against the router table, so it may help to mark your frame pieces on their back faces.
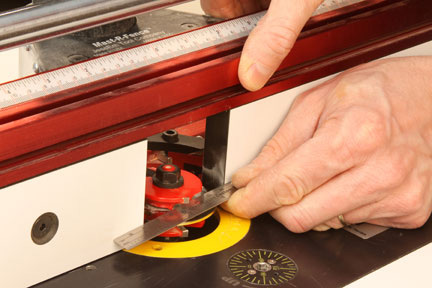
Step 5: Typically, the first step of a cope-and-stick operation is to mill the cope cuts on the ends of the rails while their edges are still flat. Install the cope cutter in your router table, and set the router table’s fence flush with the edge of the bit’s bearing (see Photo 2). Close up the fence facings as much as possible around the bit. Now carefully adjust the cope cutter’s height according to the diagram or instructions that come with the bits.
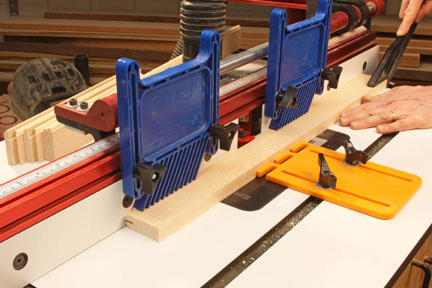
Step 6: Since cope cuts occur across the narrow end grain of the rails, you’ll need a backup board to feed the rails squarely past the bit and prevent them from catching or rocking. Install a featherboard over the bit to press the rails down firmly to the router table; if they lift up during routing, the cope cut profile will be ruined. Run a test rail first to check your cope cutter projection and height, then mill the ends of the actual rails (see Photo 3). Note: When switching from one end of the rail to the other between cope cuts, spin the workpiece around but don’t flip it over or you’ll reverse the cope orientation.
Step 7: Once the rails are coped, install the sticking bit in your router table. Adjust it up or down so the portion of the cutter that makes the panel slot aligns with the stub tenon on one of the rail workpieces (see Photo 4). Make sure the rail’s front face is down when performing this adjustment to the sticking bit.
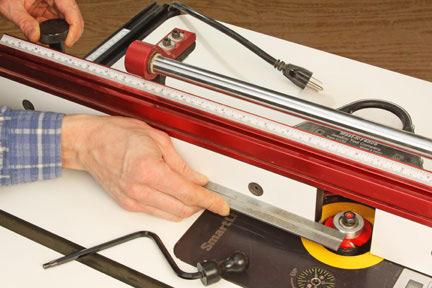
Step 8: Most sticking bits have a pilot bearing that allows you to adjust the fence position flush, similar to the coping bit. This glass door bit set, however, requires that the deepest edge of the bit’s cutter be aligned flush with the router table fence instead — there is no bearing guide. It’s easy to set this projection with a thin metal rule held against the fence (see Photo 5). Close up the fence facings around the bit to minimize tearout during cutting.
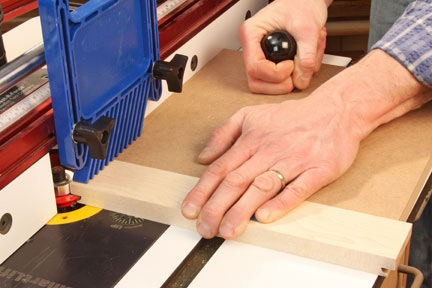
Step 9: Sticking cuts remove a substantial amount of material from the inside edges of the rails and stiles, and workpieces can’t lift up during routing, or the profile will be ruined. Control the cutting operation by installing featherboards in front of and behind the bit on the router table fence. It also helps to add a third featherboard to the table to press the rails and stiles securely against the fence. Rout the sticking profile on a scrap piece first to check the bit setting, and adjust it as needed. Continue to make test cuts until the sticking profile fits snugly and completely into the cope profile on the rails. The faces of the rails and stiles should also meet flush. With your settings dialed in, and the workpieces oriented face down, rout sticking along the inside edge of both the rails and stiles (see Photo 6).
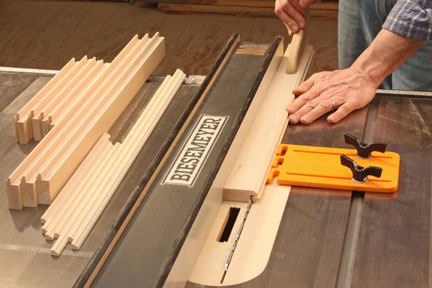
Step 10: The unique aspect of Freud’s Recoverable Bead Glass Door Bits is that half of the sticking profile is actually a beading strip to retain the glass in the door frame. Carefully set up your table saw to rip these strips free (see Photo 7). Doing this also creates a rabbet in the frame members that accommodates both the glass panel and the beading strips.
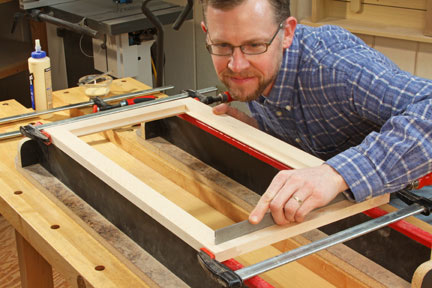
Step 11: Glue and clamp the rails and stiles together. When you tighten the clamps, use a straightedge to check that each of the joints is flat (see Photo 8). Over-tightening the clamps can sometimes distort cope-and-stick joints and twist the door frame. While the glue cures, measure the rabbeted opening and order your glass.
Step 12: Sand the door frames up through the grits, cut mortises or drill cup holes for your hinges and apply finish to both the frames and glass beading strips.
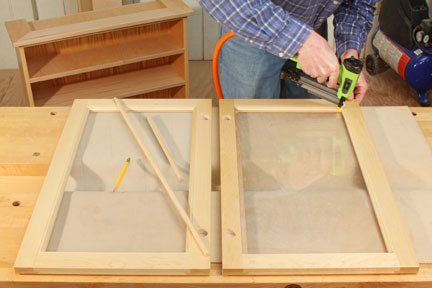
Step 13: Once the finish dries, set the glass in place, and miter-cut strips of beading to fit the frame opening. Secure the retainer strips by driving pin nails carefully into the rails and stiles (see Photo 9).
Step 14: Install your hinge hardware and door pulls or knobs. Your new glass doors are ready for hanging.


