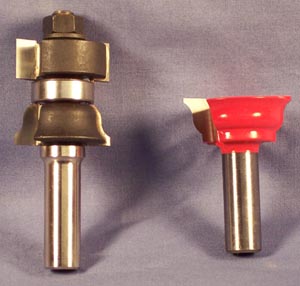
The second in our complex router bit series is the Window Sash bit set. This set is Freud’s 99-050 and 99-051 pairing. Many manufacturers make sash bits, but most are designed as ‘stub’ tenon bits, working more like a stile and rail door set. The Freud set is designed to make long tenons in the joint connections, making a vastly stronger window. Because of this, the bits require a bit more work, but the extra effort is well worth it.
Once the stock is milled to size, the parts must be cut to final length. Extra dimension needs to be added for the tenons. The tenons can be whatever size desired, based on the width of the sash parts. The stiles are the height of the window. The rails should be the width of the window, minus the two stiles, plus the length of the tenons, plus 7/16″. The muntins need to be figured as well. I found it wise to create a sample joint to verify the overall lengths.
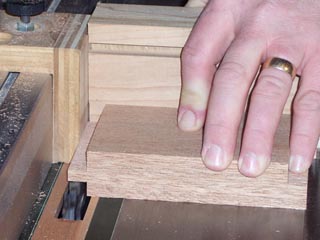
Once the parts are cut to final dimension, The cope cuts on the ends of the rails and muntins must be made. The first steps are on the table saw. Rabets must be cut to form the tongues.
 |
 |
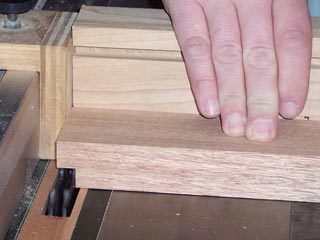
| The upper profile requires a 9/16″ deep rabbet. | Cut all of the necessary parts, then reset to cut the bottom rabbet. |
The bottom rabbet will vary depending on the thickness of your parts, but must leave a 1/4″ thick tenon.
 |
 |
 |
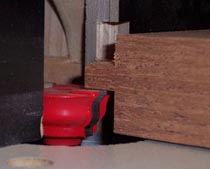
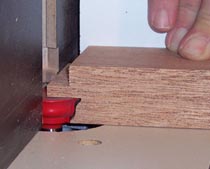
| With the tenons milled, the work turns to the router table. The coping bit 99-050 is chucked into the router and raised to 9/16″, so it is just flush with the tenon with the part upside down on the table. | Once the height is set, then the fence is set. The depth of the cut must be the tenon length, plus 1/4″ for the profile cope cut. | The parts are narrow, so use a crosscut sled or miter gauge with a backer to safely and accurately make you cuts. |
 |
 |
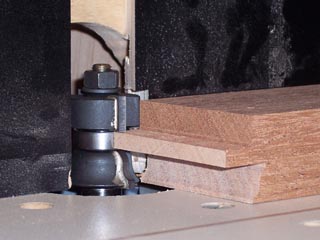
| 1. With all the needed ends coped, the sticking bit, 99-051 is mounted in the router. The height is set such that the rabbet cutter is flush with the tenon. | 2. As before, the part is upside down on the table. Set the fence so that the bearing surface is just flush with the fence. The stiles and rails get sticked on one edge, the muntins on both edges. |
 |
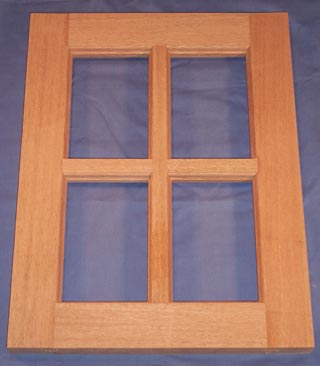 |
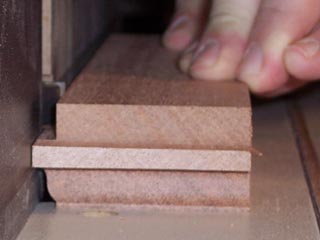
| 3. The muntins are thin. It is important to use push sticks and featherboards to safely and accurately cut these parts. | 4. With all the parts milled, mark out the mortises on the parts where needed, and mill them out, using whatever mortising technique you prefer. Dry fit all the parts and insure that everything fits properly. This bit set can, of course be used to make custom windows, rectangular, curved and even round, but I decided for this demo to use it to make a four place picture frame. |
 |
 |
This set also allows for making applied lights to be stuck to a single pane of glass. Keep the 051 bit low in the table, and use the coping bit to cope the ends. Also, because the 051 is made up of individual stacked parts, it can be rearranged to be used as a 1/4″ deep rabeting bit.
If windows, or a more novel picture frame are needed in your home, I hope you’ll give the window sash bit set a try. Work carefully and your work will be well rewarded.


